Display Translations
To use this feature of Scroll Viewport you will need to install Scroll Documents first. Trial the app for free for 30 days.
Scroll Viewport allows you to add a Confluence space or a Scroll Document as a content source. The advantage of adding a Scroll Document as a content source is that it allows you to configure and show your site’s content in one selected or in multiple languages.
When you select two or more languages of a document for your site, Scroll Viewport will add a language picker to your site. This picker allows your visitors to choose and navigate between content in different languages.

Before you Begin
Prepare your site by adjusting your site’s language(s) in site settings. Indicate what the default language of your content will be and any further languages you plan to include in your site. Learn how to Set Site Language(s) .
To publish content in selected or multiple languages to a Scroll Viewport site, your content needs to exist as a Scroll Document. This Scroll Document can then be added as a content source to any Scroll Viewport site.
Already have a site with a Confluence space as a content source and want to replace it with a Scroll Document? Learn how to convert any space into a Scroll Document.
To get started, make sure to:
Install Scroll Documents for Confluence Cloud. You can start with a free 30 day trial.
Optional: If you want to unlock the full potential of the language functionality in Scroll Documents, you’ll also need to install the extension app Translations for Scroll Documents. You can start with a free 30 day trial.
Create your first Scroll Document. Either from scratch or out of an existing space or page tree.
Start to Manage Translations
Select an existing Viewport site or create a new site.
Set a default language and add additional languages to your site.
Now you are ready to start adding your Scroll Document(s) as a content source.
Selecting Languages for a Content Source
Once you have activated languages for your Scroll Document and set languages for your Viewport site, you can select in which languages your Scroll Document should be included in your site. The languages you add need to coincide with the languages you have set under Site Settings.
You can choose to publish the different languages to different Viewport sites or to the same site.
Select languages for a new content source
To start, select a document as a content source and click Next:
Configure the URL segment
Click Next
Select the versions you want to display in the site. Learn more.
For each selected version, add the language(s) that should show in your site.
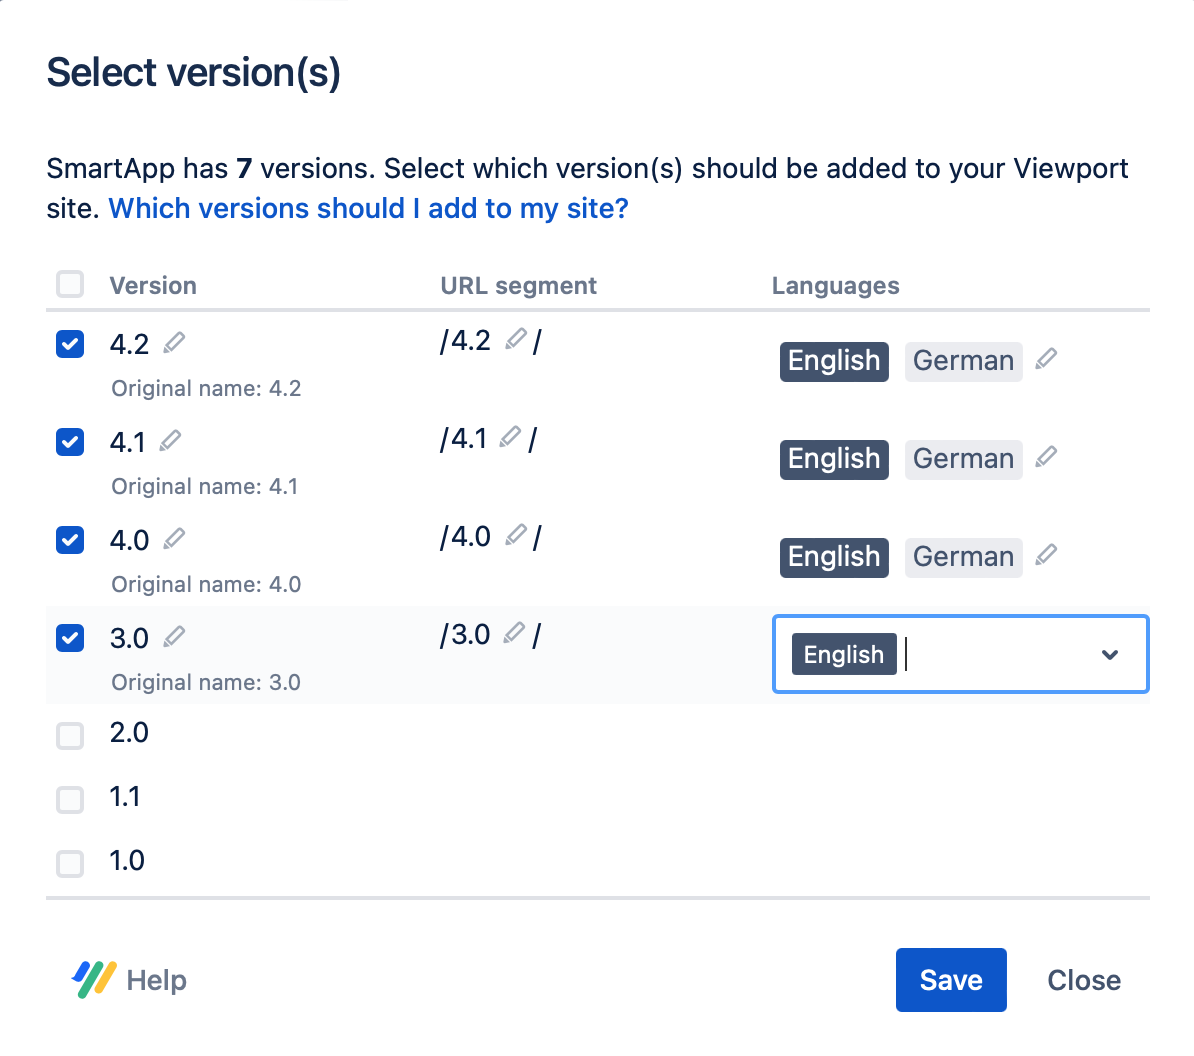
Please note the following:Make sure to first create and complete the translations for each version in Scroll Documents. If a translation doesn’t exist, it can’t be shown as an option when you select your versions for the site. Learn more.
The language you have set as the site’s default language will always be included for all versions selected in your site.
Languages that are not listed as a site language cannot be added to your site, even if in Scroll Documents a translation exists for that version. Change your site’s settings to enable additional languages.
Click Save.
Click update site to go live with your newly added content.
To ensure smooth navigation throughout the site, your site’s URLs will now include a language code: /language/content-source/version/page.
Please note that the default language you’ve set in site settings needs to exist throughout all versions of all document content source.
Select and remove languages for an existing content source
If you plan to include a new language that has never been part of your site before, first go to the language list under site settings and add the new language there.
Now you are ready to configure the languages of an existing document content source. To add or remove a language, navigate to the content source table:
From the versions column, click the link to open the versions list.
For each version, add or remove the language(s) that should show in your site.
Click save to close the version list.
If needed: Remove any unused languages from the languages set under site settings.
Click update site to go live with your newly added or removed content.
If your document was part of your live site before you activated languages for that document: Your URLs will have changed now.
We make sure to prevent broken links as best as we can by asking you to allow for auto-generated fallback redirects. Read more on Why Allow to Set Up Fallback Redirects when Adding Variants and Translations?
Navigating a Site with Multiple Languages
If you set additional language for your site and select more than one language for any given version of your site’s content source(s), your visitors will be able to navigate to their language using a language picker.
The language picker will be automatically be added to the footer of your site. Use this picker to navigate to the content in the languages you selected for your site.
Switching languages will always land you on the same version and same article you started switching from from (if such a matching page exists) or on the content source’s root page or portal page (if a matching page doesn’t exist).
The selected language is used to assign the right language attribute to the pages of your Viewport site (e.g. <html lang=“en”>). This metadata also helps screen readers and search engines return language specific results.
If the selected language is one of our officially supported languages, the help center theme will automatically adjust to that language. This means, error messages and standard texts in places like the footer or search page will always show in the right language.