Creating a Template
We want your feedback!
If you are using custom Scroll HTML Exporter v3 templates we want to hear from you. In the next major version of Scroll HTML Exporter we will be making changes that impact on template creation and customization. This will mean that current Scroll HTML Exporter v3 export templates will not be compatible with the next major version release. For further context please see our related documentation and then submit your feedback to us from the link below.
→ Submit Scroll HTML Exporter Template Feedback ←
If you’re interested in testing out the Beta version of Scroll HTML Exporter v4 please learn more here.
Before you create your first template you must set up a development environment - please have a look at the Workflow Overview documentation to see the process required for creating a template. The steps on this page will guide you through the process of creating a *.jar template app file that can then be uploaded and used in Confluence.
We've published an example template on Bitbucket that we recommend using as a starting point for new templates. You can browse it in our repository here: https://bitbucket.org/K15t/scroll-webhelp-theme
The three main steps involved in the template creation process can be navigated to quickly here:
Using the Scroll WebHelp Theme Example
Downloading the Scroll WebHelp Theme Template Files
If you are wanting to use the bundled Scroll WebHelp Theme as a base for your template creation you will either need to:
clone the repository using git:
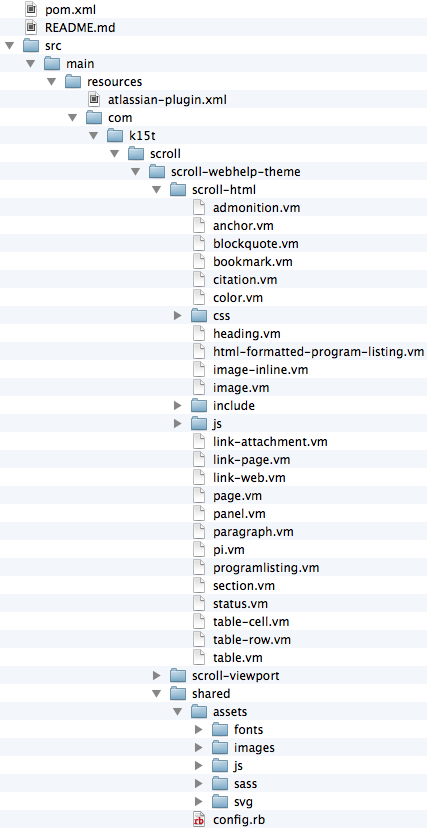
git clone https://bitbucket.org/K15t/scroll-webhelp-theme.gitor download and extract the most recent snapshot here. This will create a new directory on your computer with the following file content:
Naming your New Template App
Once you have the Scroll WebHelp Theme files, open the pom.xml file using your favourite text editor. This file contains the name and description of the app as well as build instruction for creating a proper app *.jar template file. You need to edit the top section in the file which looks like this:
<!-- The <parent> element should be completely removed when releasing your own plugin. -->
<parent>
    <groupId>com.k15t</groupId>
    <artifactId>k15t-master-pom</artifactId>
    <version>10</version>
</parent>

<!-- These should be adapted to match your company's domain and the name of the theme. -->
<groupId>com.k15t.scroll</groupId>
<artifactId>scroll-webhelp-theme</artifactId>
<version>1.1.0-SNAPSHOT</version>
<name>Scroll WebHelp Theme</name>
<description>Provides the Scroll WebHelp Theme for Scroll Viewport and Scroll HTML Exporter.</description>

<!-- Add your organization's details here. -->
<organization>
    <name>K15t Software GmbH</name>
    <url>http://www.k15t.com/</url>
</organization>

<!-- Adapt this to point to your theme's remote git repository or remove it completely if you don't use a remote repository. -->
<scm>
    <connection>scm:git:ssh://git@bitbucket.org/K15t/scroll-webhelp-theme.git</connection>
    <url>https://bitbucket.org/K15t/scroll-webhelp-theme</url>
    <tag>HEAD</tag>
</scm>-
<groupId>contains the group of your plugin. This typically starts with the reverse URL domain name of your company to make it individual. At K15t we use something likecom.k15t.scroll.templates -
<artifactId>contains the actual ID of your plugin with it's group. This typically is a variation of the plugin name consisting only of letters ([a-zA-Z]), numbers ([0-9]) and dashes (-). -
<version>contains the version of your template plugin. While still in development the version number usually ends with-SNAPSHOT. You can set that to whatever you want, e.1.3.5-SNAPOTand1.3.5respectively for a version that should be used in production. -
<name>and<description>are displayed in the Plugin Manager. The name is just the name of the plugin, not the name of the template as displayed on the export dialog (more on that later). -
<organization>contains the name and the URL of your company. This is also displayed in the Plugin Manager.
After you adapted the relevant sections in the file, you can save and close the file. Please note, the other parts of the file contain build information and must not be modified. Additionally, the specified Confluence version can be ignored as it is only required for building the template app file and doesn't need to match the Confluence version you are using.
Customizing the Template
Next, you can start customizing the template. Typically you'll want to add some custom logos and CSS files to your template. You do that by adding so called static resources to the template. To do this open the file atlassian-plugin.xml in your favorite text editor. You'll find it in the src/main/resources directory.
Adding Static Resources
Static resources (e.g. logos, icon, CSS / JavaScript files) can be added to the template app *.jar file. For each static resource, define a <resource> element with type static-resource in the atlassian-plugin.xml file.
An example Static Resource definition: <resource type="static-resource" name="images/logos/icons/information.png" location="template/images/icons/accept.png" />
This will make the file appear in the exported ZIP file.
name -contains the relative path where the file will be placed inside the exported ZIP file.location-contains the relative path where the file is located in your template directory
In case of CSS / JavaScript files you'll also need to make sure a respective import <link> or <script> element is added to the exported HTML files. This is done by opening the file page.vm in a text editor. You'll find it in the src/main/resources/template directory. This file contains the top level HTML structure as well as Velocity placeholders where the actual Confluence content will be merged in. Add references to your CSS or JavaScript files here. You'll need to use the static resource names here.
Defining Velocity Templates (optional)
Should you require changes in the way the exporter generates HTML for the individual page elements like tables, notes and so on, you'll need to change some more Velocity files. If the default output is fine for your use case then you can simply ignore this section.
The Velocity templates are used by Scroll Exporters to output the Confluence contents to HTML. By modifying the templates the outputted HTML can be modified. With Velocity templates defined in the plugin you can overwrite the default velocity templates shipped with the exporter.
For each Velocity template that should be overwritten, define a resource element with type template-part in the atlassian-plugin.xml file.
An example Velocity Template definition: <resource type="template-part" name="page" location="template/page.vm" />
Building and Installing the New Template
After this your template is now to be built and then uploaded to Confluence. The new template will be installed as a Confluence app module in the Manage Apps section.
Building the *.jar file Template
- Install Atlassian SDK: https://developer.atlassian.com/docs/getting-started/set-up-the-atlassian-plugin-sdk-and-build-a-project/install-the-atlassian-sdk-on-a-linux-or-mac-system
- Open Terminal (Linux/Mac) or Command Prompt (Windows) and navigate into the directory that contains the
pom.xmlfile. Execute this command:
atlas-packageInfo
Don't worry if it takes quite some time to build. The Plugin SDK is based on maven which needs to download quite a few files when running for the first time. If you run
atlas-packagethe next time it will be a lot faster. You can also automate the installation using theatlas-install-plugincommand.- After the packaging process for the build has been completed you will find a new folder called
targetinside the current directory which contains the required *.jar template file.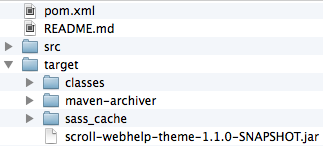
Installing the Template in Confluence
Finally, you can upload the *.jar template file to Confluence via the Universal Plugin Manager (UPM) via the Manage Apps section in the Confluence administration. Any changes to the data in the pom.xml file (see step one) will then be visible in the expanded details for the template app in Confluence: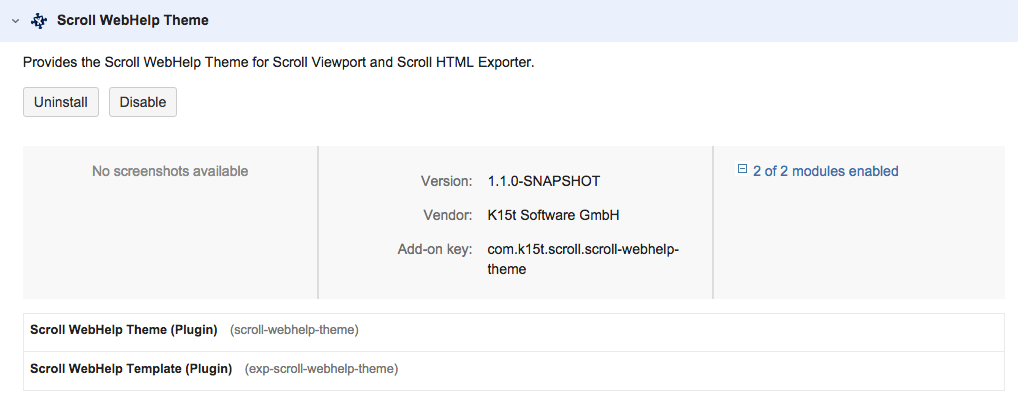
After the template *.jar file is uploaded you can select the template from the export dialogue when exporting - there will be an additional template available which is named according to what was defined in the pom.xml file.