Connect a Custom Domain
The custom domain feature allows you to make your Scroll Viewport site available under a domain your visitors know and are familiar with.
What You Need To Know Before Setting Up Custom Domains
Before starting the process of setting up a custom domain, please make sure you meet the following requirements:
You already own a custom domain.
You have the ability to set up a CNAME records for the custom domain DNS name.
If you set up a custom domain, your reserved .scrollhelp.site domain will redirect incoming requests to the new custom domain. If you decide to delete the custom domain, your .scrollhelp.site domain will be reactivated, but there won’t be any redirects sent from the deleted custom domain to the scrollhelp.site domain.
If you have two or more Scroll Viewport sites, we recommend you set up one custom domain at a time.
How To Setup a Custom Domain
Follow these steps to set up a custom domain for your Scroll Viewport site:
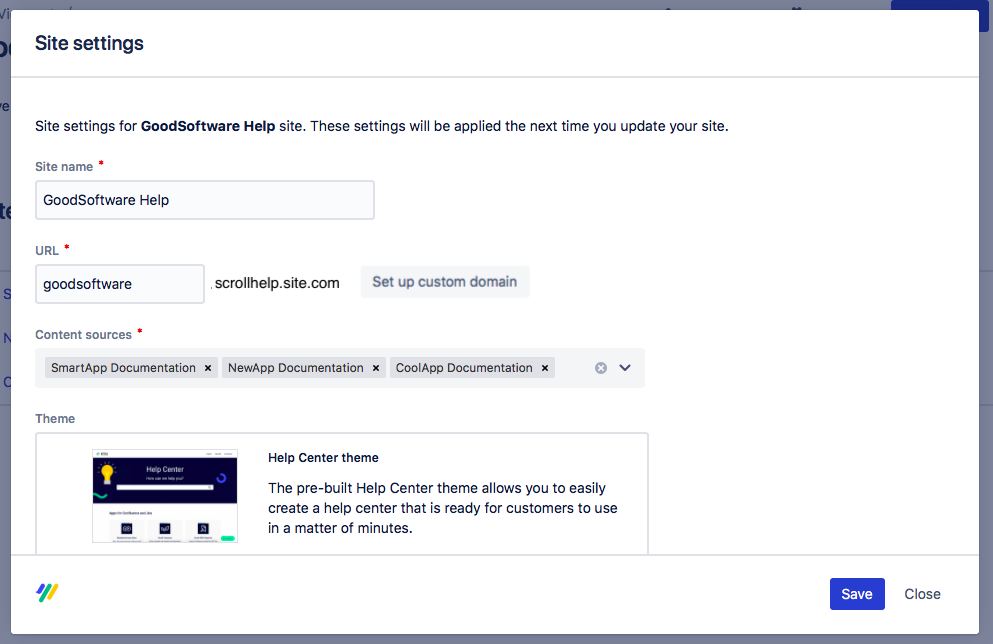
Navigate to the single site overview.
Click the “settings” button on the top right.
In the URL settings click the button “Setup custom domain”.
Starting the process
To start the custom domain setup you need to:
Enter a custom domain you already own that you wish to use for your Scroll Viewport site.
Hit the “Start” button.
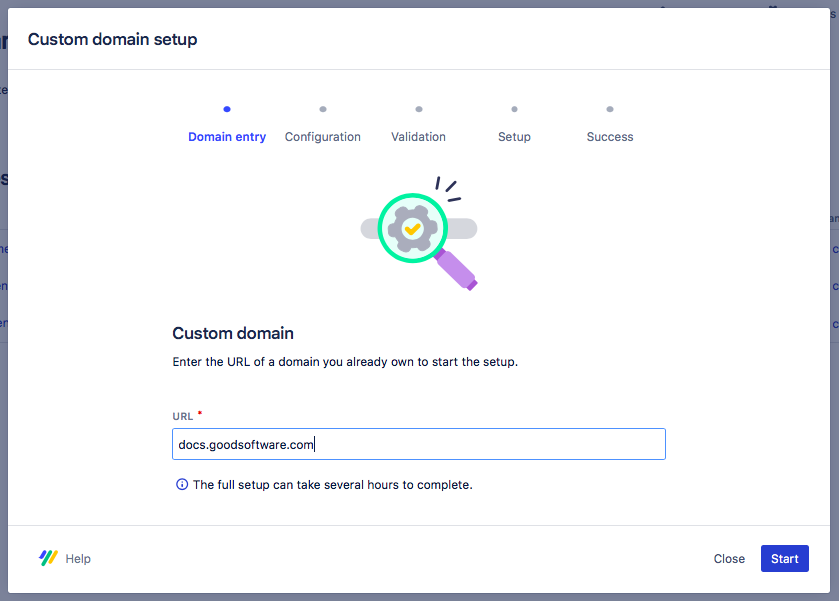
This will start the setup process.
DNS configuration
This next step is to generate CNAME records for your custom domain. This step won’t take long.
Copy the provided CNAME records.
Add the CNAME records to your DNS configuration.
Create a new CNAME record and add the first two values we provide as entries (Name + Value under Custom domain validation).
Create another CNAME record and add the last two values we provide as entries (Name + Value under Certificate validation).
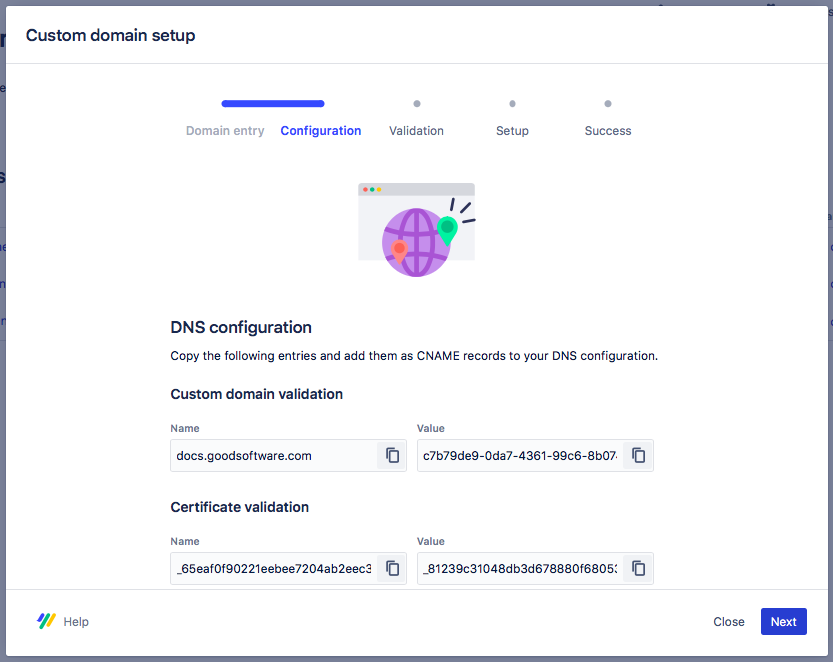
Make sure that you CAA records allow for the AWS Certificate Manager (ACM) to issue a certificate for your domain or subdomain. Read more on Custom Domain Setup Fails
Hit the “Next” button.
Please make sure you complete the required tasks as quickly as possible. After 72 hours the process will fail automatically if the CNAME couldn’t be found.
Validating DNS entries
This is an automated process and may take several hours. You can close the dialog – and the window if needed – and check back later.
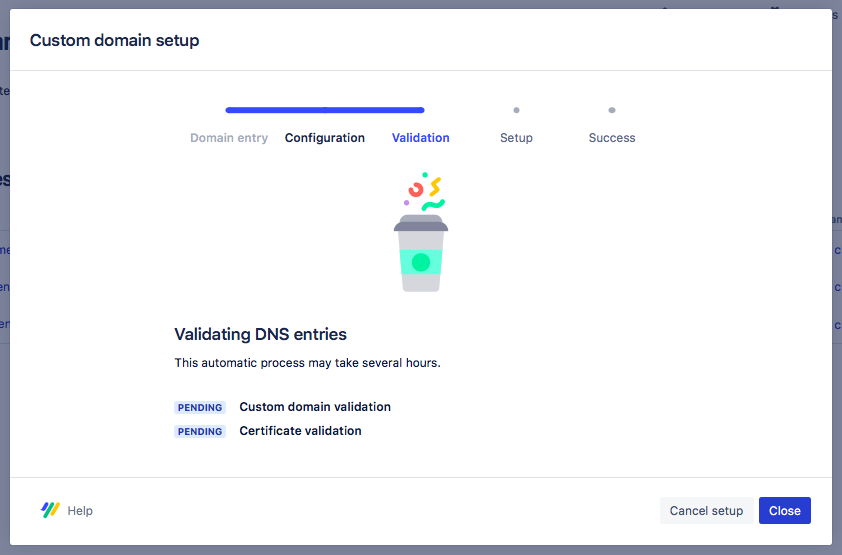
Currently, you won’t be notified once the validation is complete. You’ll need to manually check the status by reopening the dialog:
Open the site settings again.
Click on “more information” beside the URL configuration.
What happens in the background?
During this part of the process, your CNAME record is being searched for to set up the custom domain. If we can’t validate the record within 72 hours, the process will be canceled automatically and will need to be restarted manually.
Setting up the custom domain
Once the validation is successful, the custom domain for your Scroll Viewport site will start to be set up.
This step will run automatically in the background and could take a little while.
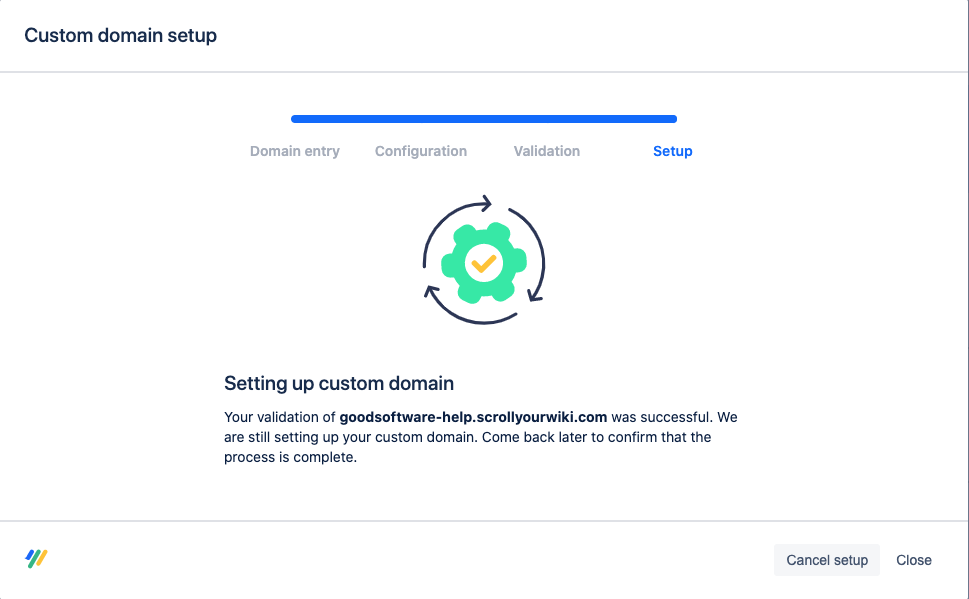
What happens in the background
We start creating a CloudFront distribution specific to that site.
We wait until the CloudFront distribution is ready.
We start polling the site with HTTP requests using the custom domain.
Once we get a valid response using the custom domain, we mark the process as completed.
Success
When the setup was a success your site settings should look like this:
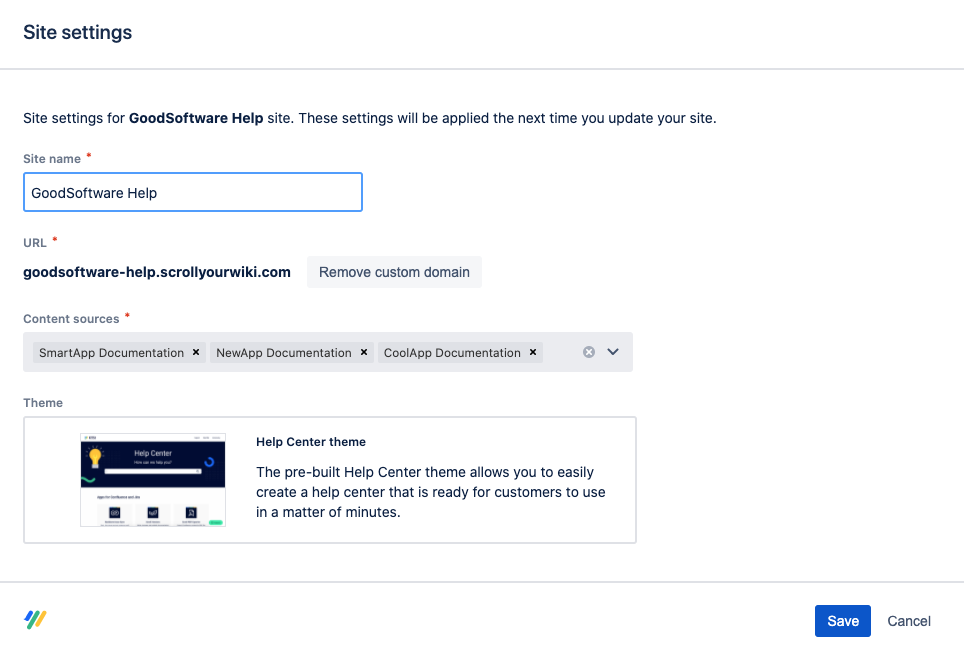
You can always remove the custom domain, should you ever need to.
Please don’t delete the entries from your DNS configuration unless you no longer use the site or custom domain. Deleting the entries could make your site inaccessible under your custom domain.
Trouble with the setup?
Have you tried to set up a custom domain but haven’t been able to complete the process? Check out why your custom domain setup fails.