Beta Test: Add and Remove Content Sources
A Scroll Viewport site can consist of many content sources. A content source can be a Confluence space or a Scroll Document.
The advantage of adding a Scroll Document as a content source is that it allows you to display multiple versions of your content on your site and make use of additional content management functionality in Confluence.
To be able to select a Scroll Document, make sure you install the app and create a document first.
Already have a site with a Confluence space as a content source and want to replace it with a Scroll Document? Learn how you can convert a space to a Scroll Document.
Adding a content source
To add content sources to your site, from the single site overview click on the plus (+) button on the top right of your Content sources table.
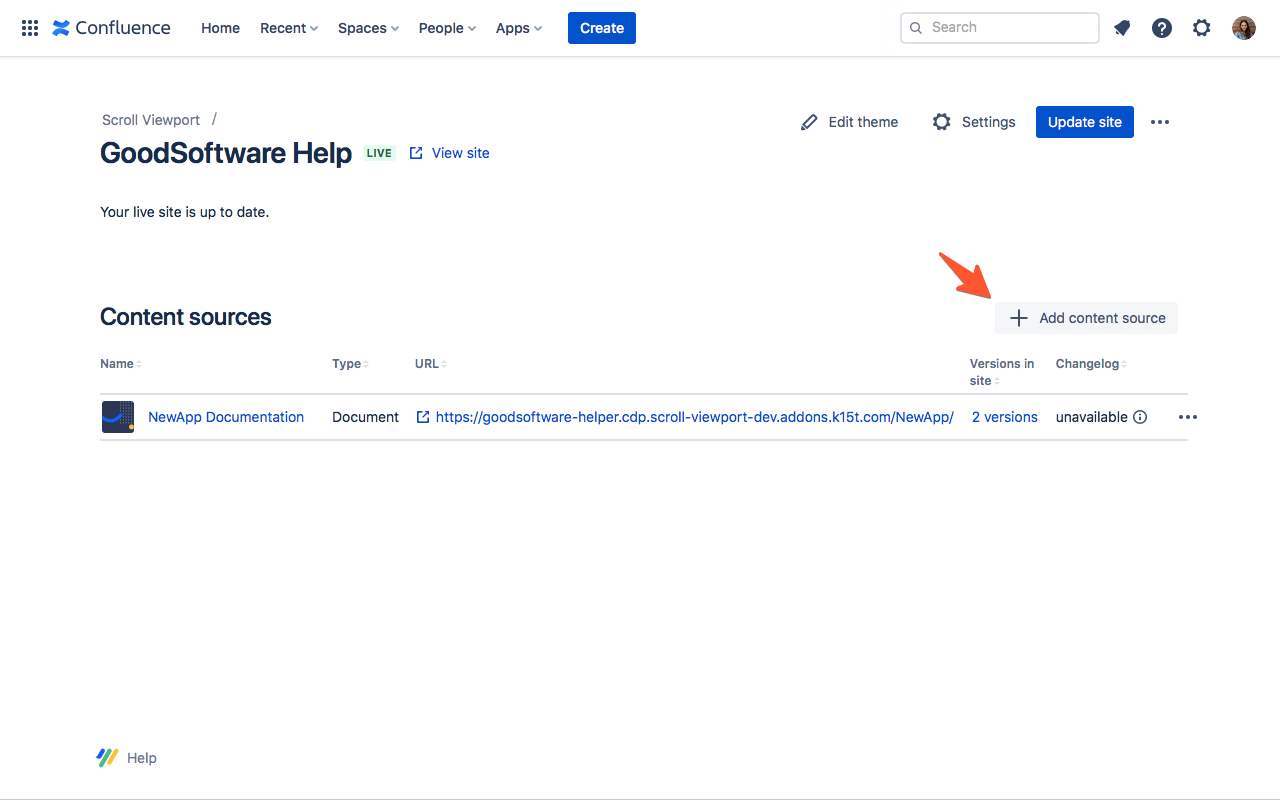
A new window will pop up where you can add one new content source at a time:
In the content source field, enter the name of your document or space.
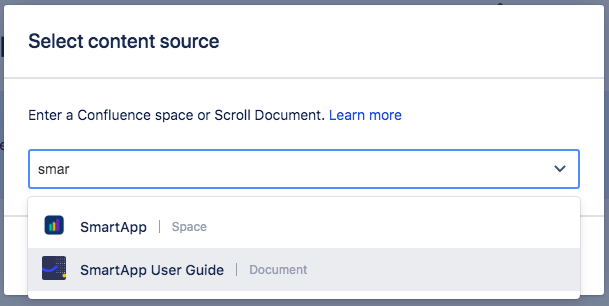
Select the space or document from the drop down list and click Next.
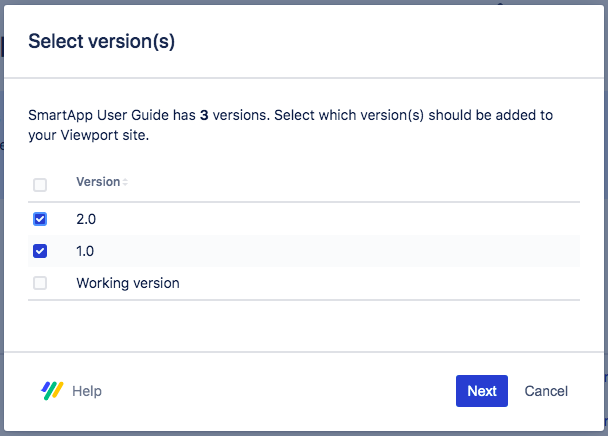
Only for a Scroll Document: Select which versions you want to add to your site. Check at least one version from the list. Which versions should I add to my site?
Configure the URL path for each of your content sources. By default, Viewport will use the space key or document name for the content source segment of the URL.
Click save and see your content source appear in the content source table.
Make sure that the spaces or Scroll Documents you add have the right permissions set, so that Scroll Viewport can access its content and display it on your site.
You can always go back to the + button and add more content sources to your live site.
Going live with your new content sources
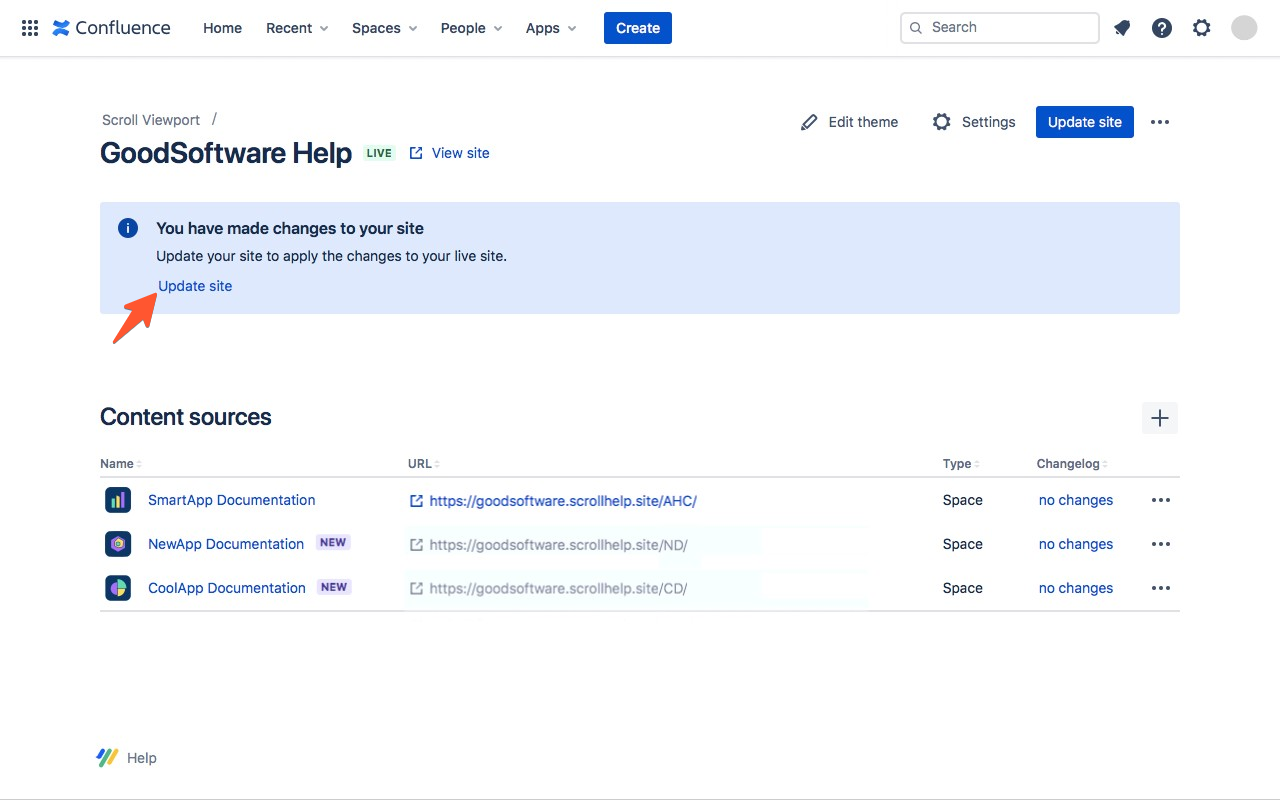
On the overview page, you will see all of the content sources that have been added.
You will need to update your site to re-generate a preview before the new content sources will appear in your live site.
Preview your newly added content sources in your site or go live directly.
If you selected two versions or more, a version picker will be added to your site. Learn more.
If you later change the name of a version that is selected in your site, your URL paths to all article pages of that version will change as well. Any links that use the old version name will break.
Prevent content from going live
If you add a content source, all of its content will be part of the site. For Scroll Documents, this includes only the versions you have selected for your site.
Remember to restrict any content within the space or Scroll Document that you don’t want to be live on your help center.
You will need to restrict this directly in your Confluence space settings or Scroll Document restrictions, not within the Scroll Viewport app. Learn more about how you can configure which content Scroll Viewport can access.
Remove content sources
You can always go back and remove your content sources from your live site.
To remove a content source, find it in the Content sources table and open the ••• menu next to it. Select remove and click remove again from the dialog to confirm your action.
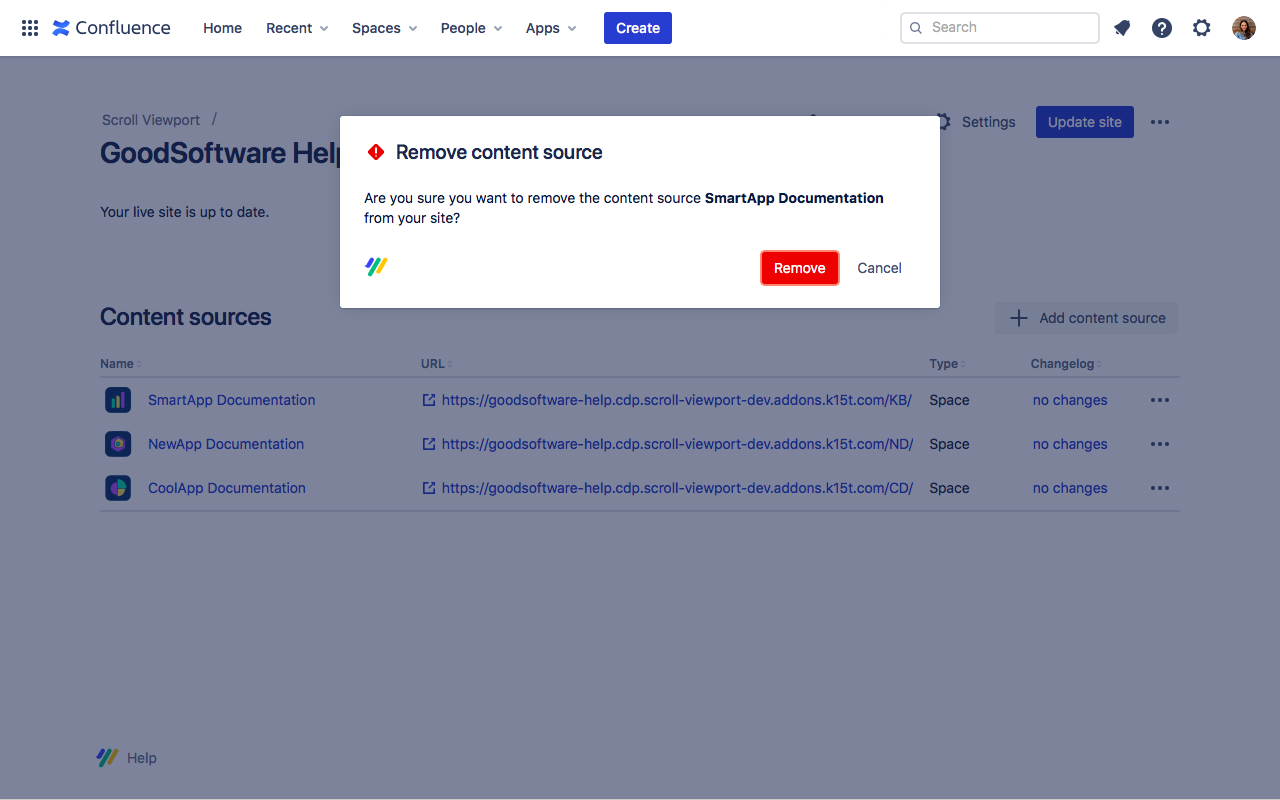
Remember to click update site each time you add a new or remove a content source. A removed content source will still be part of your live site until you go live again after making the changes.
Handling multiple content sources with a portal page
If you add more than one content source, your site will receive a new landing page: the portal page.
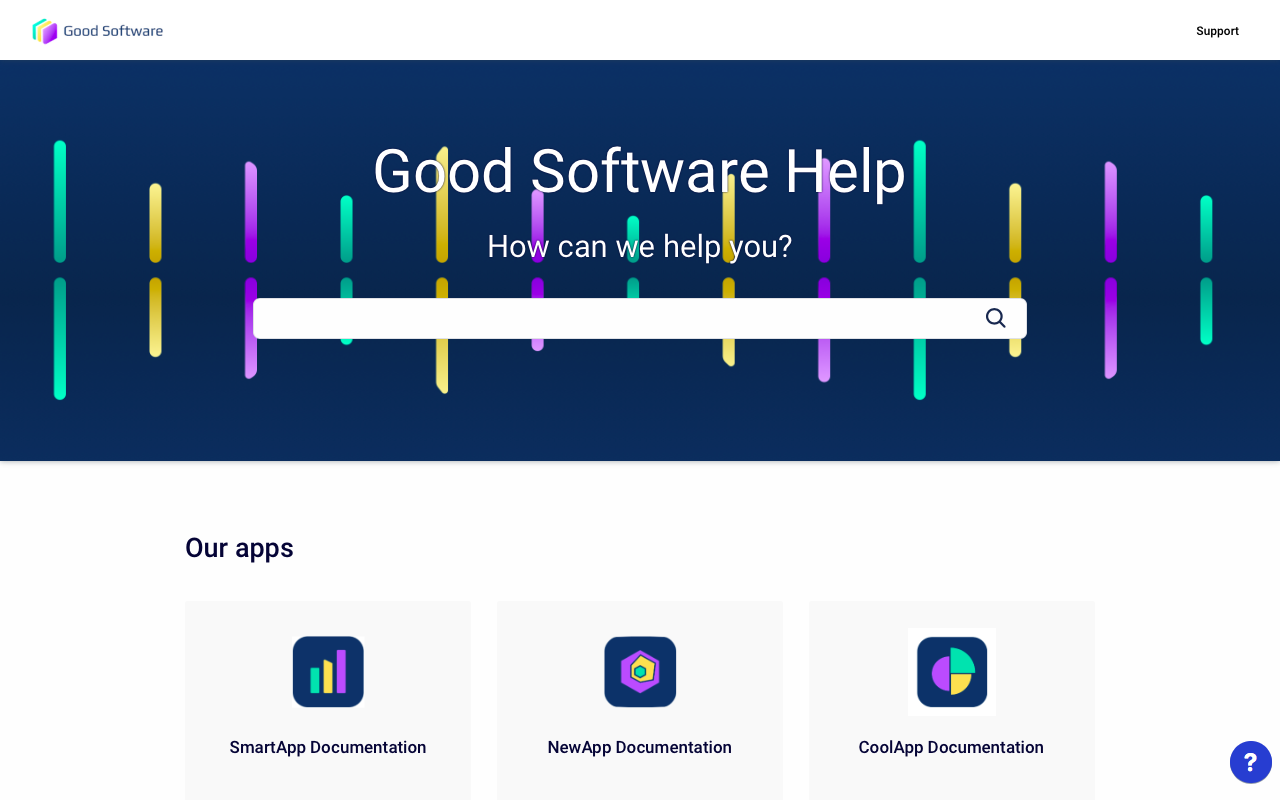
If you set up a help center with multiple content sources, customizing the portal page in the theme editor will allow you to optimise the browse experience for your users and help them navigate your content.