Get Started
Scroll Documents is an app that enables your team to manage your pages as documents – save versions, track changes, manage approvals, and leverage powerful document management functionality in Confluence.
Get started with Scroll Documents with the help of a step-by-step tutorial.
- Create a new document — Create a document with a working version that uses a new page tree.
- Add and organize content on your working version — Collaborate on the working version of your document without impacting published versions.
- Save a version — Create snapshots of your document over time and compare different versions using the comparison tool.
- Browse all Documents in a space — Overview all documents and navigate between all versions with the help of an organized and searchable Document Library.
- Read a Document — Use the scrollable Document Reader to read and interact with multiple pages of a document at once.
- Export versions — Export a version of your document as a professionally-styled Word or PDF file using an integration with the Scroll PDF Exporter and Scroll Word Exporter apps.
1: Create a new document
To start, you’re going to create a new document and add it to your space.
A new document always starts out with a Working Version. In the following steps you will learn how you can create this version from a new page tree.
Open Scroll Documents from the Apps section in your space sidebar.
- From the Document Library, click New Document in the upper right corner. The create new document dropdown displays.
- Select Start from scratch.
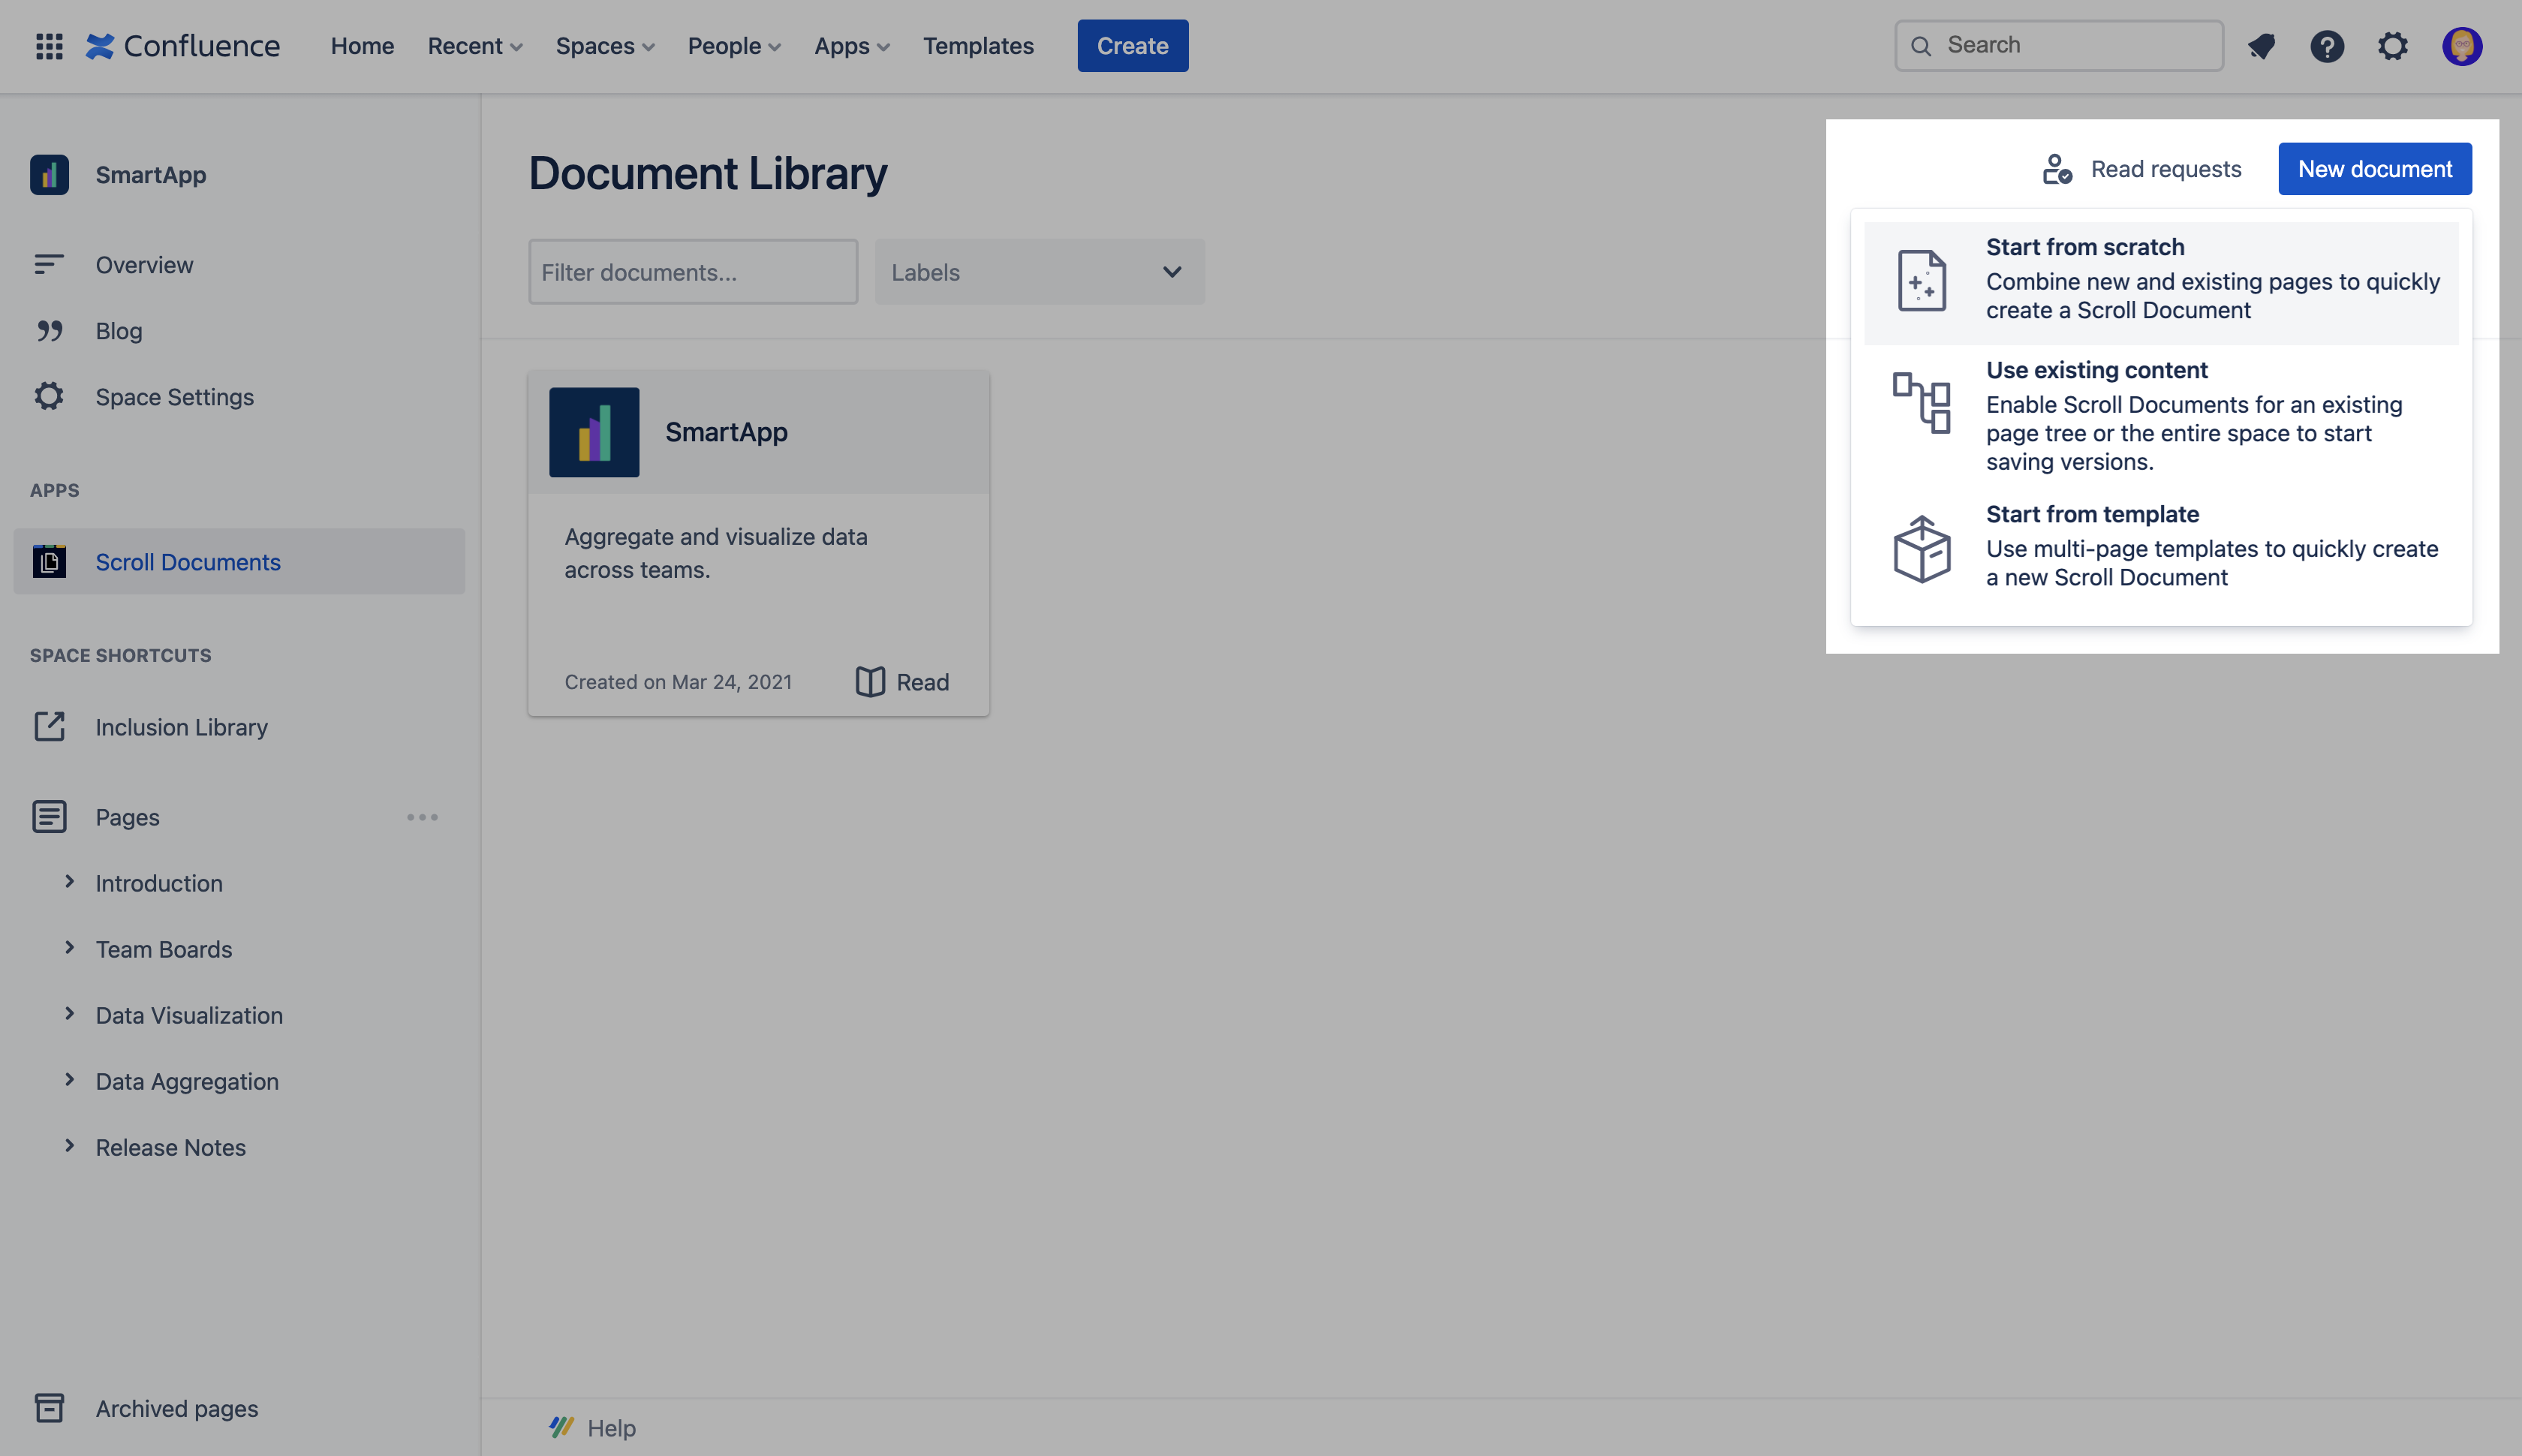
- First, define document details such as Document Title, Labels, Summary, and Cover Image.
- Using the Organize Page Tree option define and organize the pages that should be part of the working version.
- Click Save.
The document now also appears as a Document card in your Document Library. To find it, open Scroll Documents from the Apps section in your space sidebar.
2: Add and organize content on your working version
After creating a document the root page of your working version will open. From here, update the content on all pages of your working version, the same way you would update any other page in Confluence.
Edit the structure of the page tree by adding new pages, copying pages, and including existing pages:
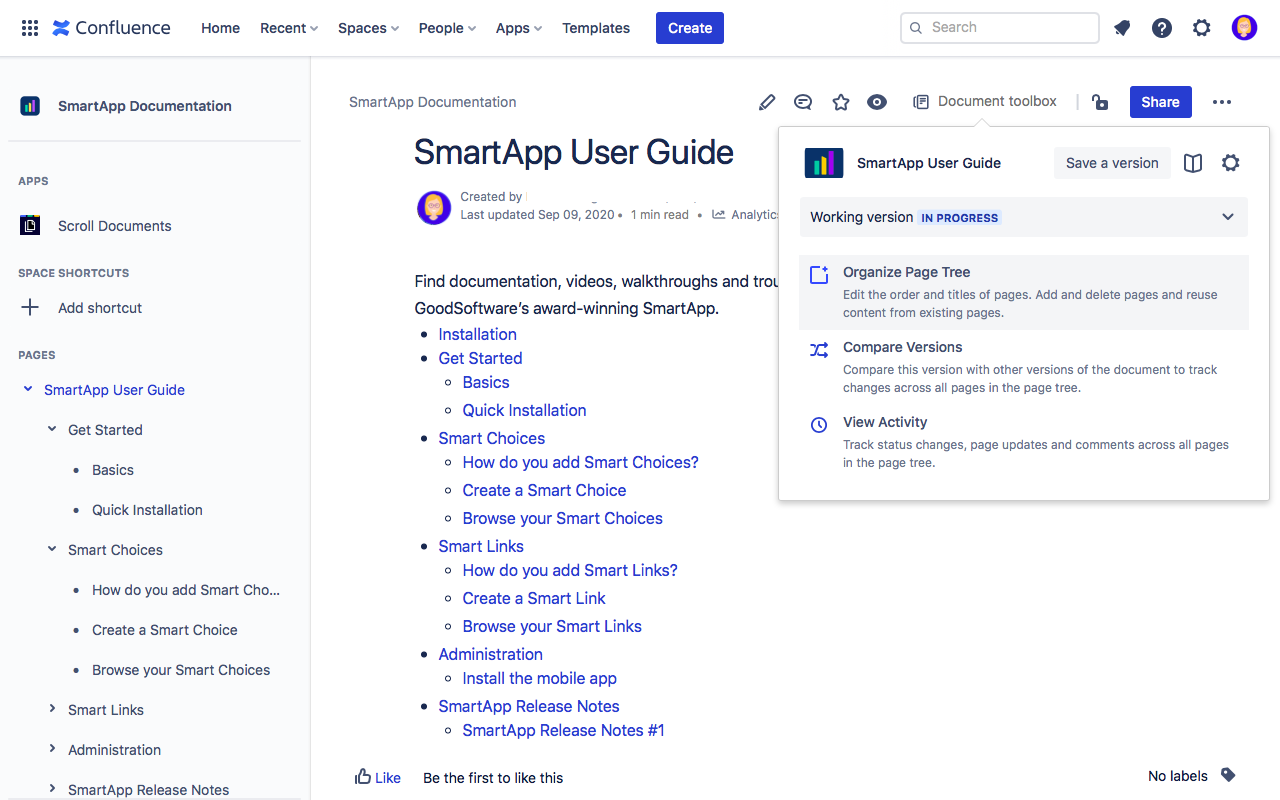
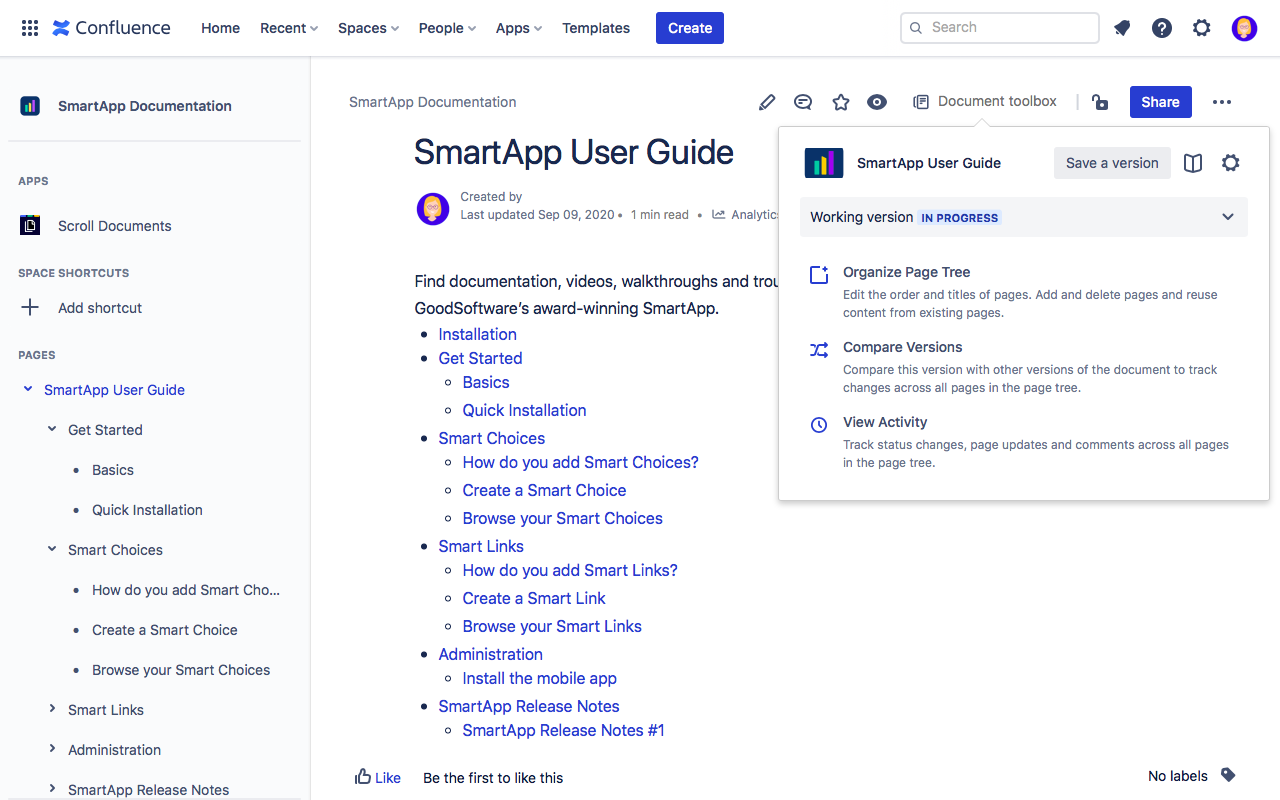
Click Organize Page Tree from the Document Toolbox. You can find the Document Toolbox on any page of your document, between the watch and share icon.
Start to add new pages, delete pages or include or copy in existing pages to build up your page tree. Learn about all organize page tree options.
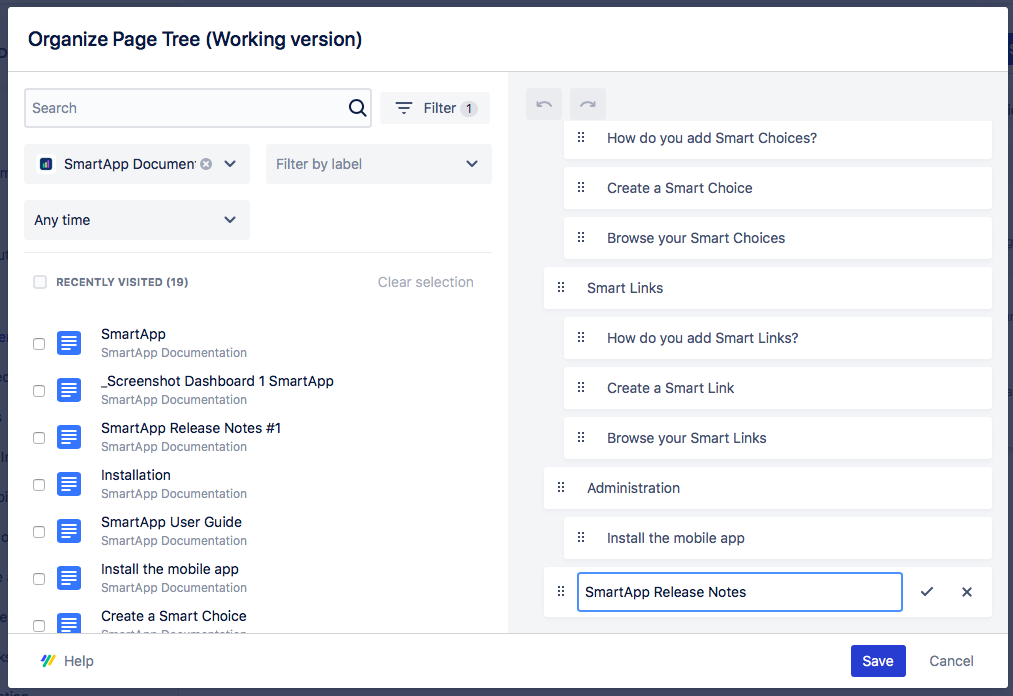
Click Save when you’re done.
Click Edit in the top right of any page within that page tree to edit the content on the pages.

When you’re finished making updates to a page, click Publish to close the editor.
All changes will be reflected within the working version of the document.
3: Save a version
When you save a version of a document, you're saving a snapshot of the working version and its content at a certain point in time. This enables you to track changes to documents throughout the document lifecycle.
After finalising and reviewing the content on your working version, open the Document toolbox to save a snapshot of it.
Open the toolbox from any page of your working version page tree.
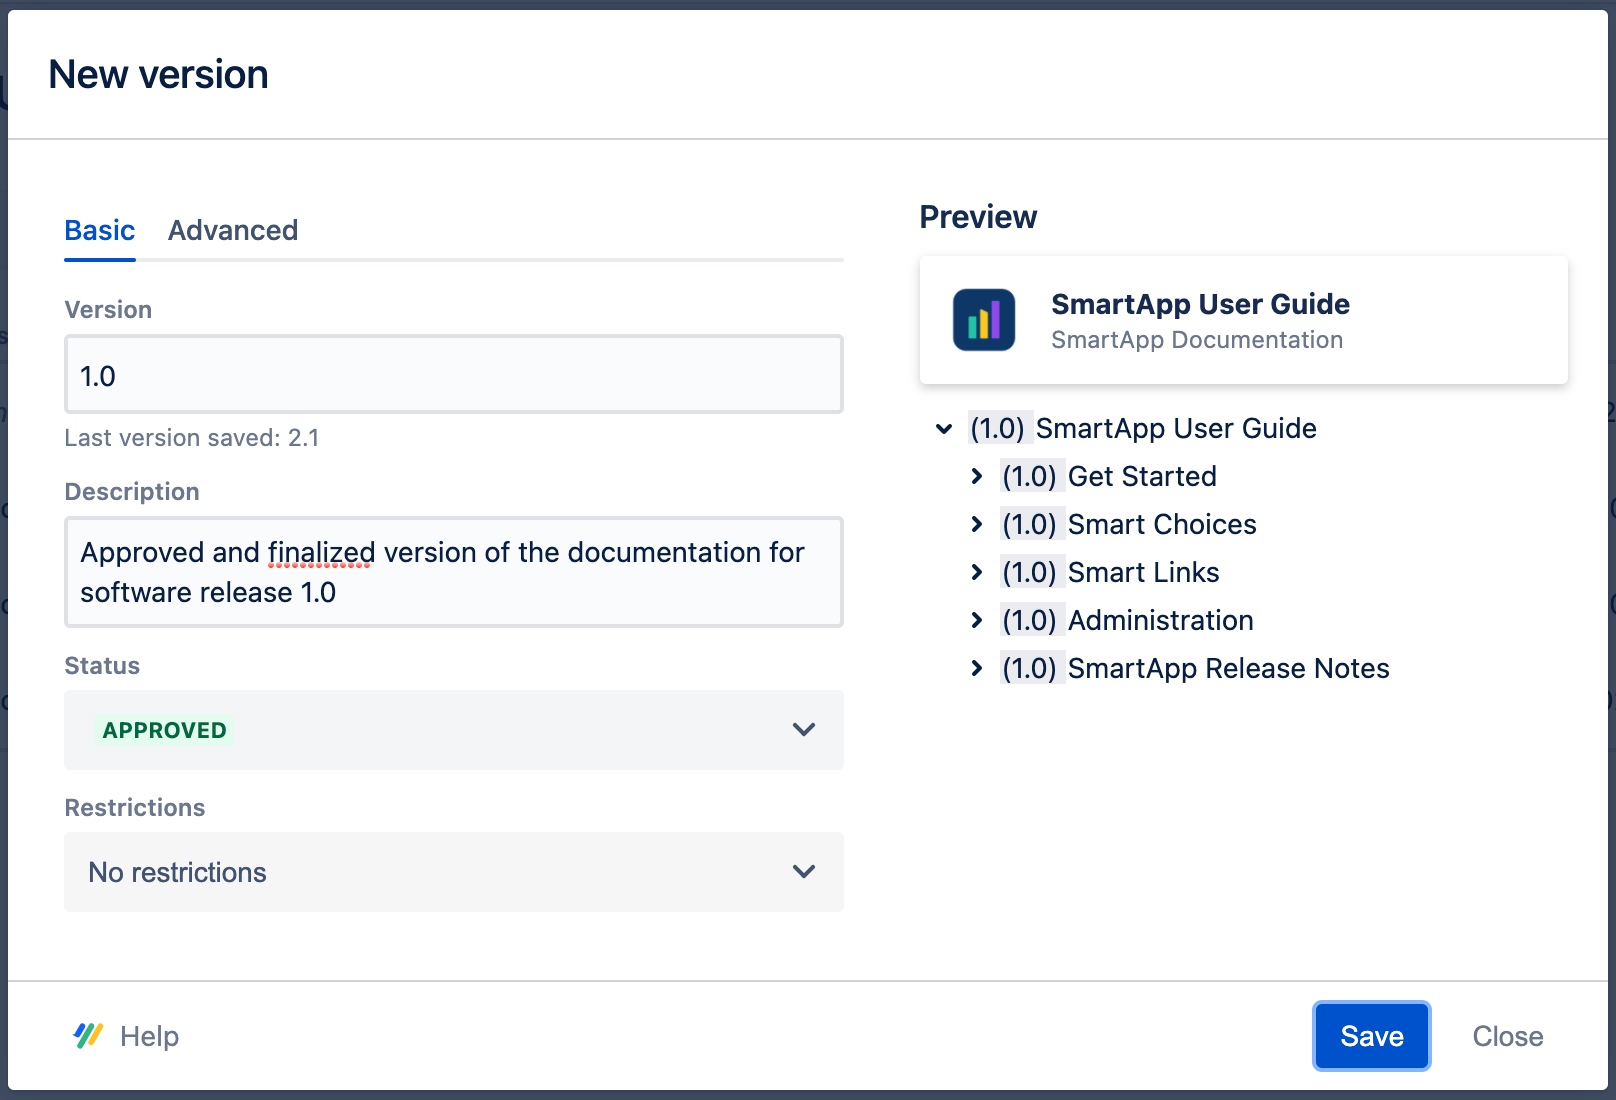
Click Save a version. The New version dialog displays.
Optionally add the following:
In Version, enter “1.0”
In Description, enter “Approved and finalized version of the documentation for software release 1.0”
Optionally, add restrictions to the version to keep others from editing the content.
Click Save.
The new version appears in the version history table along with the Working version. The versions are automatically sorted according to the version name.

Now that this version is saved, you can compare this version to the current working version or any future version of the document by clicking Compare versions.
4: Browse all documents in the space
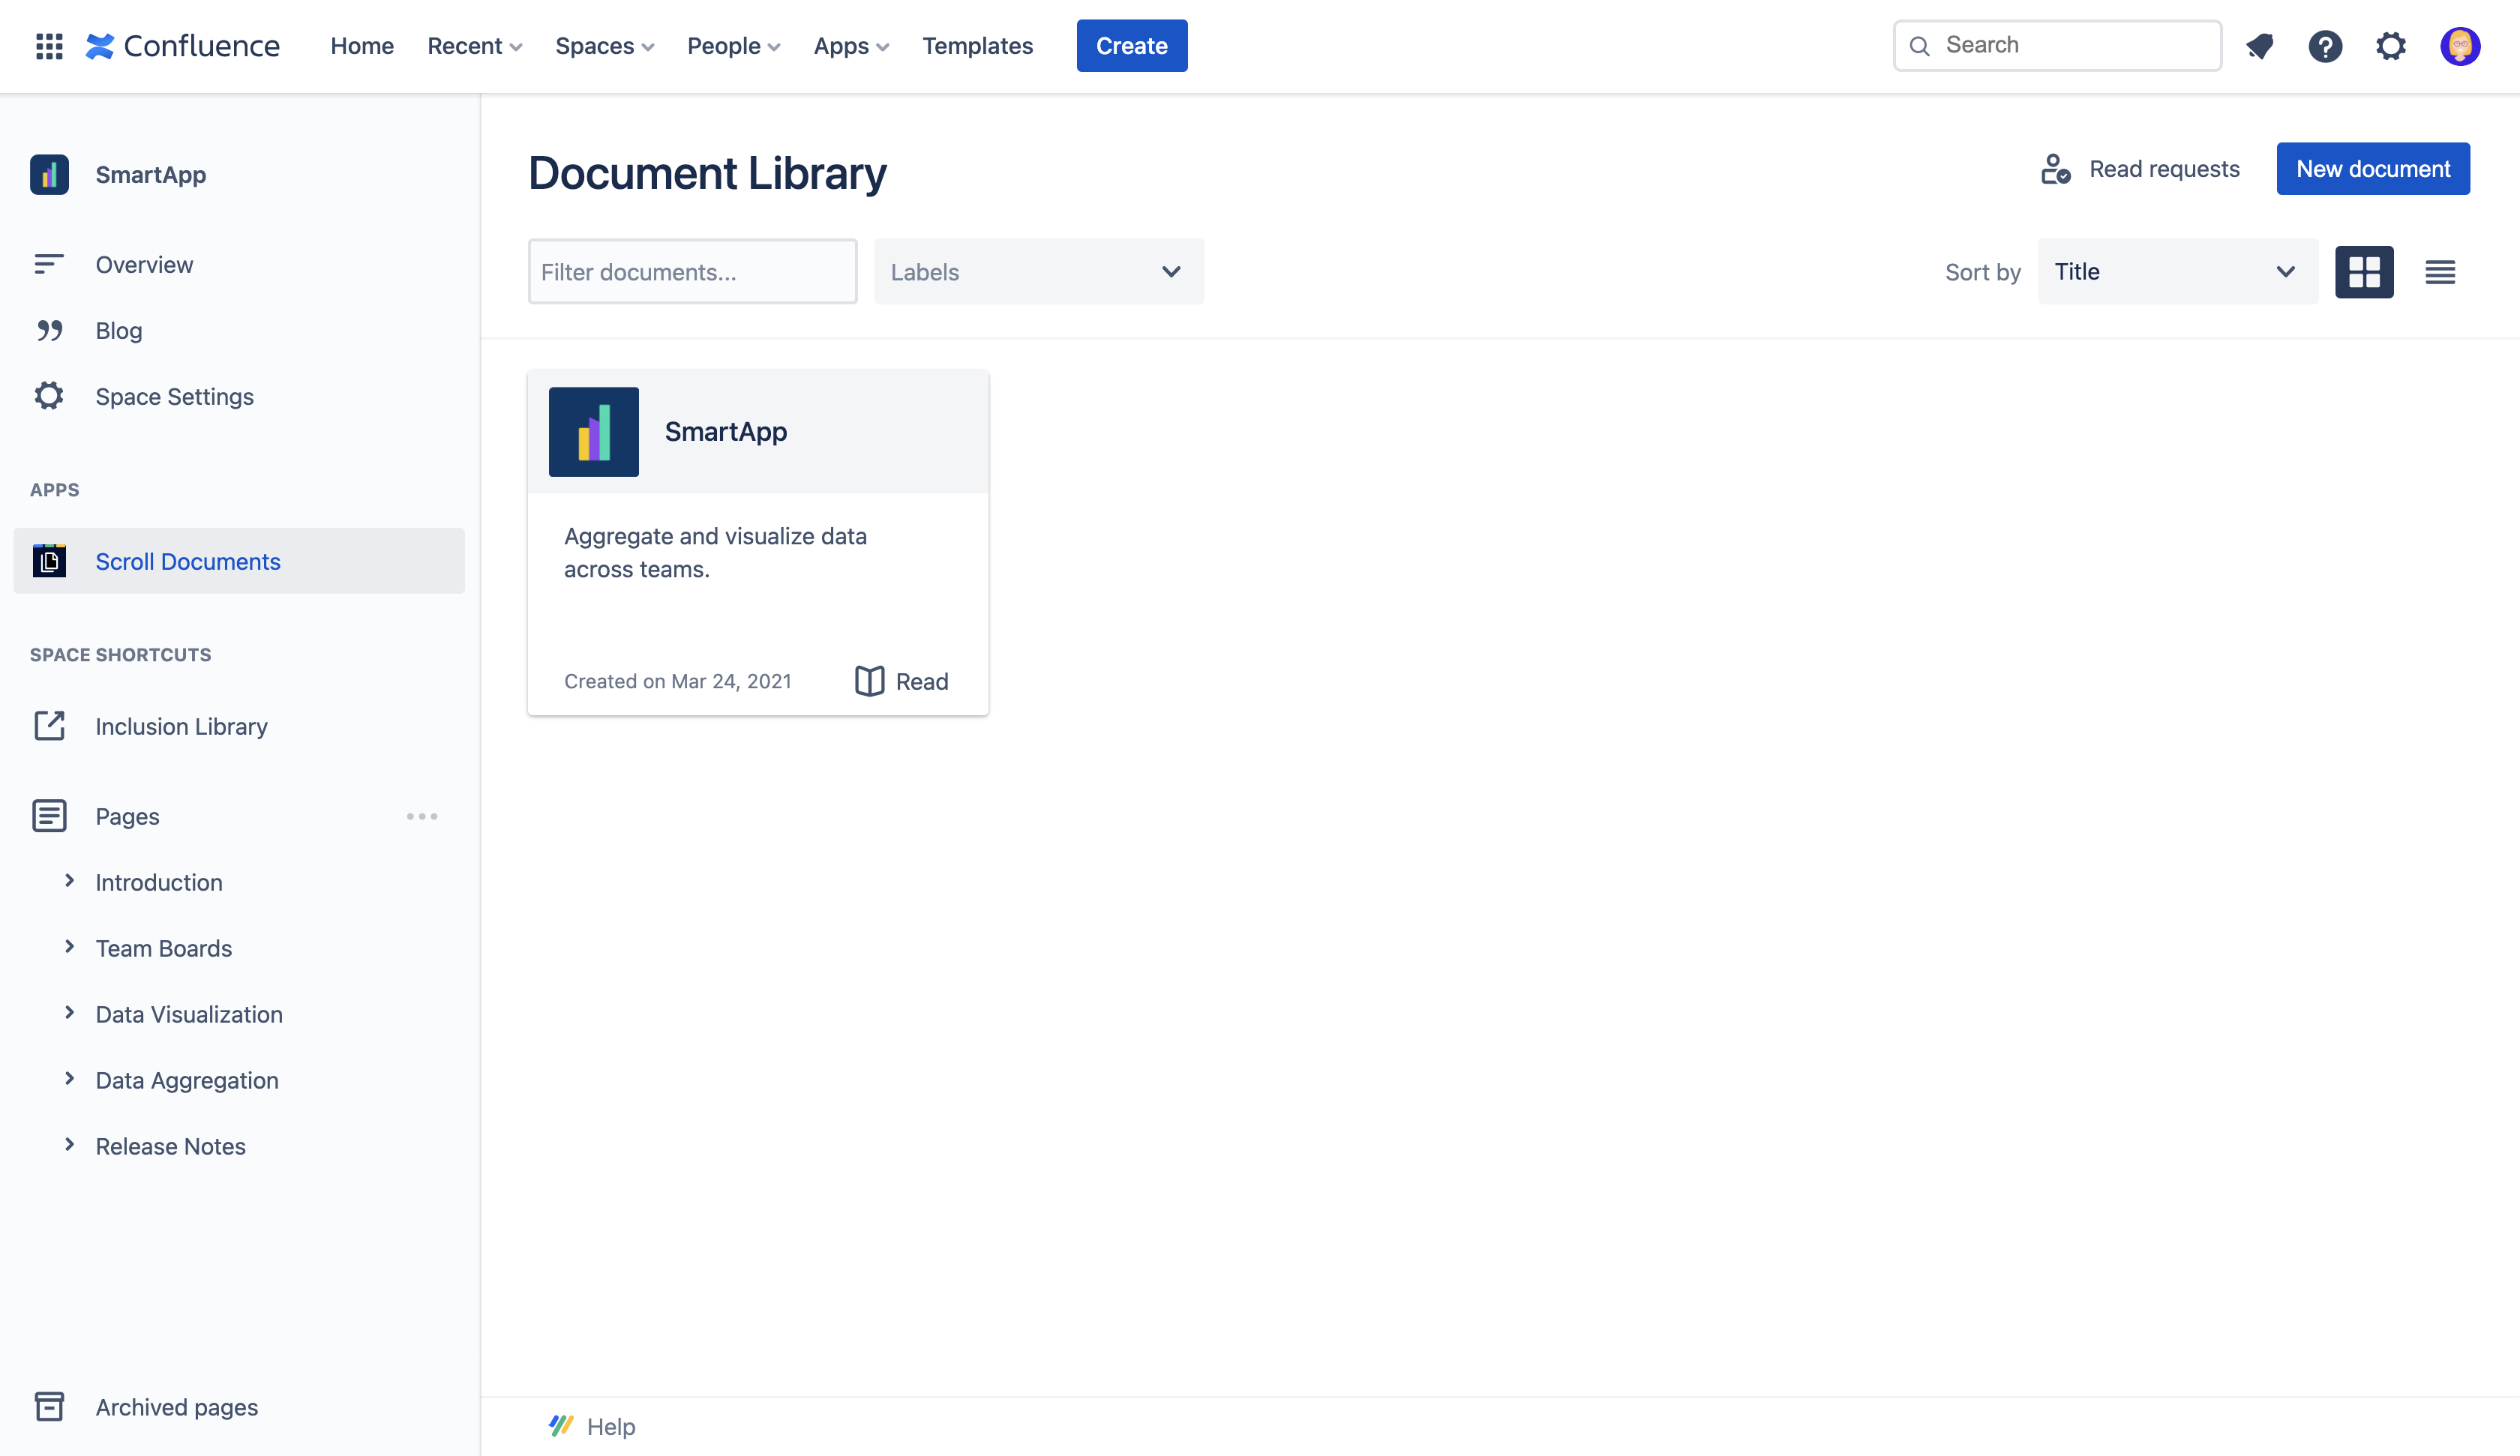
Your created documents appear in the Document Library.
The Document Library is the home for all documents created within your space. It enables you to access, organize, classify, and filter documents from one place.
For each document, you can see the title, the summary and document labels, along with the document creation date.
In order to navigate to the Document Library, click Scroll Documents in the space sidebar.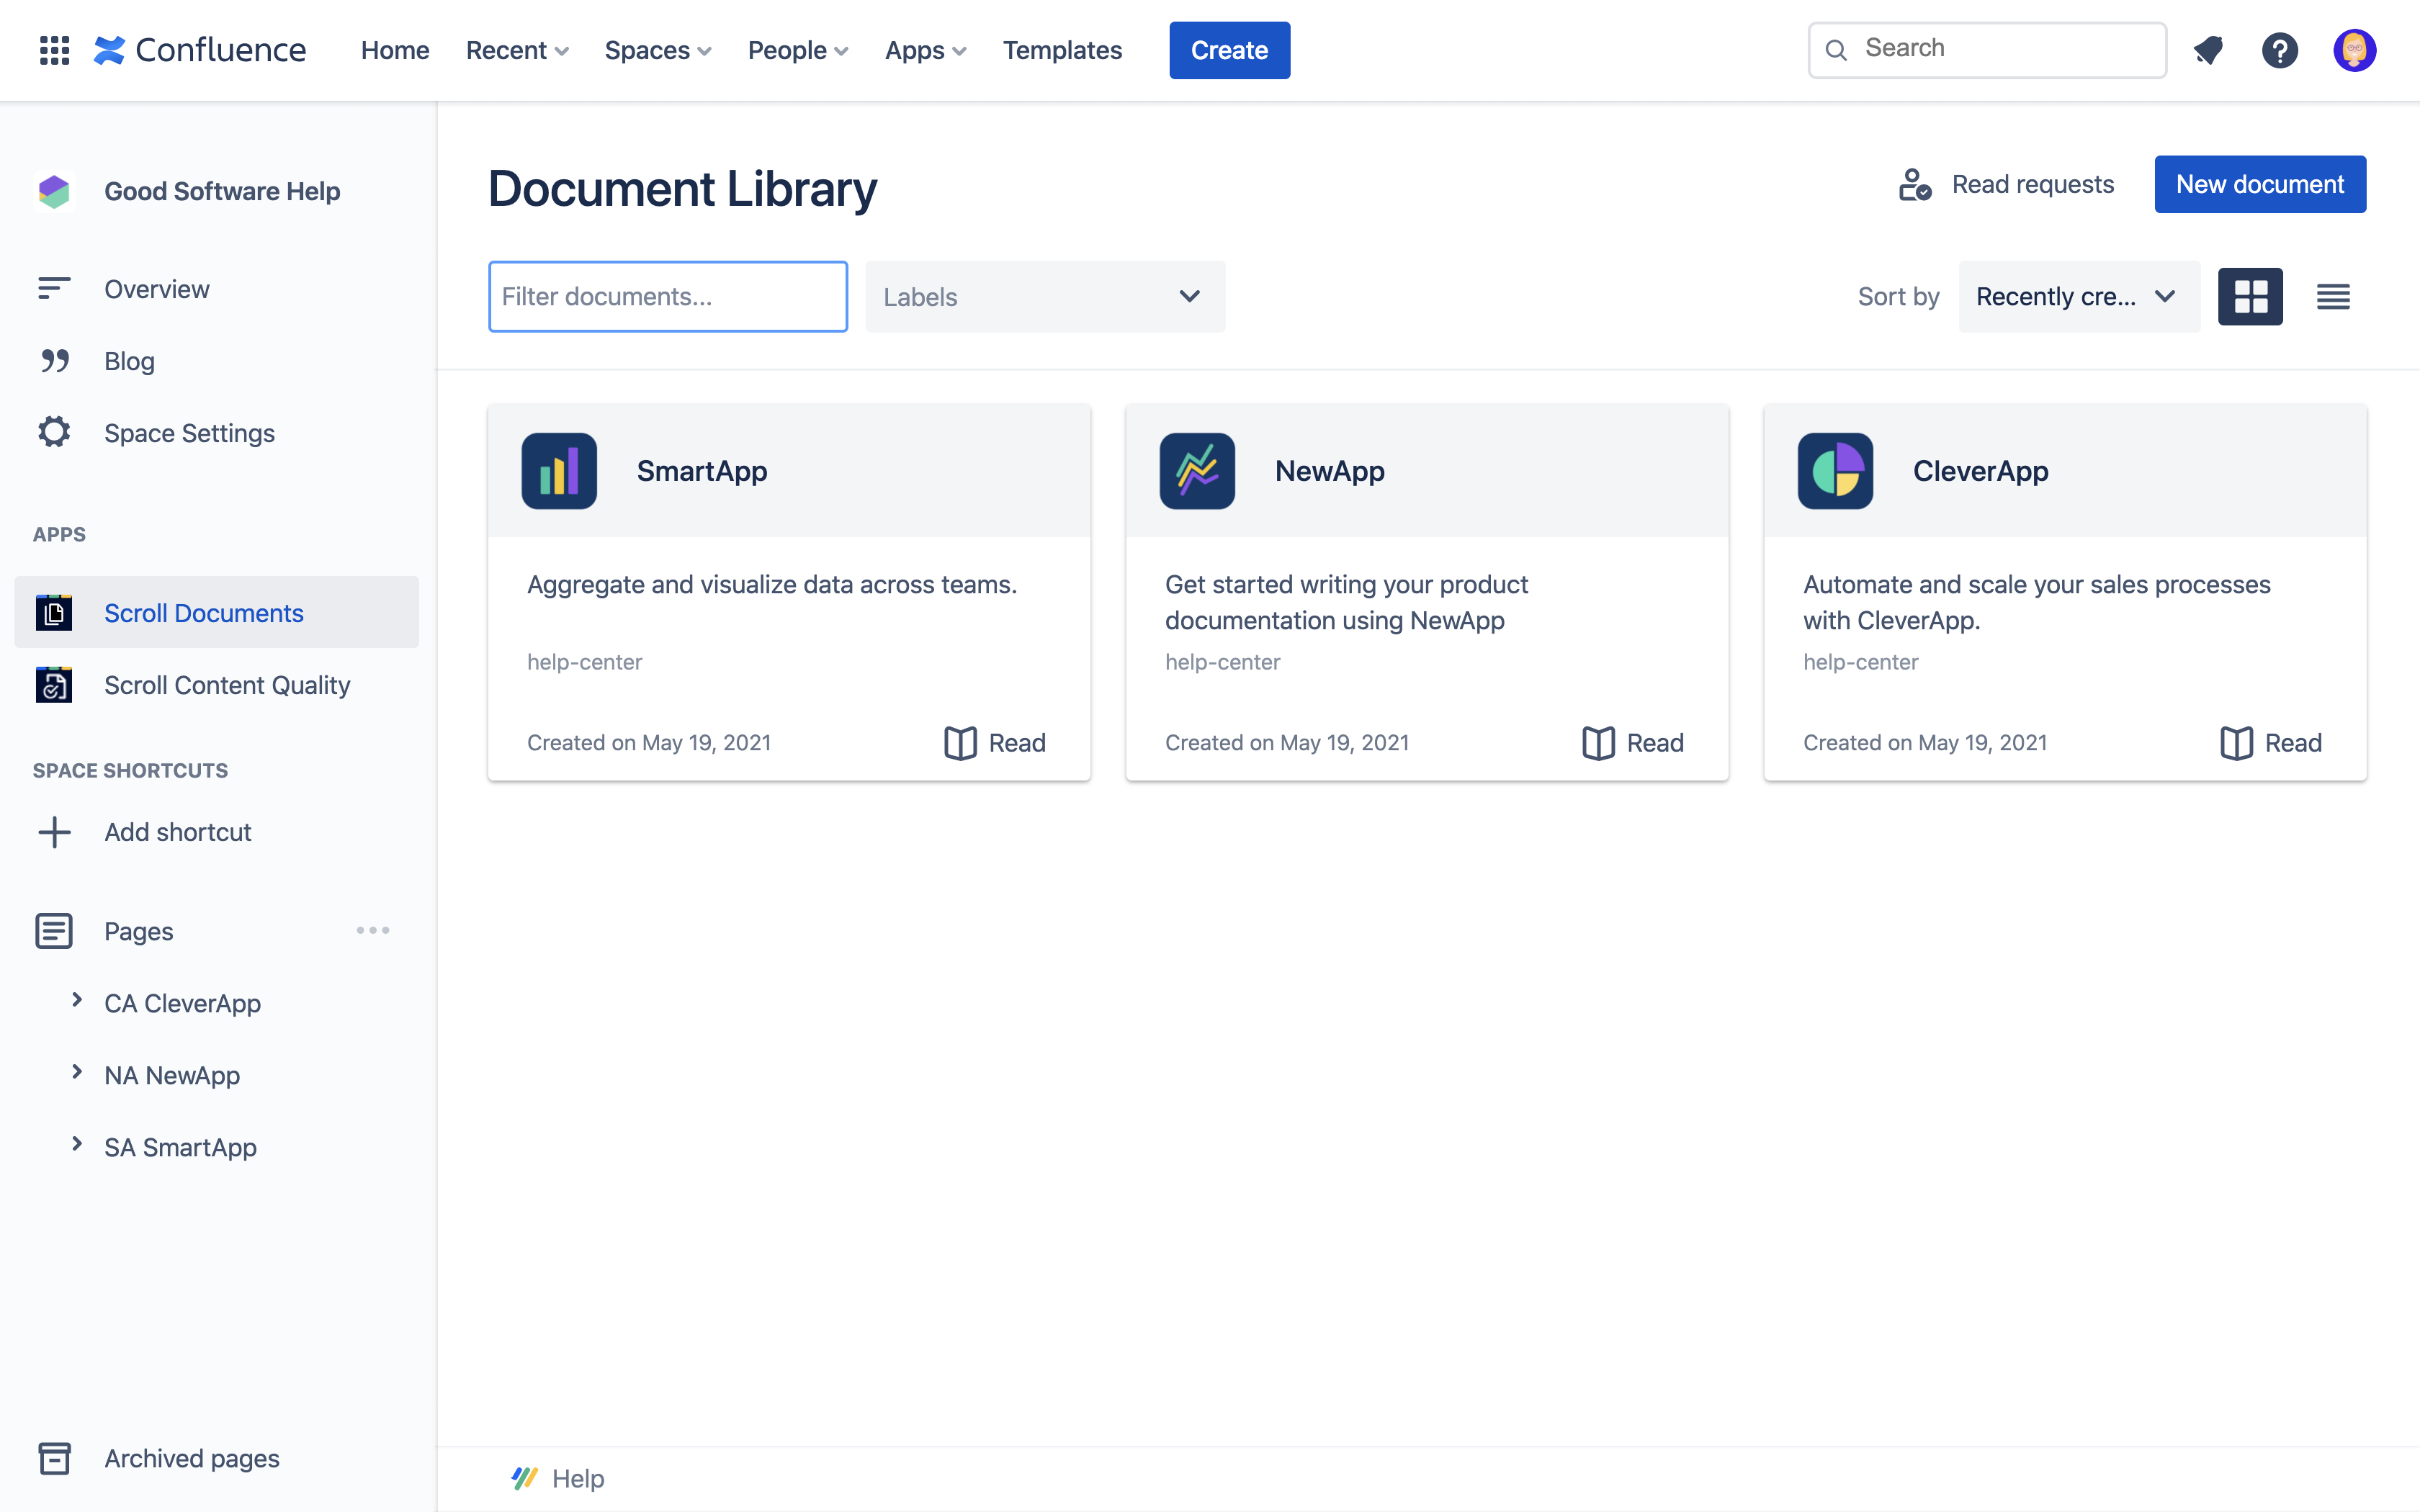
5: Use the Document Reader to read and share the document
The Document Reader is a dedicated, scrollable view of all of the pages of your document. The reader is an ideal way to share your document with your readers in Confluence. In addition to optimizing readability, they can view and navigate the document using the outline.
You can also use the reader to jump directly to the document's pages to edit them.
From the Document Library, click the document you created. The Document Reader dialog displays. You can now read and scroll through the content of your entire document.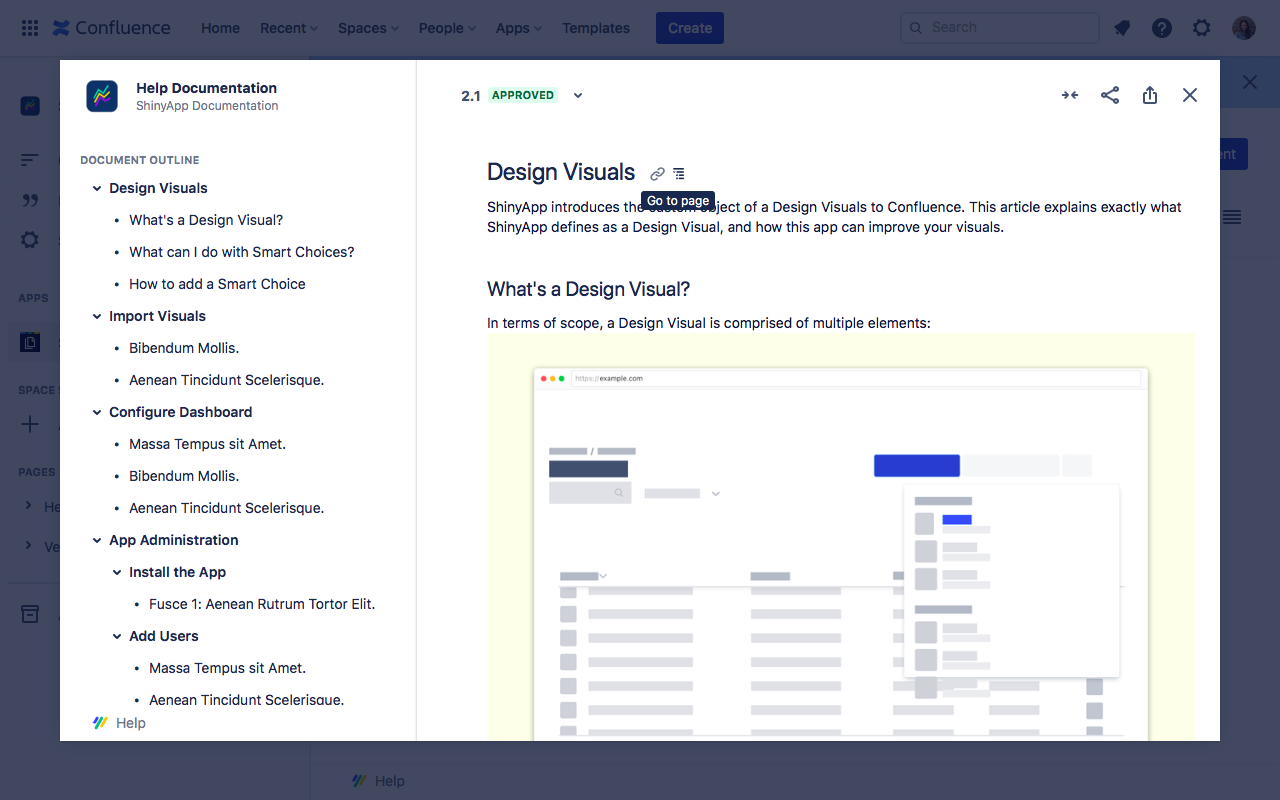
6: Export versions of your document to PDF or Word
You can export your document as a PDF or Word file with complete control over styling using the Scroll Documents integration with the Scroll PDF Exporter and Scroll Word Exporter apps.
To export a version as a fully styled PDF, you can try the Scroll PDF Exporter app and to export as a fully styled Word file, you can try the Scroll Word Exporter app.
Alternatively, export the pages of your document using Confluence's export functionality.
To export a document version using Scroll PDF Exporter or Scroll Word Exporter:
From the Document Library, click on the document card. You are now in the Document Manager.
Click on the Export button for the version you want to export to see the available export options. Choose the one applicable to you.
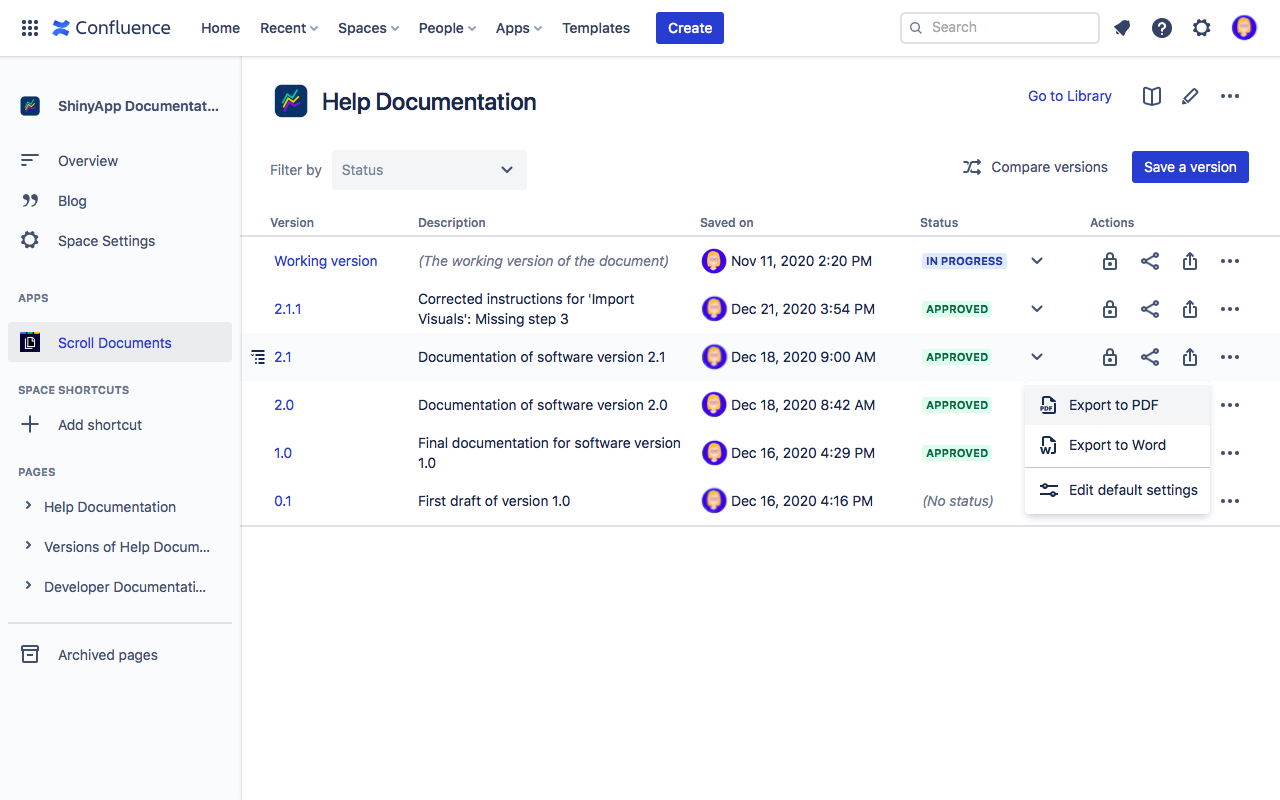
Select one of the included templates or select one of your own custom templates.
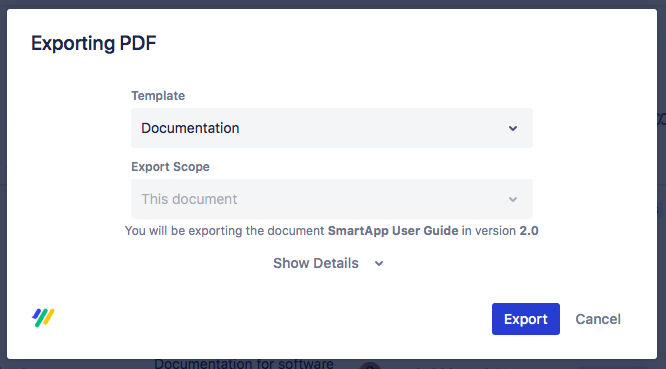
Click Export.
Your formatted PDF or Word file is available in the downloads area within your browser. Learn more about what you can do with Scroll PDF Exporter and Scroll Word Exporter.
That's it! You now know how to create a document, save a document version, set a status, and export a document as a PDF or Word file.
What’s Next?
Now you can find out how to use more of Scroll Documents' functionality, such as how to View and Track Activity on a document or Compare Versions.