Quick start Tutorial: Set Up and Manage Variants
Welcome to getting started with Variants for Scroll Documents. Work through the steps below to set up variants for your documentation. In this tutorial, you will first set up two variants, then conditionalize articles, and finally conditionalize content inside an article.
Before You Start
Before you jump into the first practical steps of this tutorial, we recommend you go through the prerequisites and terms listed below.
Prerequisites
Make sure the following prerequisites are fulfilled before starting the tutorial:
Scroll Documents and Variants for Scroll Documents are installed.
You have a test space you can use for this tutorial.
There is already a document created in the space.
You have the space permissions:
View All
Add Pages
Add Attachments
Important terms
Useful terms which are good to know in this tutorial:
Step 1: Create an Admin Variant and Conditionalize Articles
In this tutorial, we will work with a user guide as an example. This user guide has two audiences:
users,
and admins.
A lot of content should be accessible to both audiences, but some content is only relevant to the Admin audience. Hence, each variant will contain content shared between the two, but there will also be content which is assigned only to the Admin variant.
First, let’s start with navigating to the Document Manager:
Click Scroll Documents from the Apps section in your space sidebar.
From the Document Library, click the document card of a document.
Or
From a page in a document, click Document toolbox.
Click on the cog icon.
When you are in the Document Manager, you can continue with creating the default variant:
1. Click Manage > select Variants, this will take you to the variant manager.
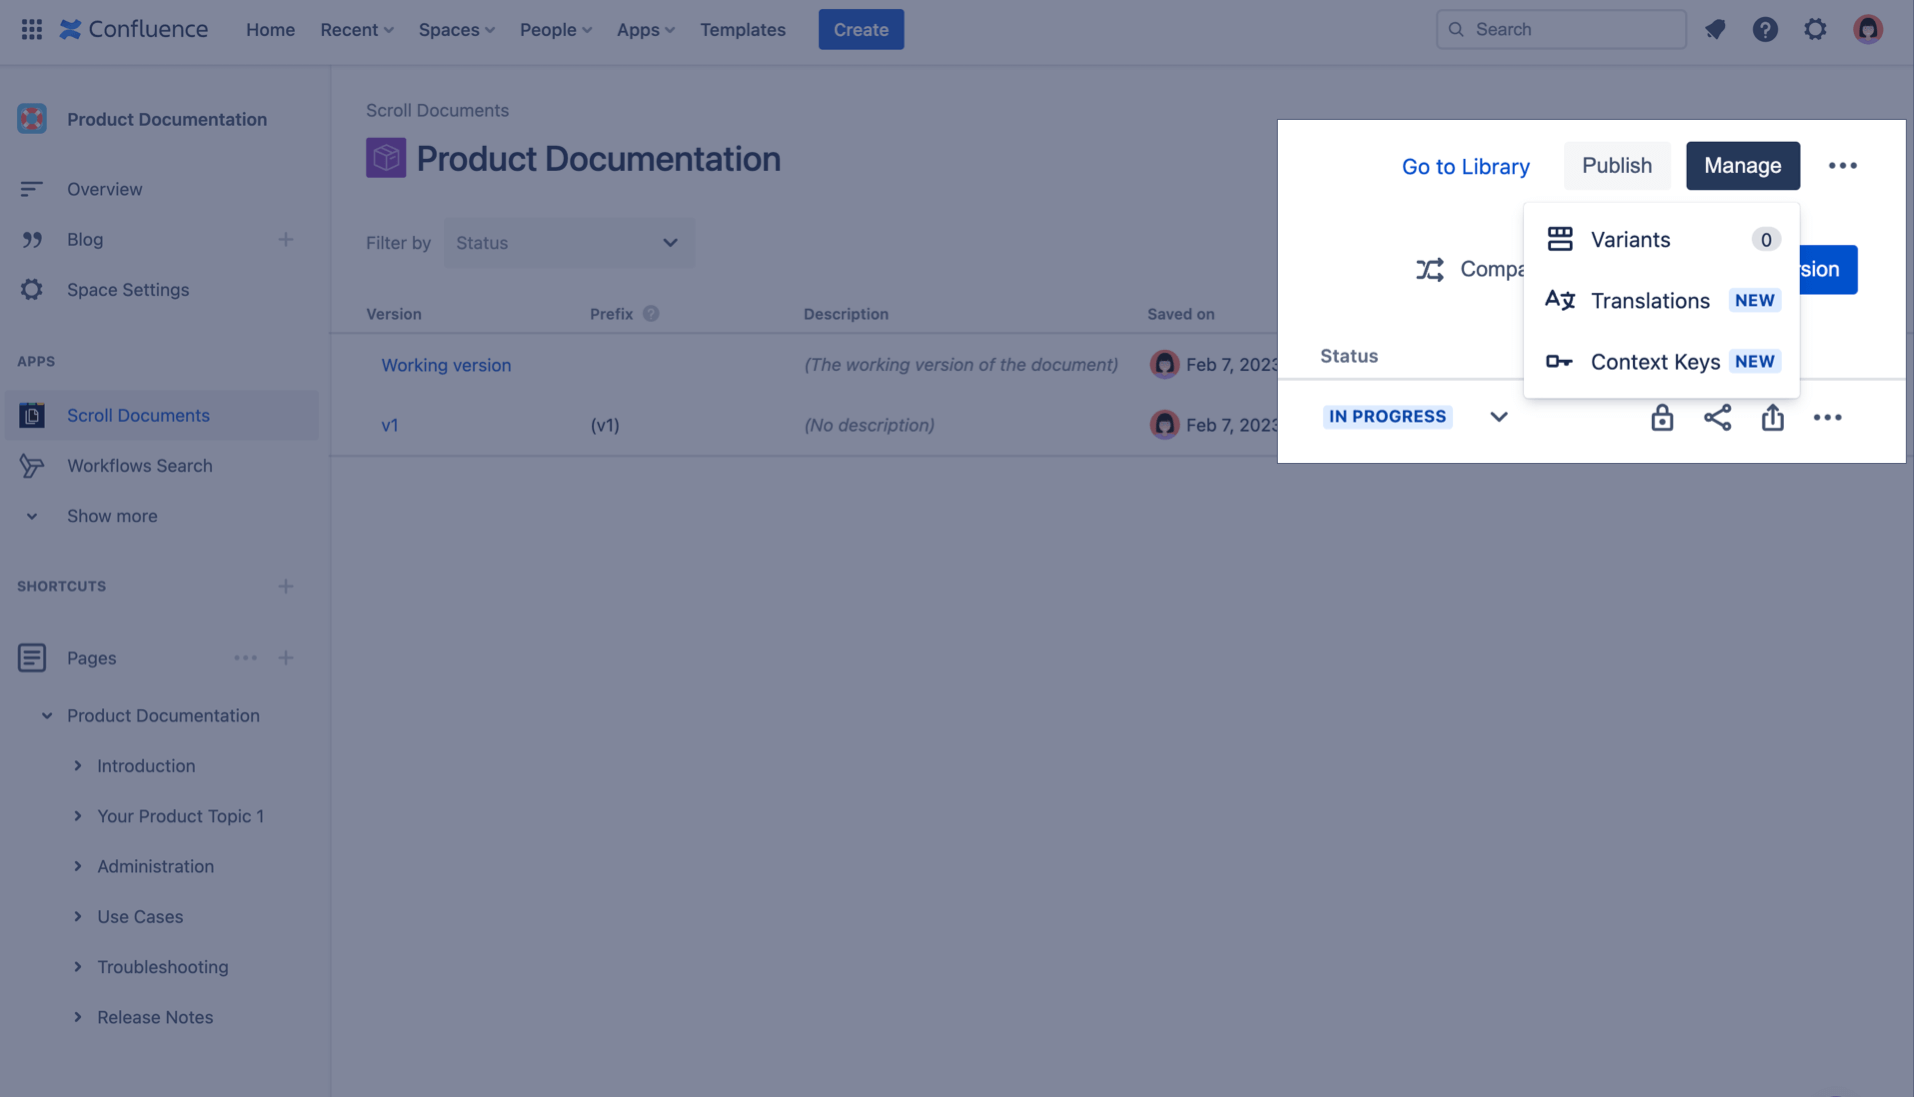
2. Click New Variant, this will open the “New Variant” dialog:
a. Type in “Admin” as variant name.
b. Under “Rules” set the first dropdown to all so it says: “Include pages that match all of the following rules”
c. Set the second dropdown to has label:
i. Type “admin” as label name in the “Add label” field > click Create admin in the dropdown that appears below the field.
We recommend you write the label names in lowercase as labels are case sensitive.
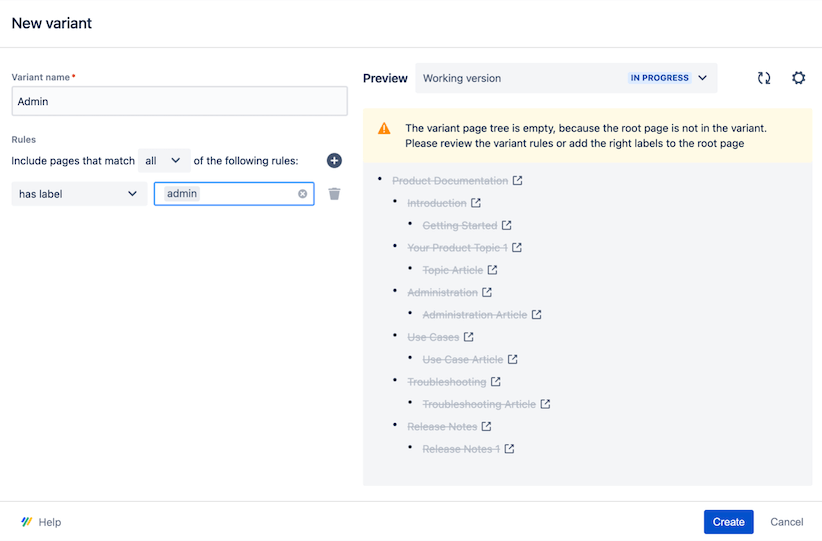
d. Click on the cog shaped icon (to open settings) > enable the toggle for “Edit page labels.”
e. Click Add label… on the top-level page of the page tree:
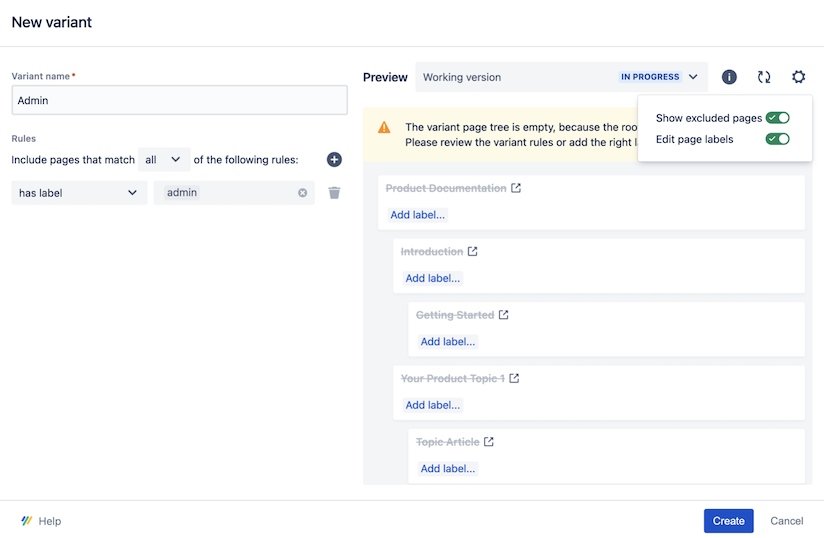
i. Type the label name “admin” > hold down Alt/Option on your keyboard and click on the check mark ![]() , this action will add the label “admin” to all pages in the page tree. The action of adding a variant-specific label to a page will conditionalize the page, making it a part of the variant.
, this action will add the label “admin” to all pages in the page tree. The action of adding a variant-specific label to a page will conditionalize the page, making it a part of the variant.
For a page to be part of a given variant, all of its ancestor pages need to be part of the variant, too. It’s required that at least the top-level page of the page tree has the label of each variant you create.
3. Click Create to create the variant.
Awesome!
You have created your first variant and conditionalized your first articles. Let’s create a second variant to repeat.
Step 2: Create a User Variant and Conditionalize Articles
Now, let’s create a second variant dedicated to “User” specific content. To do this, you’ll repeat almost the same process as before:
Click New Variant to open the “New Variant” dialog:
a. Type in “User” as variant name.
b. Under “Rules” set the first dropdown to all so it says: “Include pages that match all of the following rules”
c. Set the second dropdown to has label:
i. Type “user” as label name in the “Add label” field > click Create user in the dropdown that appears below the field.
d. Click on the cog shaped icon (to open settings) > enable the toggle for “Edit page labels.”
e. Click Add label… on the top-level page of the page tree:
i. Type the label name “user” and click on the check mark ![]() , this action will add the label “user” to the top-level page.
, this action will add the label “user” to the top-level page.
ii. Continue to add the “user” label to a few more pages which you find relevant.
2. Click Create to create the User variant.
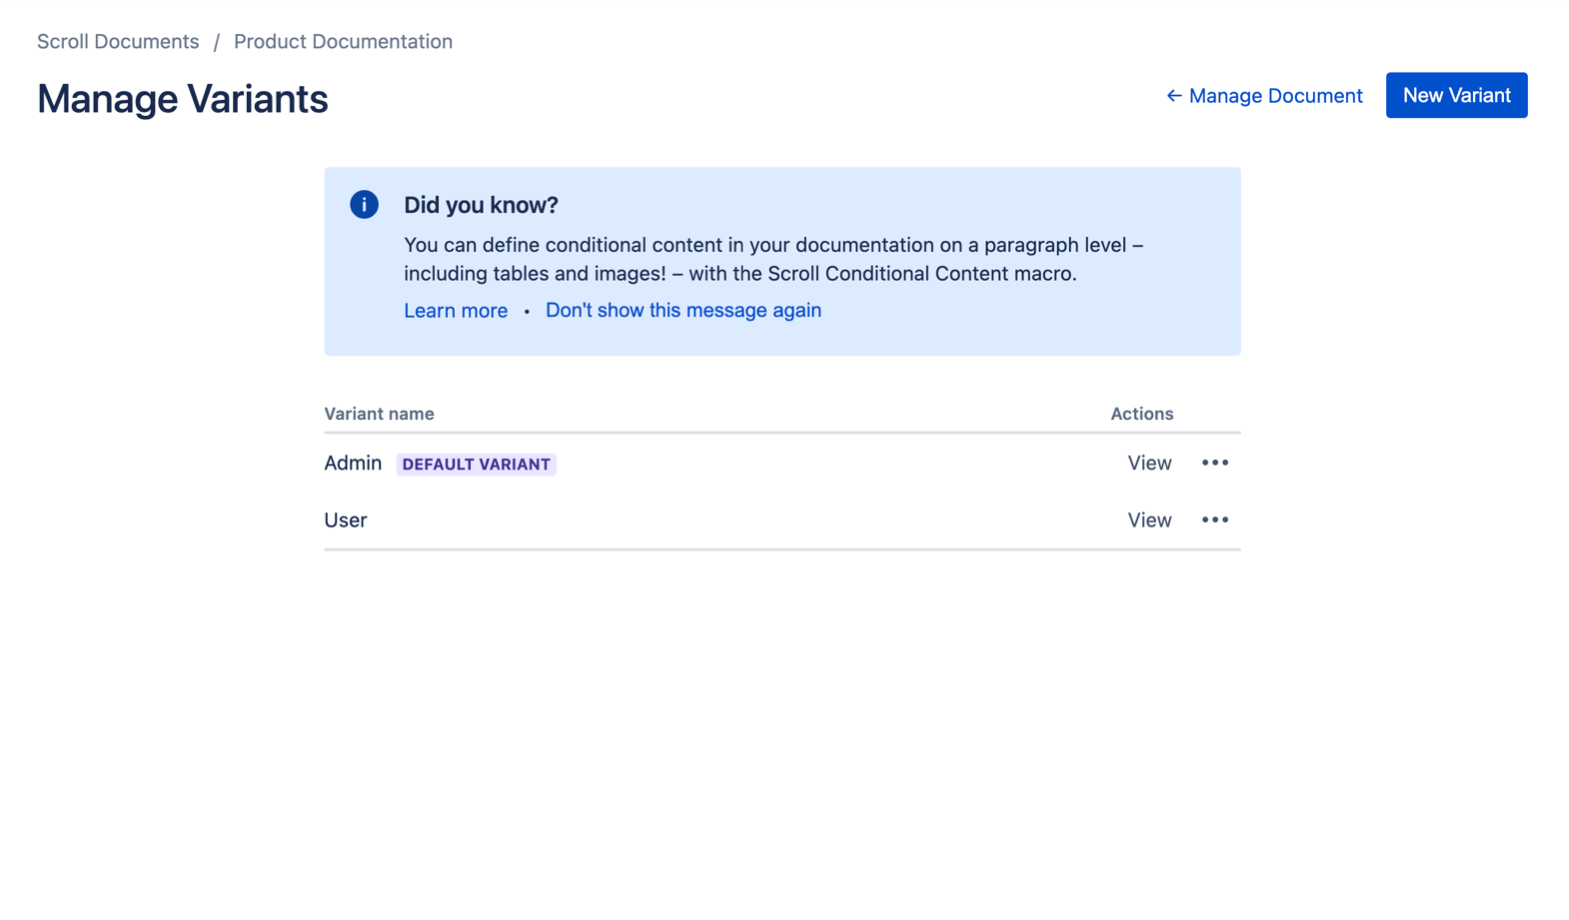
Since you created the Admins variant first, you should see this variant has been marked as DEFAULT VARIANT in the Variant manager. The default variant will be pre-selected for users when reading the Scroll Document in the Document Reader or a Viewport site, as well as when exporting to PDF, Word, or HTML.
If you want to change the default variant, click More actions (•••) next to the variant you want to mark as default > select Set as default.
Well done!
You are now familiar with how to create a variant and conditionalize articles.
Step 3: Conditionalize a Paragraph
Now you know how to conditionalize articles to specific variants. In this last section, you’ll learn how you can do the same with text within an article – by putting the content inside a conditional content macro.
You can also place images and tables inside conditional content macros, making the content conditional.
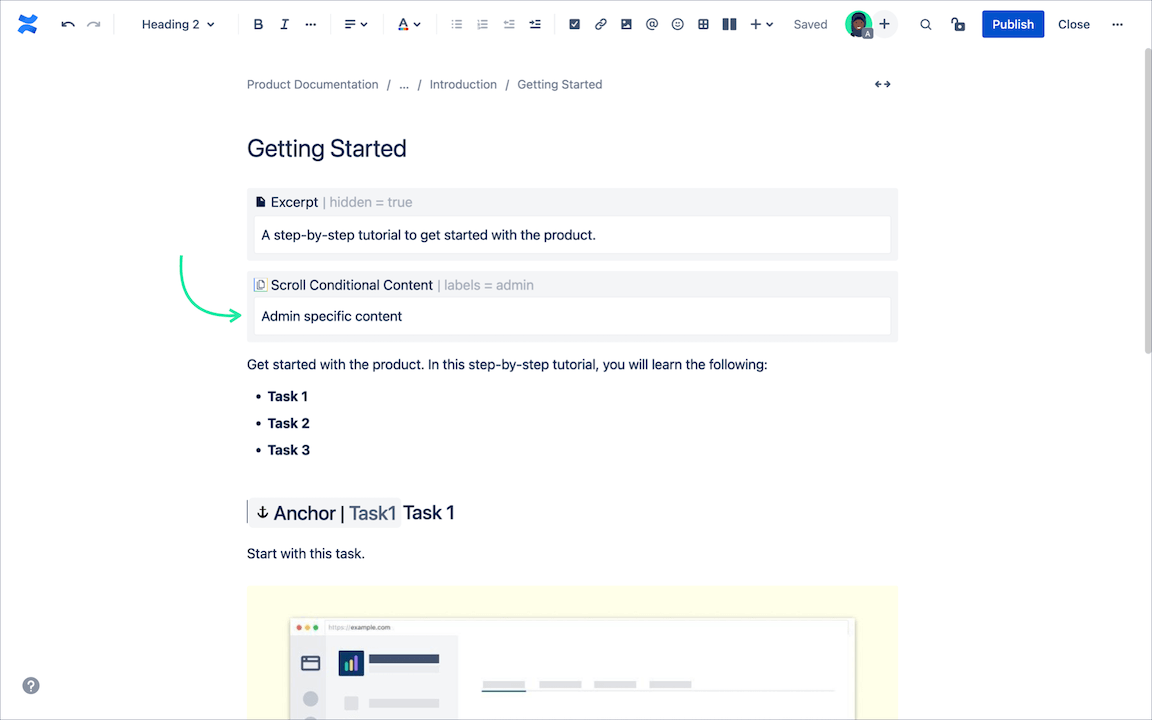
Let’s say an article is available in both the Admin and User variant, but some specific content only applies to the Admin variant. In this case, you can put the Admin specific content inside a conditional content macro and assign it to the Admin variant. As a result, if a reader opens the article with the User variant selected in the Document Reader or in Viewport, the content in the conditional content macro will be hidden.
In Confluence page view all conditional content macros will show on the page.
To conditionalize a paragraph in an article, follow the steps below:
1. Navigate to the top-level article in your page tree, this article should be mapped to both the Admin variant and the User variant.
2. Click Edit on the pen-shaped icon.
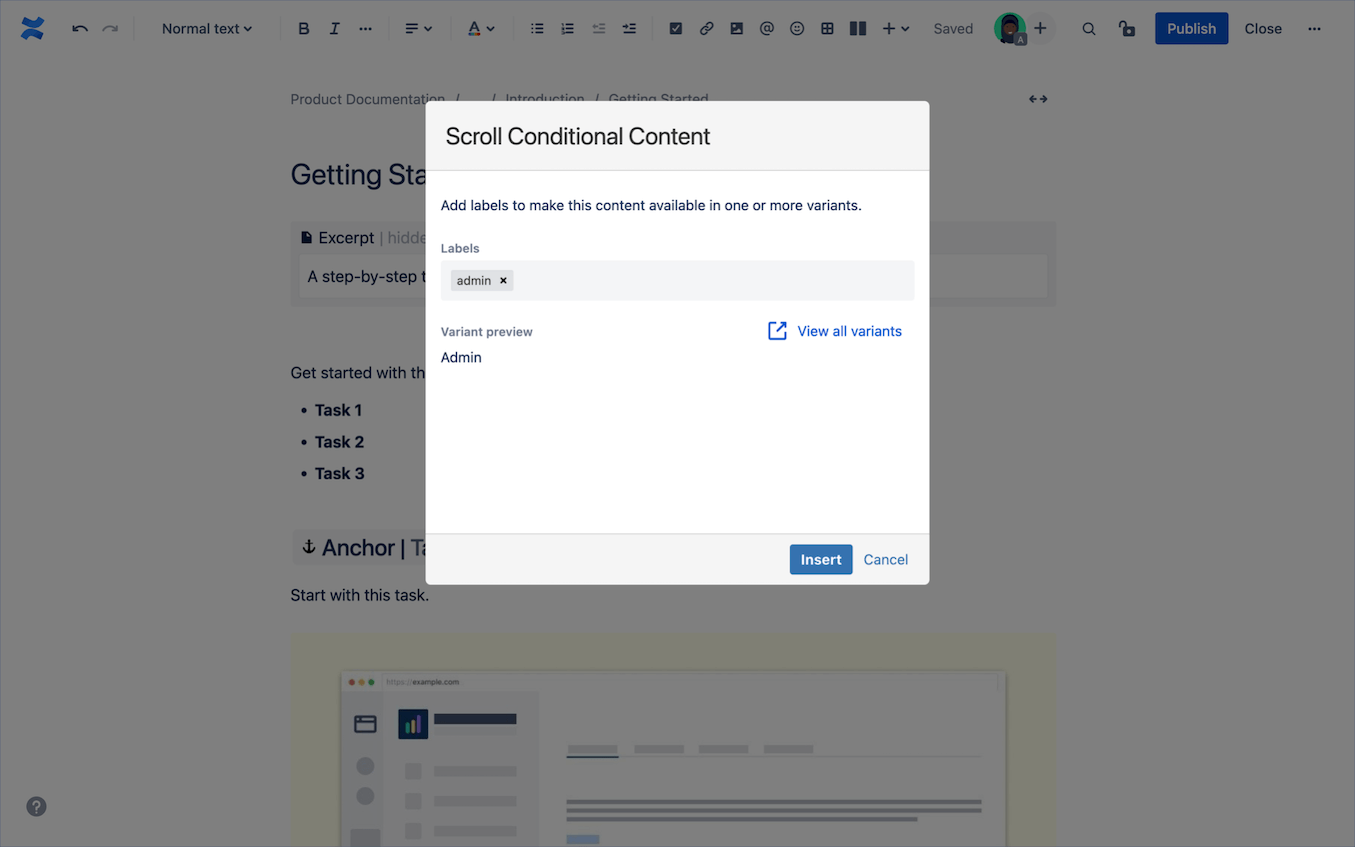
3. Click on Insert ➕ in the Confluence toolbar to open the macro browser:
a. Search for “Scroll Conditional Content” and click on it, this will open up the “Scroll Conditional Content” dialog:
i. Click on the labels dropdown and select admin.
ii. Click Insert to add the macro to the page.
4. Add some text in the macro which should only apply for the Admin variant.
5. Click Publish.
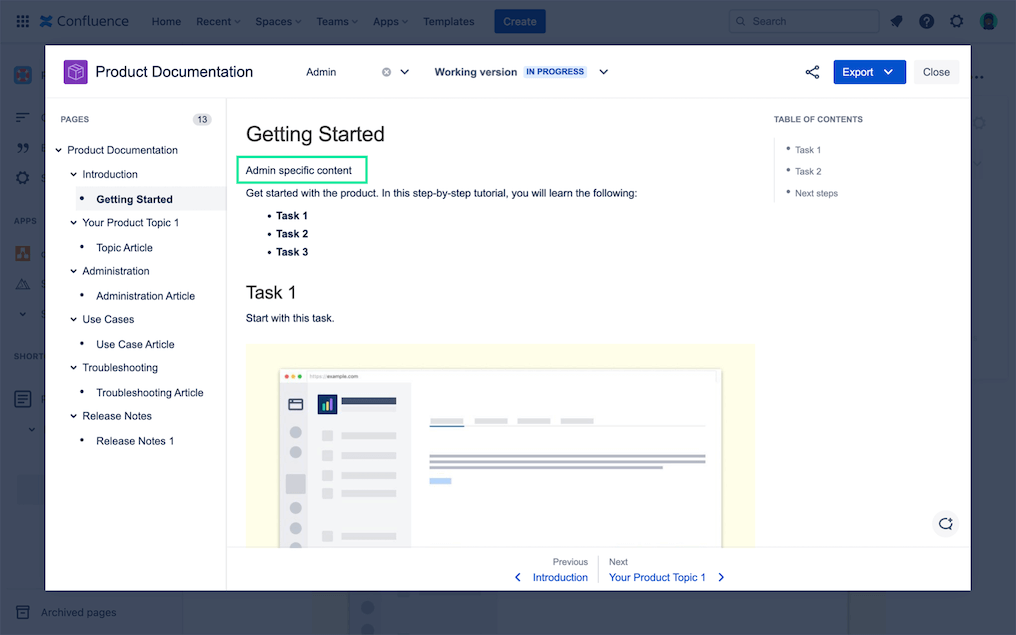
6. Click on the Document toolbox > click Read (on the book shaped icon), this will open up the page in the Document reader:
a. Click on the variants dropdown and switch between the two variants, you should now see that:
- the content in the conditional content macro is hidden when the User variant is selected,
- and that the pages who are missing the “user” label is not visible when the Admin variant is selected.
Nice!
You now know how to conditionalize paragraphs within an article.
Learnings 🏆
Congratulations! You have now completed the tutorial. Let’s summarize what you have learned:
how to create variants as well as,
conditionalize articles and paragraphs.
Next Steps
As a next step we recommend proceeding with the following articles:
If you want to learn more about creating variants see:
For more information about how to start working with conditional content, read:
For more information about publishing variants, continue with: