Can I Move a Document to Another Space?
If you’re planning to create a new documentation library it’s likely you want to move over some of the existing documents and their saved versions to the new space as well.
It’s currently not supported to move a document using Confluence’s move functionality, this can break the original space where the document was created. Hence, in this article you’ll learn how to copy over a document with several versions to a new space.
Page comments, inline comments, and original creation date and time will not be copied when copying over a document.
How to Move the Document
Again, it’s currently not possible to move a document between spaces. However, you can copy over versions and recreate the document in a new space following the process below:
Copy the Working version
Copy the saved versions
Recreate the document
Prerequisites
Before you can start copying over your document and its versions, you need to fulfil the following prerequisites:
You must have Scroll Documents 3.0.0 or any later version installed.
The original space has an existing document with at least one saved version.
There is a new space where the existing document can be copied over.
You must have save version permissions in the new Confluence target space.
Part 1: Copy the Working version
First, you need to copy your document’s working version to the new space:
Navigate to your old documentation space.
Click on Scroll Documents in the left sidebar in your Confluence space.
Press on the document card of the document you want to move, let’s say we have a document called “CleverApp Docs.”
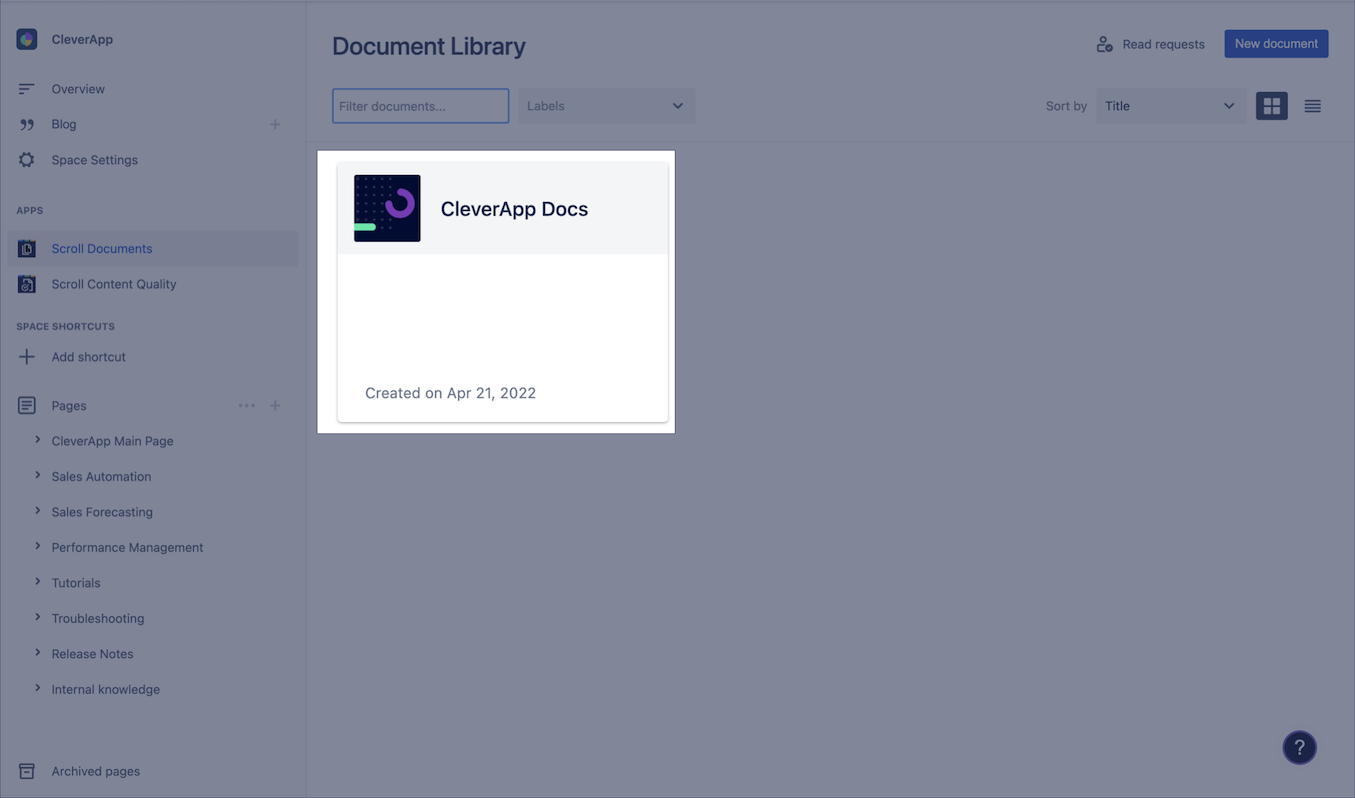
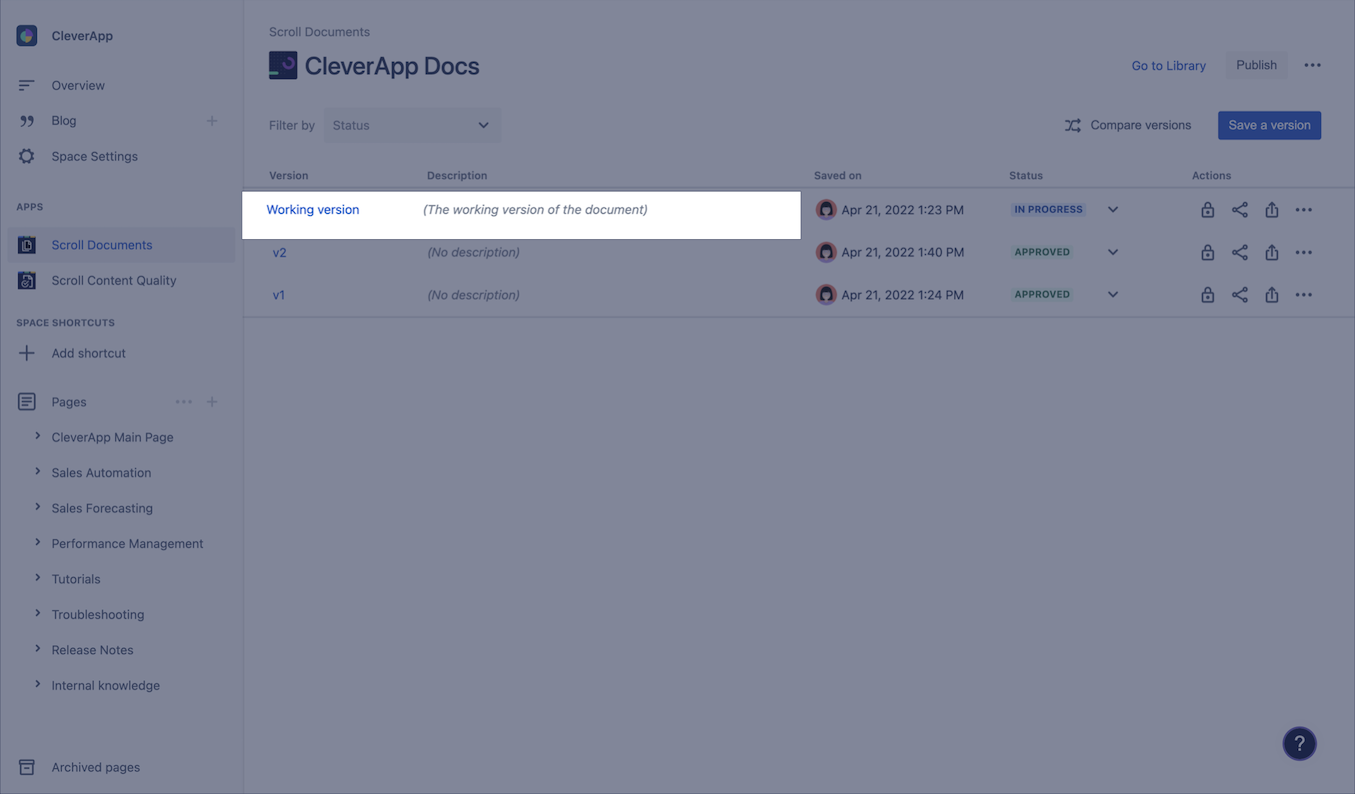
Click on the Working version, you should now end up at the parent page of the Working version, which in this example would be “CleverApp.”
Still on the parent page, click on Confluence page tools button (•••) > Click Copy:
Enter the target space and its home page in the Copy dialog.
Check the box “Include X child pages.”
Click Next, this will give you a preview of the new pages.
Click Copy, the pages in the working version should now have been copied to the new space.
Great, you have now copied over the Working version. Let’s proceed to the second part of this process.
Part 2: Copy over the saved document versions
Now, it’s time to copy over your previously saved document versions:
Navigate to your old documentation space.
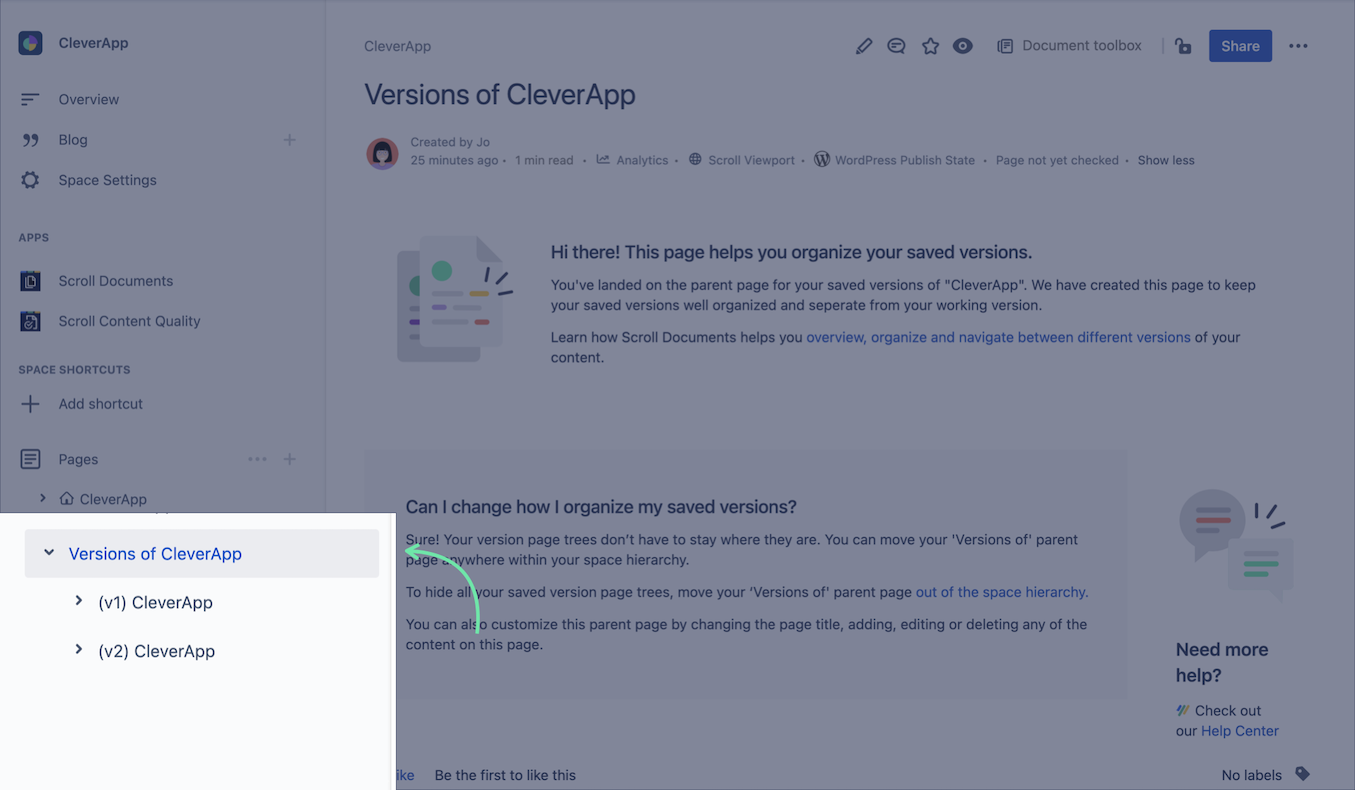
Look in the space tree and click on the parent page which contains all your saved document versions, the parent page should have a name similair to the example “Versions of CleverApp.”
On the parent page of your document versions, for example “Versions of CleverApp,” click on the page tools button (•••) > Click Copy:
Enter the target space and its home page in the Copy dialog.
Check the box “Include X child pages.”
Click Next.
Click Copy, all pages in the saved versions should now have been copied to the new space.
Almost done, in the next part you’ll assemble all versions you have copied over to a new document.
Part 3: Assemble the document versions
Let’s recreate your old document by assembling all the versions you’ve copied over:
Navigate to the new space.
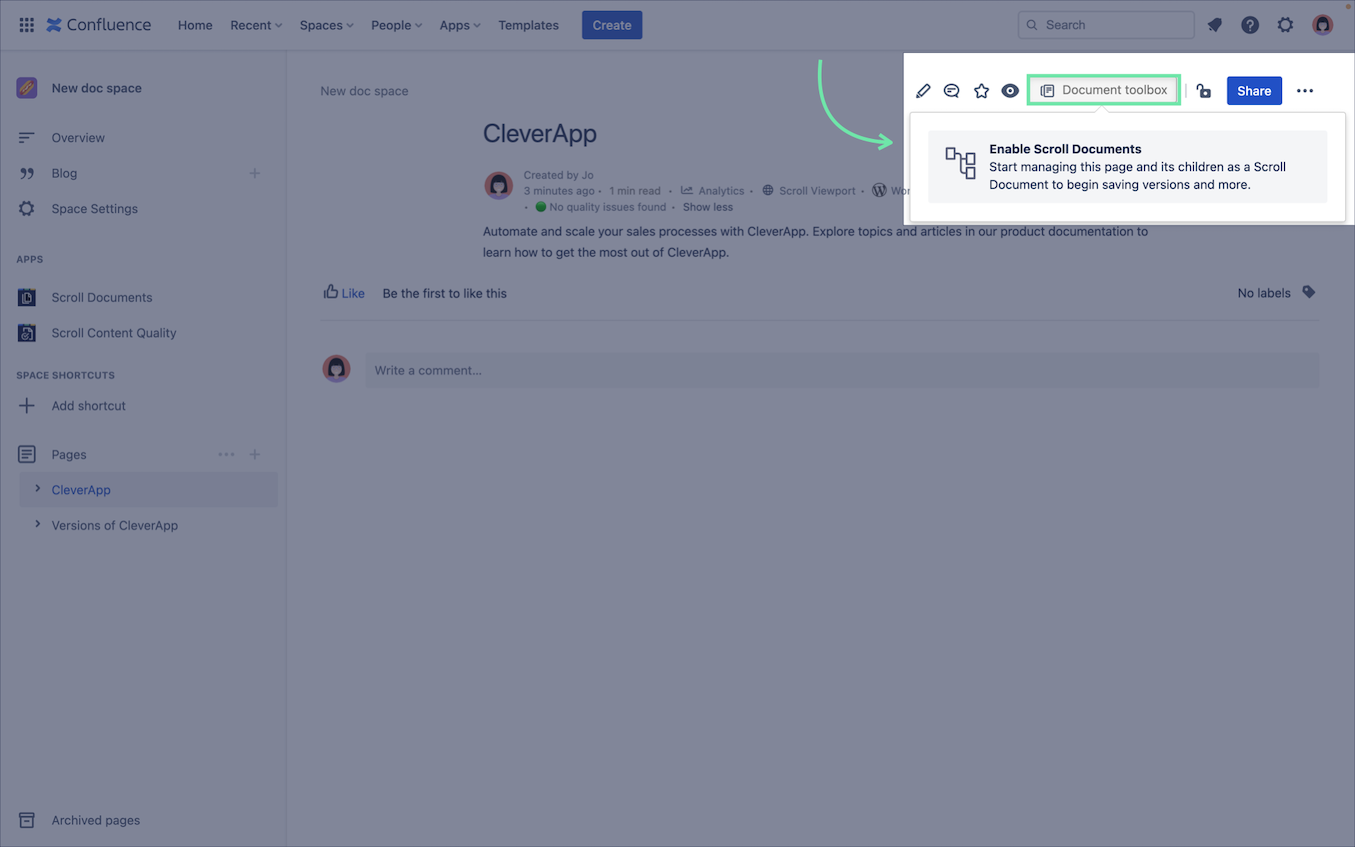
In the space tree, click on the parent page from the previously copied Working version, in this example it would be the page with the title “CleverApp.”
Click on the Document toolbox > Enable Scroll Documents, you should now be redirected to the document manager where you should see the Working version of your new document.
In the document manager, click on the tools icon in the upper corner (•••) > Advanced options > Add existing page tree:
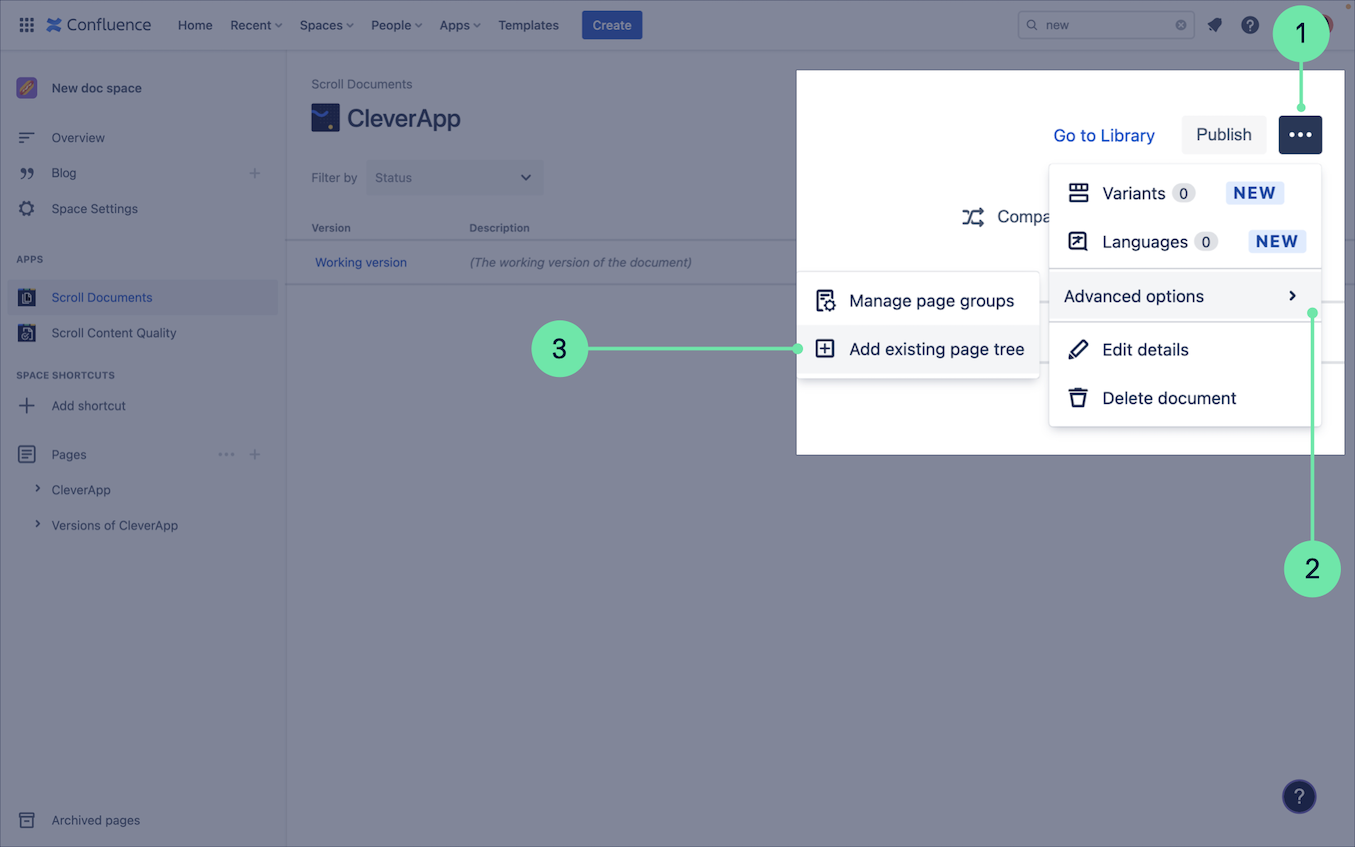
Search for the parent page of your first saved version, which in this example would be “V1 CleverApp” and select it.
Click Next
Click Save, the V1 document pages will now be saved as version 1 in your document.
Repeat steps 4-4c for any additional versions.
Congratulations 🎉
You’ve successfully copied over your document to a new space.
Before you navigate back to your old space to delete your old document, we recommend that you go through the new document to make sure all content got copied over as expected.