Create and update a synchronization
Are you on the right help page?
If you connect Jiras...
...via HTTP(S) (to server/data center, to cloud, local), you're in the right place.
...via email or file exchange (to server/data center behind firewall), check out this page instead.
Backbone Issue Sync allows you to integrate two Jira projects to synchronize issues.
Scope of a synchronization
Synchronizations are always configured on a project-by-project basis, always between two projects.
However, you can create multiple synchronizations per project. So if you want to connect one project with multiple projects, you can simply create multiple synchronizations for a project.
Data transmission protocol
Backbone uses the official Jira REST API in order to access both Jira projects which it integrates. If you provide a HTTPS URL when you setup the synchronization, Backbone will use an encrypted channel in order to communicate with JIRA.
Create a synchronization
To server/data center
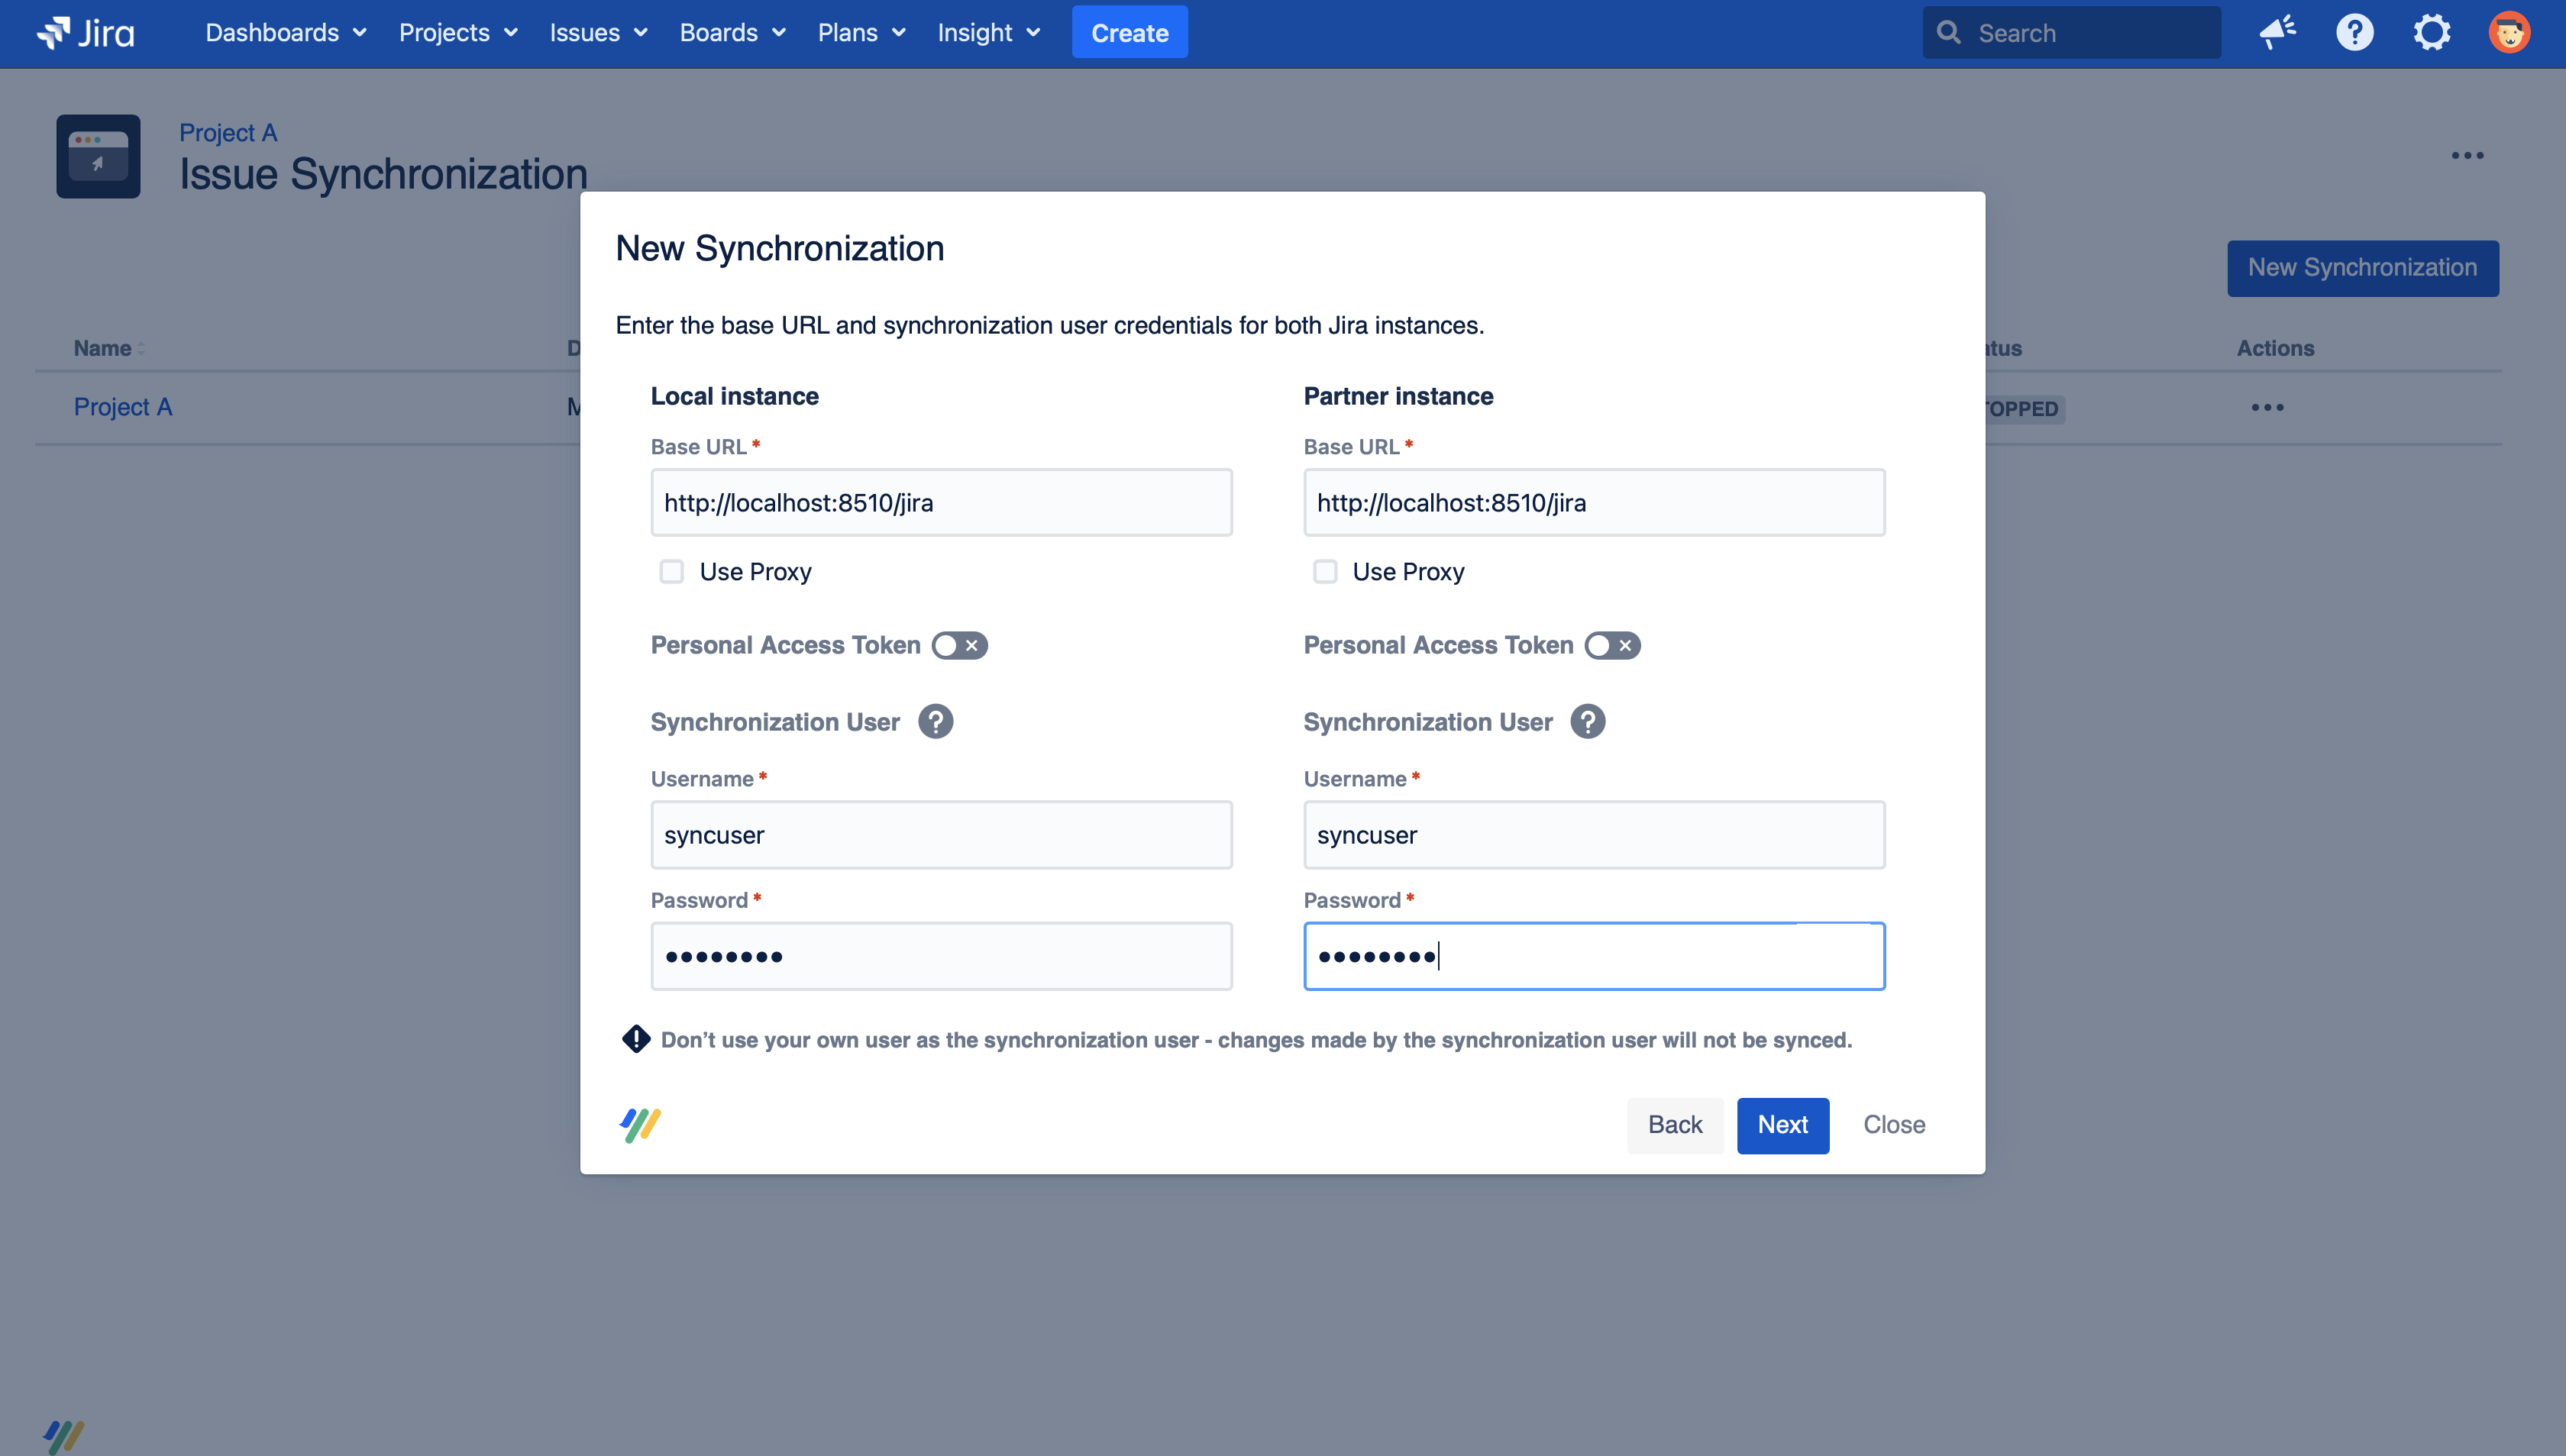
- Open the project where you want to configure the synchronization then select Project settings > Issue Synchronization > New Synchronization > Server or data center
- Now, you can start configuring the synchronization:

In Base URL, enter the Base URL of your Jira instance and the partner instance
- Optionally configure a forward proxy.
- Optionally activate using a personal access token
- In Synchronization User:
- enter the synchronization user's username (in this example, that's syncuser)
- enter the synchronization user's password/personal access token
- On the next screen, you can select which project you want to synchronize with
- Next, you can assign the synchronization a name and description. When you make multiple synchronizations for a project, it's important to name them descriptively, so you don't get them confused. However, for now, let's stick with the default.
Congratulations, you've established a synchronization! Now, carry on and configure what issue types will be synchronized between the projects.
To Cloud
- Open the project where you want to configure the synchronization then select Project settings > Issue Synchronization > New Synchronization > Cloud
- Now, you can start configuring the synchronization:
In Base URL, enter the Base URL of your Jira instance and the partner instance
- Optionally configure a forward proxy.
- Optionally activate using a personal access token
- In Synchronization User:
- enter the synchronization user's username for the server instance (in this example, that's syncuser), and email for the cloud synchronization user.
- enter the synchronization user's password/personal access token for the server instance, and API token for the the cloud synchronization user.
- On the next screen, you can select which project you want to synchronize with
- Next, you can assign the synchronization a name and description. When you make multiple synchronizations for a project, it's important to name them descriptively, so you don't get them confused. However, for now, let's stick with the default.
Local
- Open the project where you want to configure the synchronization then select Project settings > Issue Synchronization > New Synchronization > Local
- Now, you can start configuring the synchronization:
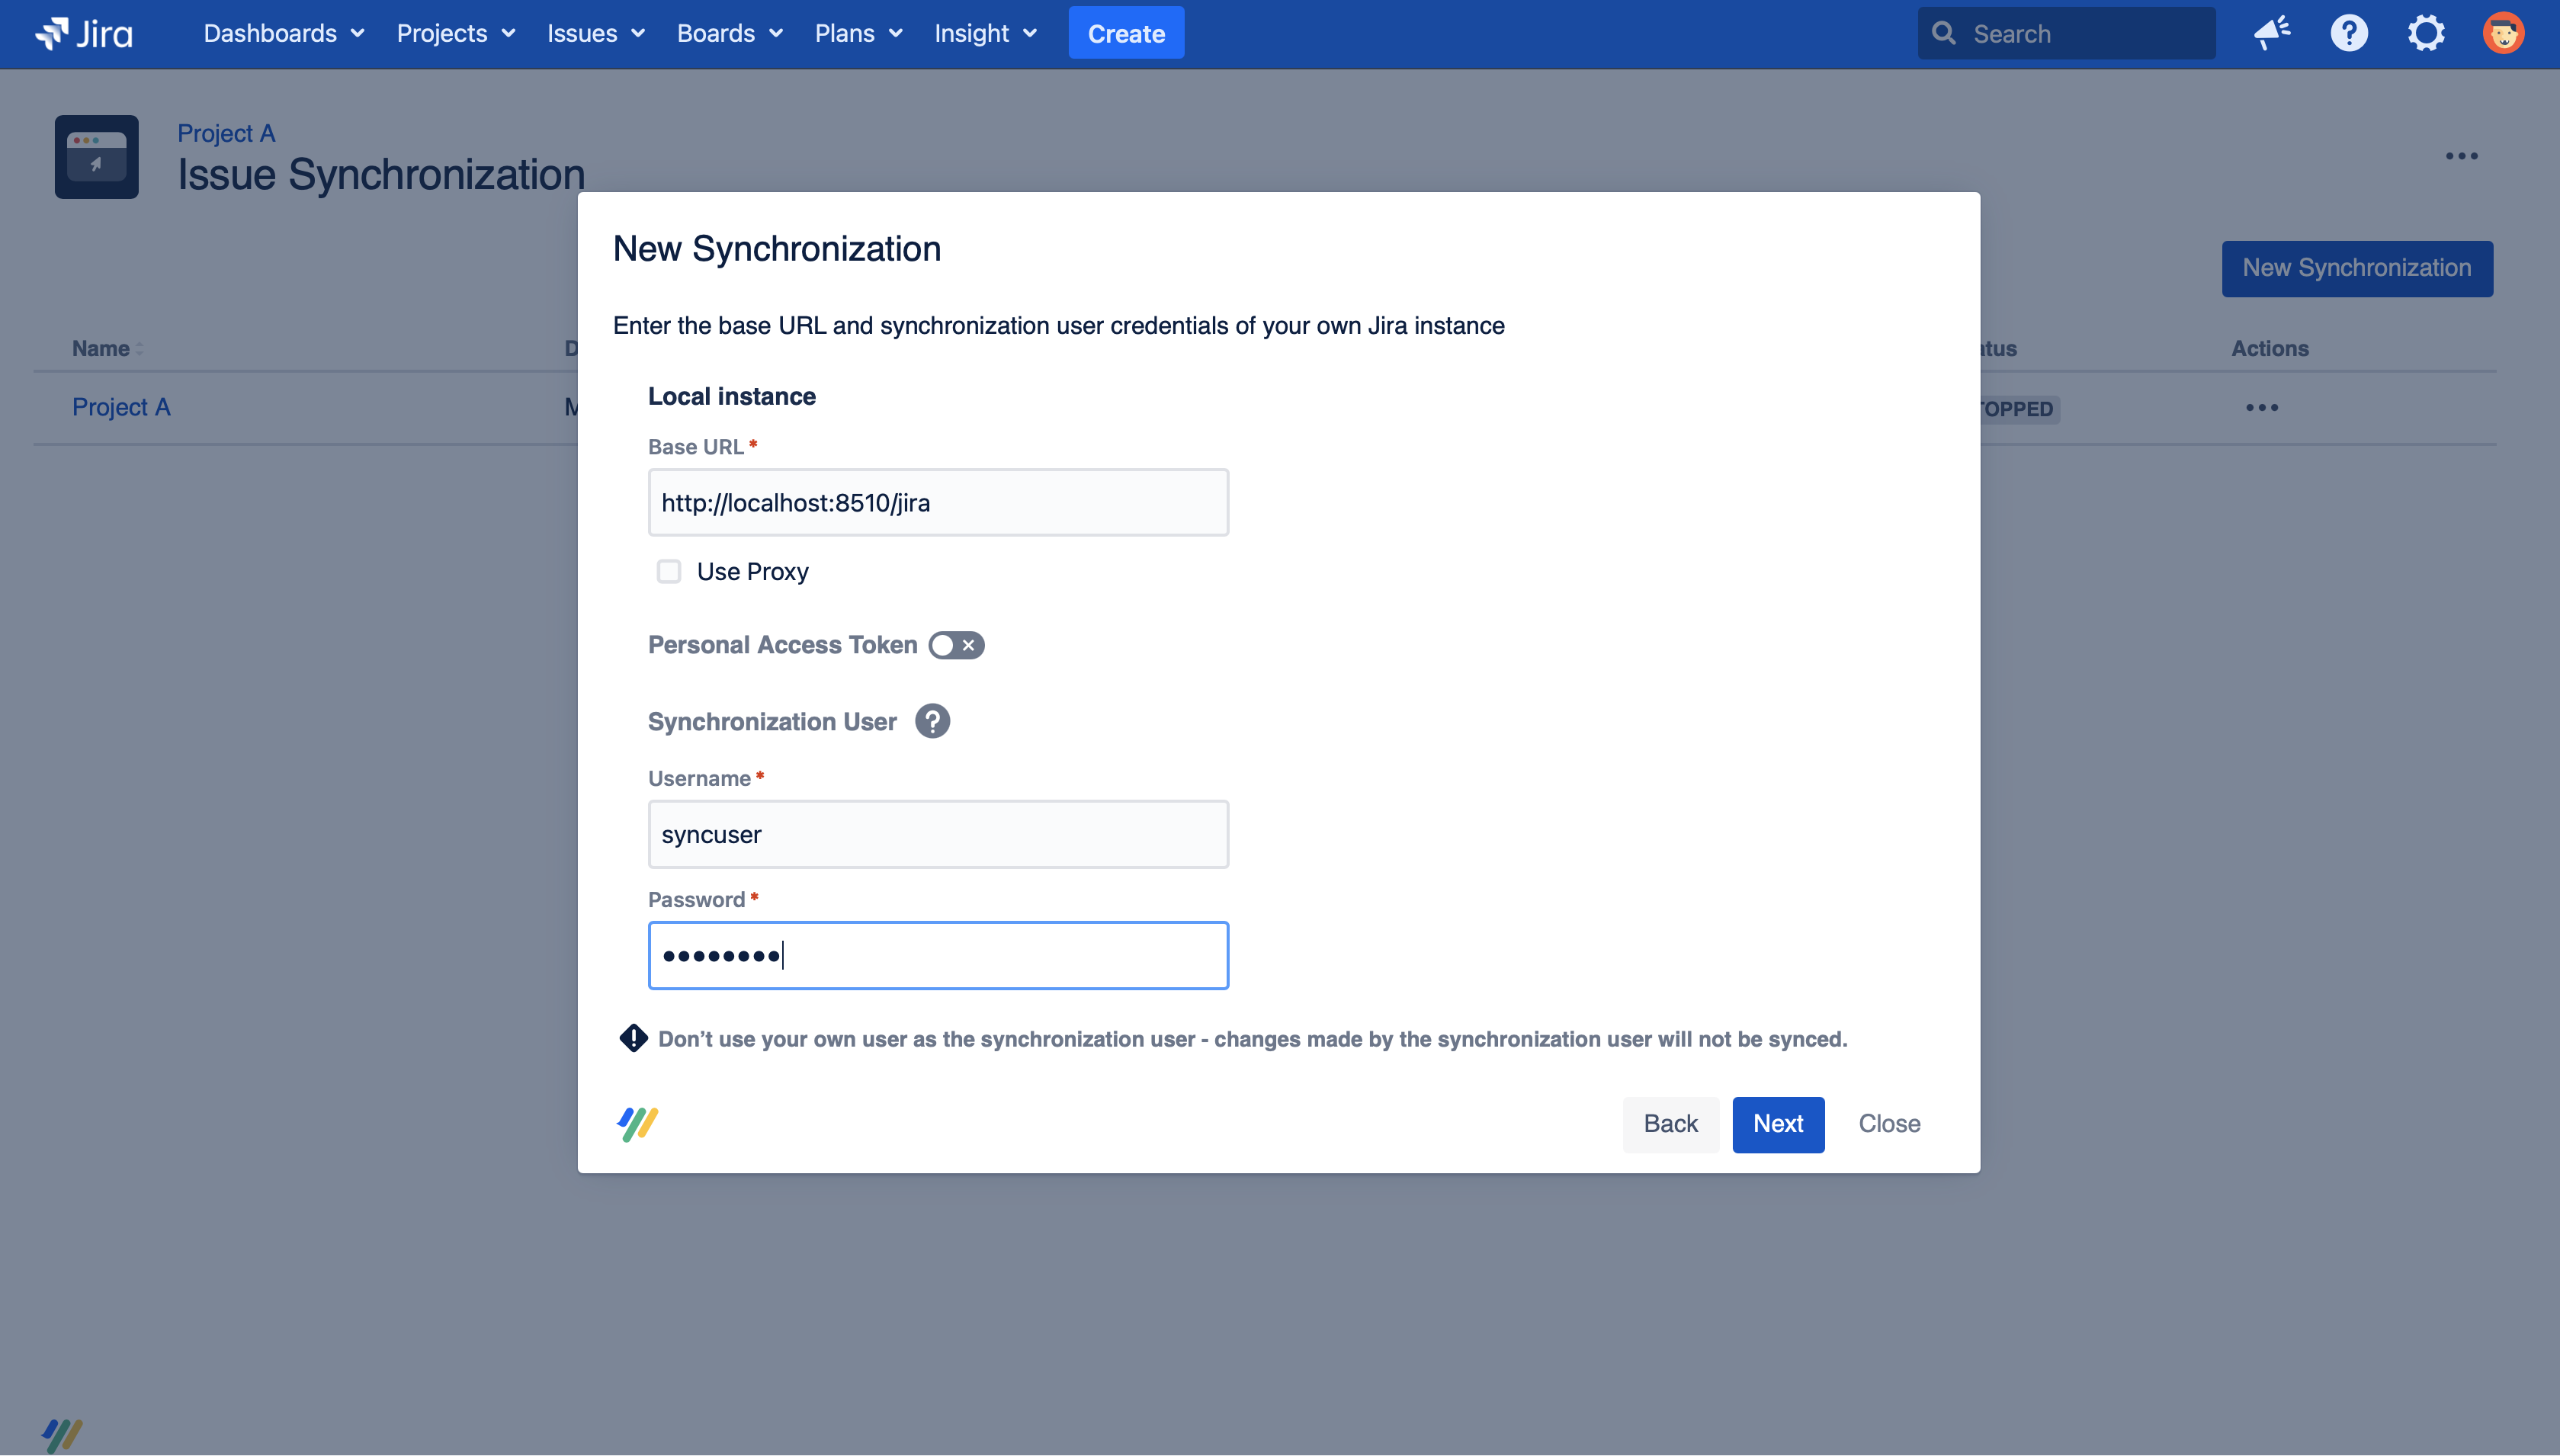
In Base URL, enter the Base URL of your Jira instance
- Optionally configure a forward proxy.
- Optionally activate using a personal access token
- In Synchronization User:
- enter the synchronization user's username (in this example, that's syncuser)
- enter the synchronization user's password/personal access token
- On the next screen, you can select which project you want to synchronize with
- Next, you can assign the synchronization a name and description. When you make multiple synchronizations for a project, it's important to name them descriptively, so you don't get them confused. However, for now, let's stick with the default.