2nd Level Support (Jira Service Management to Jira Service Management)
In this scenario, you synchronize your 1st level support's Jira Service Management system with your 2nd level support's Jira Service Management installation:
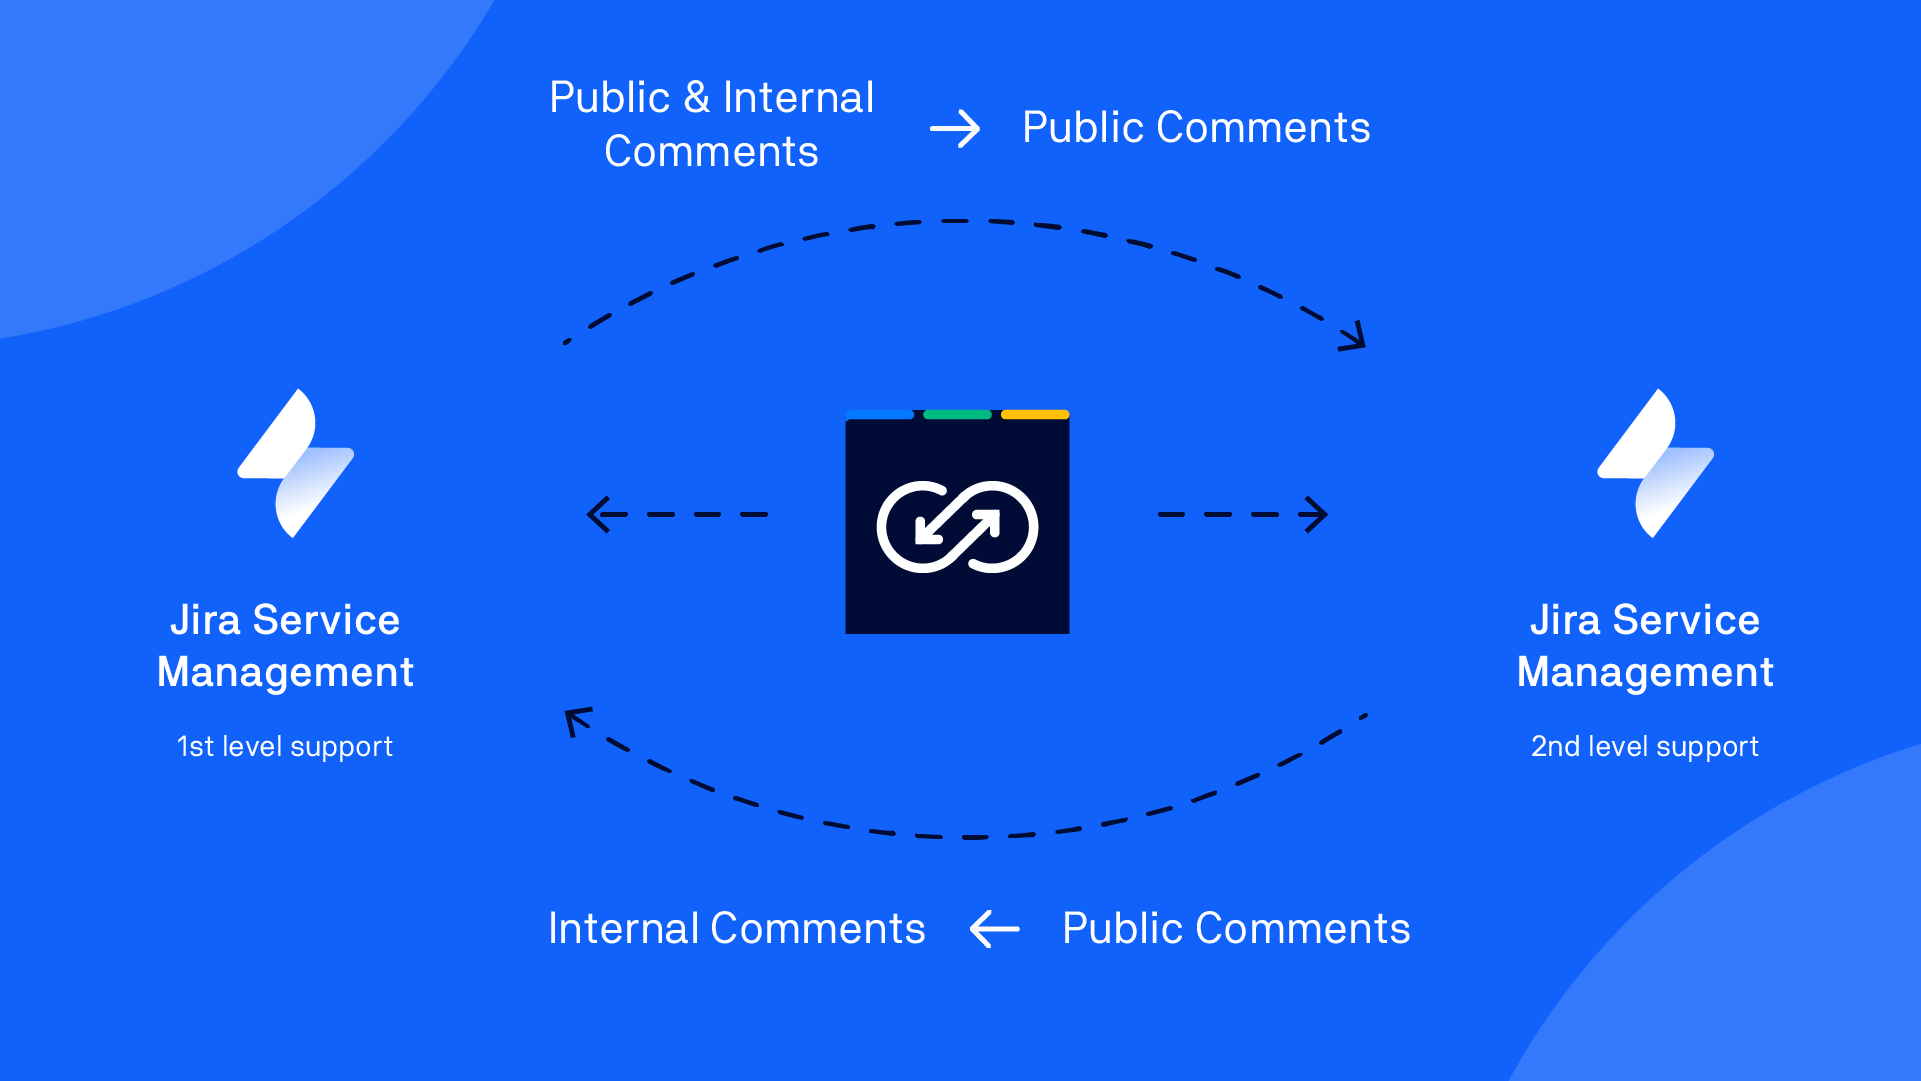
This allows 2nd level agents to help 1st level agents by making internal comments in Jira Service Management requests from their own Jira Service Management system.
Public comments made by 2nd level support will be created as internal comments in the 1st level Jira Service Management system.
Configuration Guide
Now, we will configure this scenario as a guide. The two sample projects will be configured on the same Jira system: in most real world scenarios, Backbone will synchronize projects on separate Jira systems, but the configuration is very similar in both cases.
Configure the synchronization user
- Add the synchronization user to the jira-service-desk-users group
- Assign the Service Desk Team role for all synchronized Jira Service Desk projects.
Set up projects
Establish the connection
Now, we have to establish a connection between Project A and Project B – please refer to the guide to creating a new synchronization for step-by-step instructions.
Configure the synchronization
Now, we'll tell Backbone what data to synchronize, and which Jira Service Management scenario we want to use.
On the Issue Synchronization screen, the actions column, click ... > Configure to open up the configuration UI.
- On the Issue Types tab, click New Issue Type Mapping. In the dialog select First to Second, and click Next.
- On the Edit Issue Type Mapping screen, you can map one or multiple request types from Project A to Project B.
- The next step is to configure the synchronization of customer request types. Start by going to the Fields – Default Values tab.
- On the Project B column, click the + button to open up the Create Default value screen. In the Field box, select Customer Request Type, uncheck the All Issue Types box, and map the following Issue Types:
- IT Help to the Default value Get IT Help
- Purchase to Default value Purchase request
- Access to Default value Request a new account.
- On the Field Mappings tab, click on Suggestions to map fields. Select at least the Summary and Description fields.
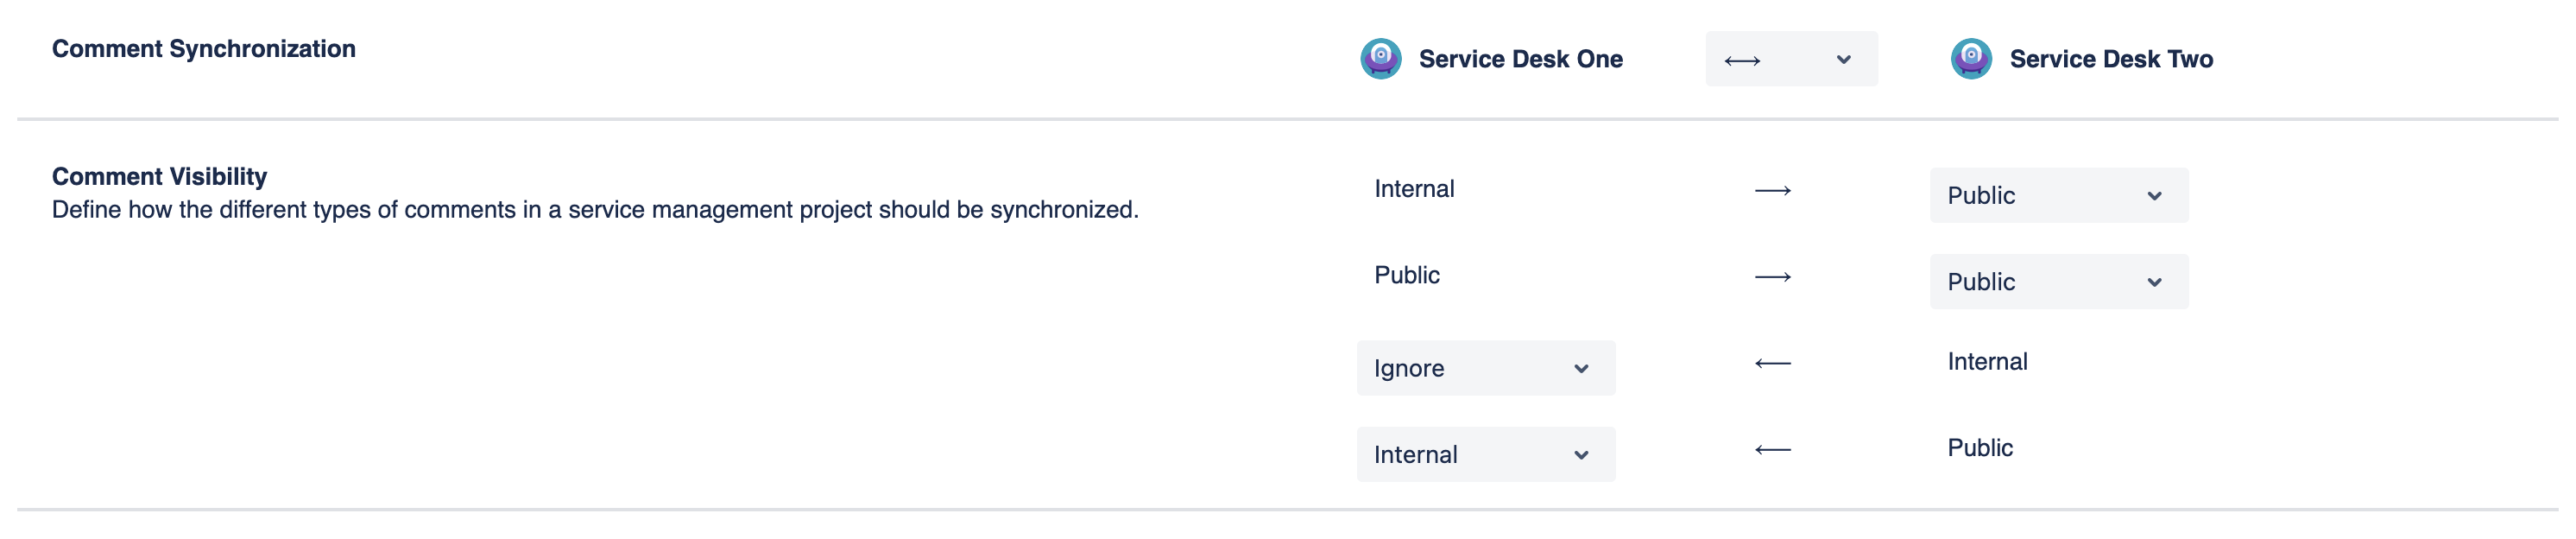
- On the comments tab, enable comments and select the Enriched mapping option (so that when comments are synced between your 1st and 2nd level teams, you know exactly who wrote them). For comment visibility, make sure the internal and public comments are synced to a public from 1st to 2nd level support, and only the public comments from the 2nd level team are synced to internal (as in the image below).
- To start the synchronization, click Publish Draft > Start.
Result
Now, comments made by your 2nd level support team will appear as internal comments (made by syncuser) in the 1st level team's Jira Support Management system, and comments made by the 1st level team will appear as public comments in 2nd level support's Jira Service Management.
Next steps
Basic configuration is now complete – you can now go further and configure additional Field Mappings.