Get started
Thanks for choosing Backbone Issue Sync to synchronize your JIRA projects, letting you collaborate across departmental and B2B borders.
In a few simple steps, this article will show you how to synchronize issues between two Jira Cloud projects.
There are two separate guides – one for synchronizing projects in the same Jira instance, and another for synchronizing projects in separate Jira instances. This is because the steps needed for both processes are slightly different.
Watch the video
You can also watch our get started video explaining features on a high level view as well as showing the exact setup steps.
 Synchronize 2 projects in the same Jira instance
1: First steps
Firstly, let's create two Jira projects to synchronize issues between.
- Create two new Jira projects called Project A and Project B
2: Establish a connection between the projects
Let's establish a connection between the two projects, so that they can communicate with each other.
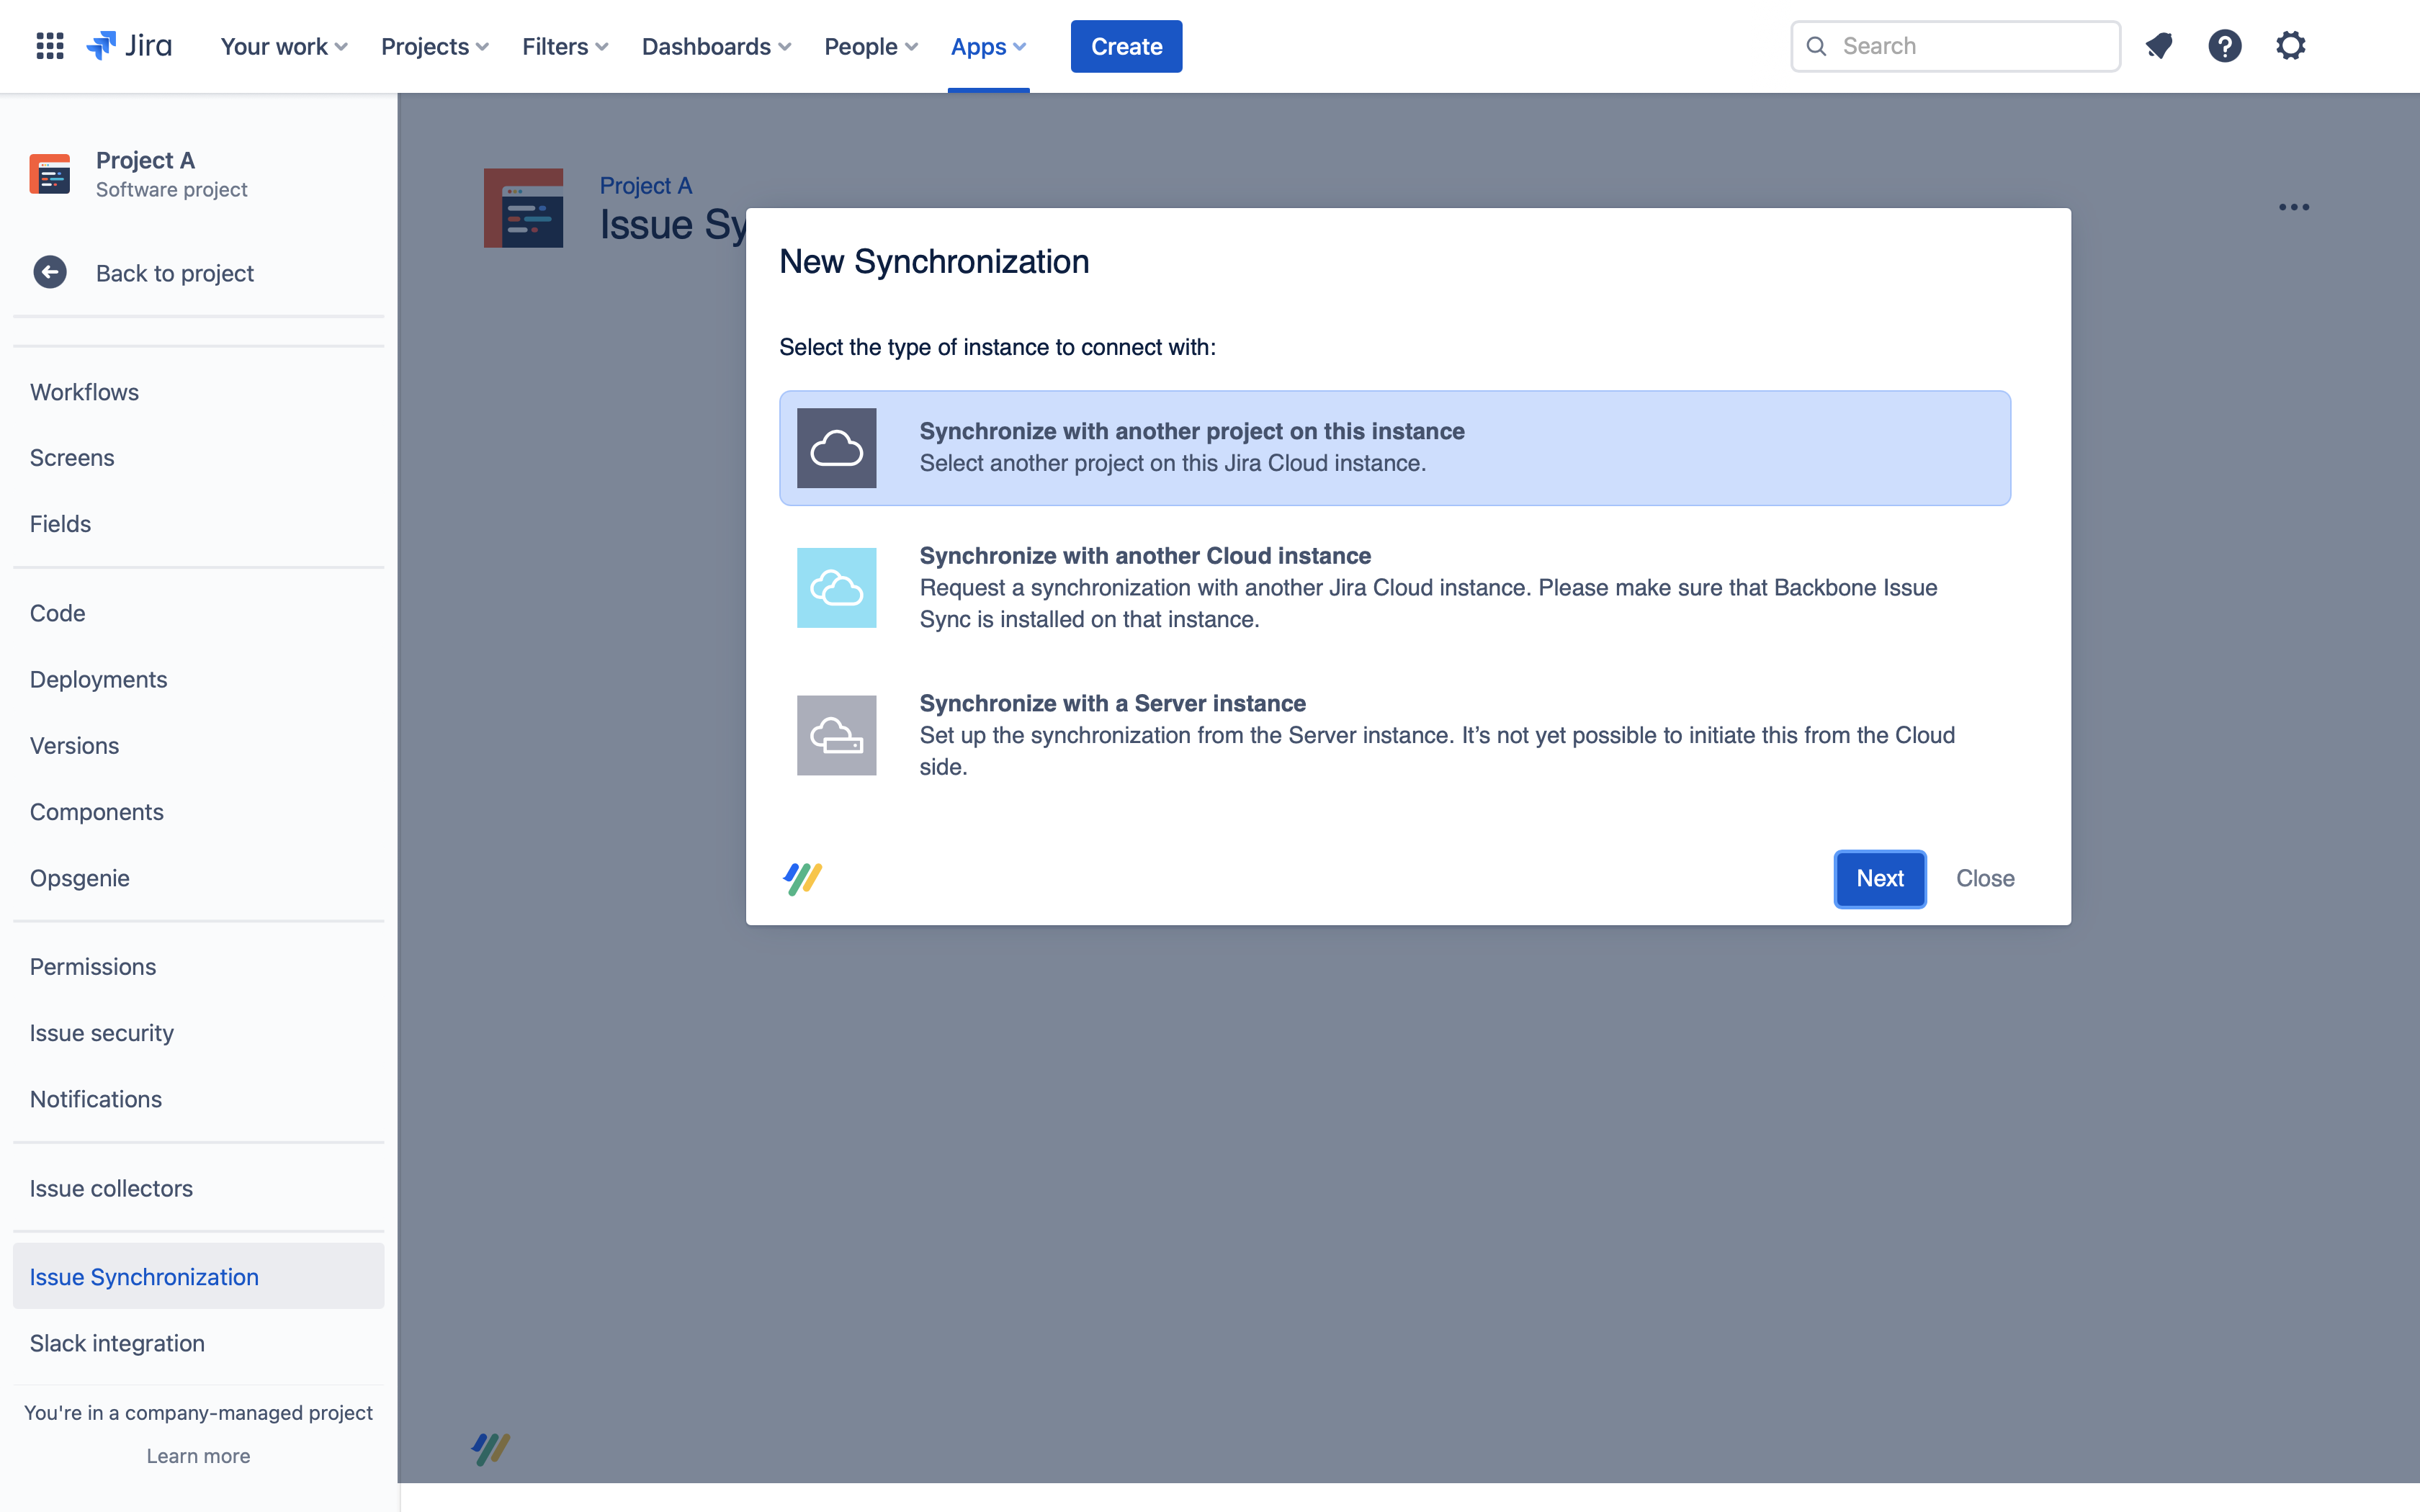
- Open Project A and select Project settings > Issue synchronization > New synchronization > Synchronize with another project on this instance:
- Choose the project you want to synchronize issue data with – select Project B, then click Next
- Assign a name and description. For now, let's stick with the default name and description – just click Next
- On the settings overview screen, check the configuration settings then click Send Request
- Now, any user with the Administer Projects permission for Project B can accept the synchronization request to establish the connection between the projects. To accept the request, open Project B and click Project settings > Issue synchronization > in the Actions column, click ... > View Request > Accept Request.
Now we've connected the projects, it's time to configure some synchronization settings.
3: Configure synchronization settings
In this step, we'll configure the synchronization, telling Backbone what data it should synchronize between the projects.
- To start editing the synchronization, click its name
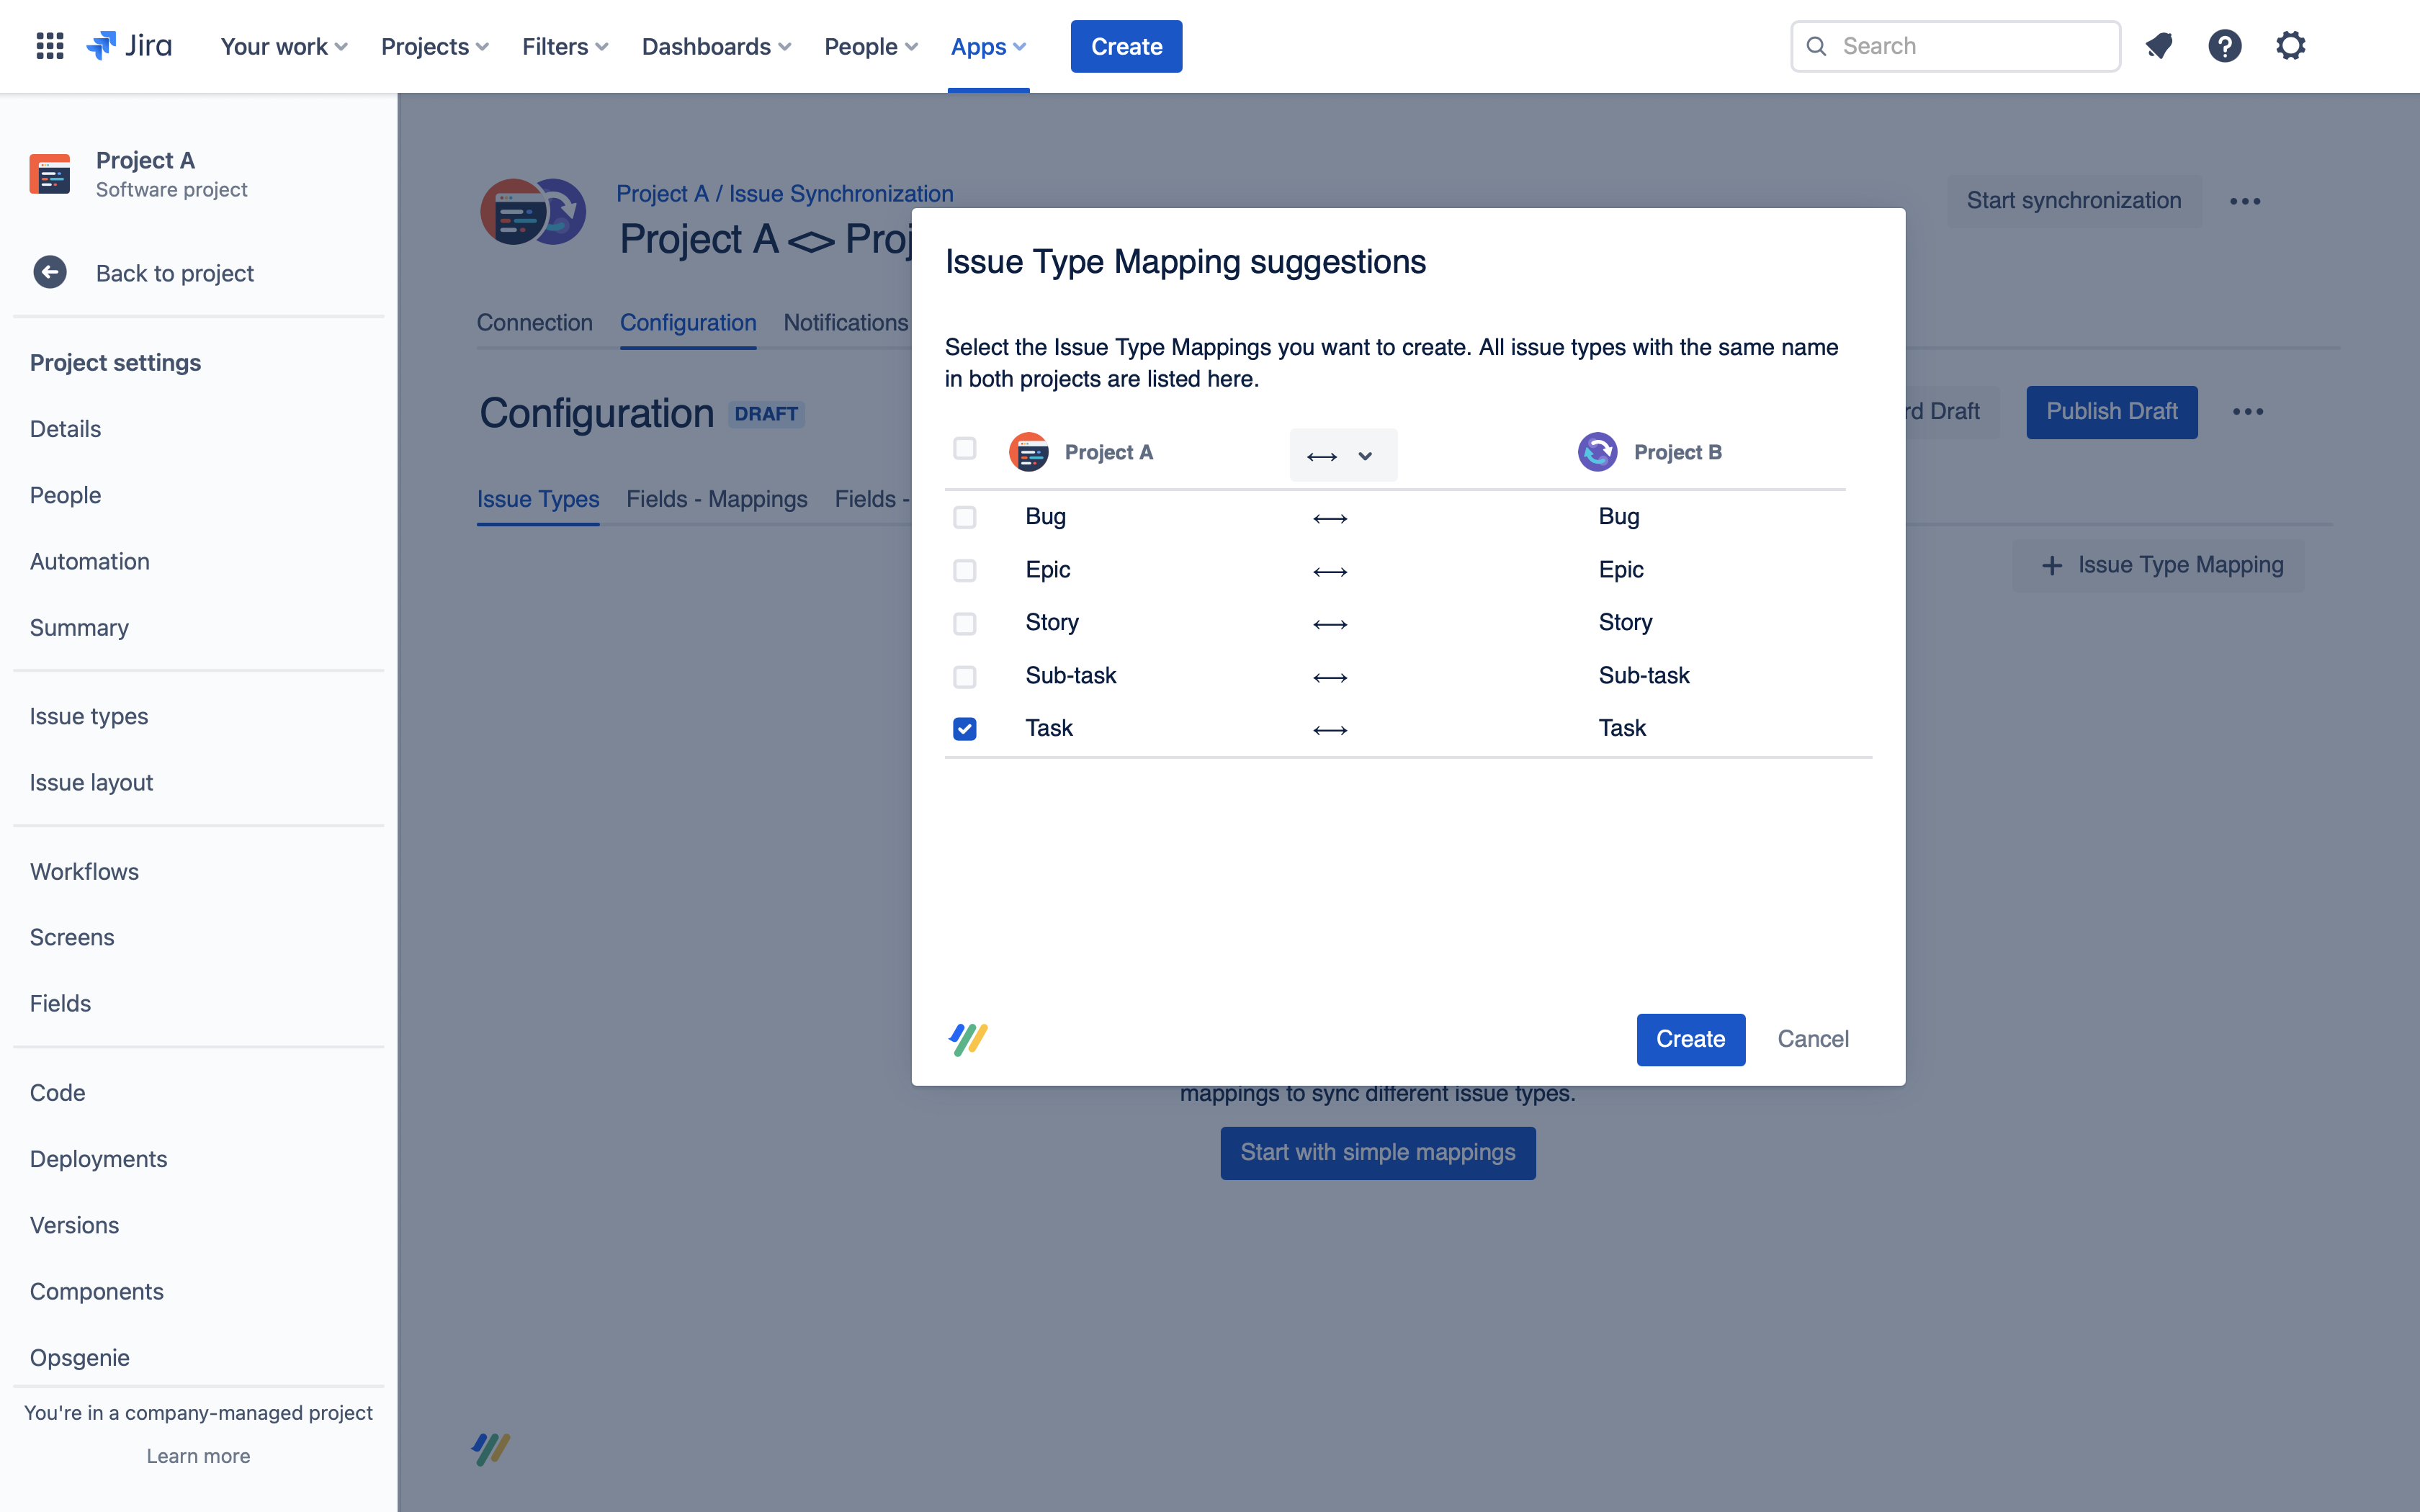
- Open the Issue Types tab, and click New Issue Type Mapping > Each other to synchronize the issue type in both directions between Project A and Project B
- Next, map the issue type Task in Project A to Task in Project B:
- Now, map which fields should be synchronized at Fields - Mappings > Suggestions
- Check Summary and Description, and click Create
- Click Publish Draft to save the configuration, then click Start to start the synchronization
Well done – you've configured your first synchronization! Now, all new issues with type Task will be synchronized between Projects A and B, and the Summary and Description fields will be synchronized between those issues.
4: Use the synchronization
Now for the fun part: let's use the synchronization by creating an issue in Project B, and watching as it is automatically synchronized to Project A.
- Create a new issue with type Task in Project B, and enter some content in the Summary and Description fields
- Now, open Project A – you'll see that the issue has now been synchronized
- Open the synchronized issue in Project A, and edit the summary and description
- Go back to the issue in Project B, and the edits have now been synchronized back over
That's all there is to it – you have successfully created and tested your first synchronization.
Next steps
Now, you can try out more configuration options, such as different issue/field types, or comments and attachments.
Synchronize 2 projects in separate Jira instances
In this guide, we'll configure Backbone to synchronize issues between projects in two separate Jira instances (which we'll refer to as instance A and instance B). Please make sure that you have installed Backbone in both Jira instances.
1: First steps
Firstly, let's create two Jira projects to synchronize issues between.
In instance A, create a new project called Project A, and in instance B, create a new project called Project B
2: Establish a connection between the projects
Let's establish a connection between the two projects, so that they can communicate with each other.
To do so, we'll send a 'Synchronization request' to the other instance, which the Jira administrators in the other instance can accept to establish a connection.
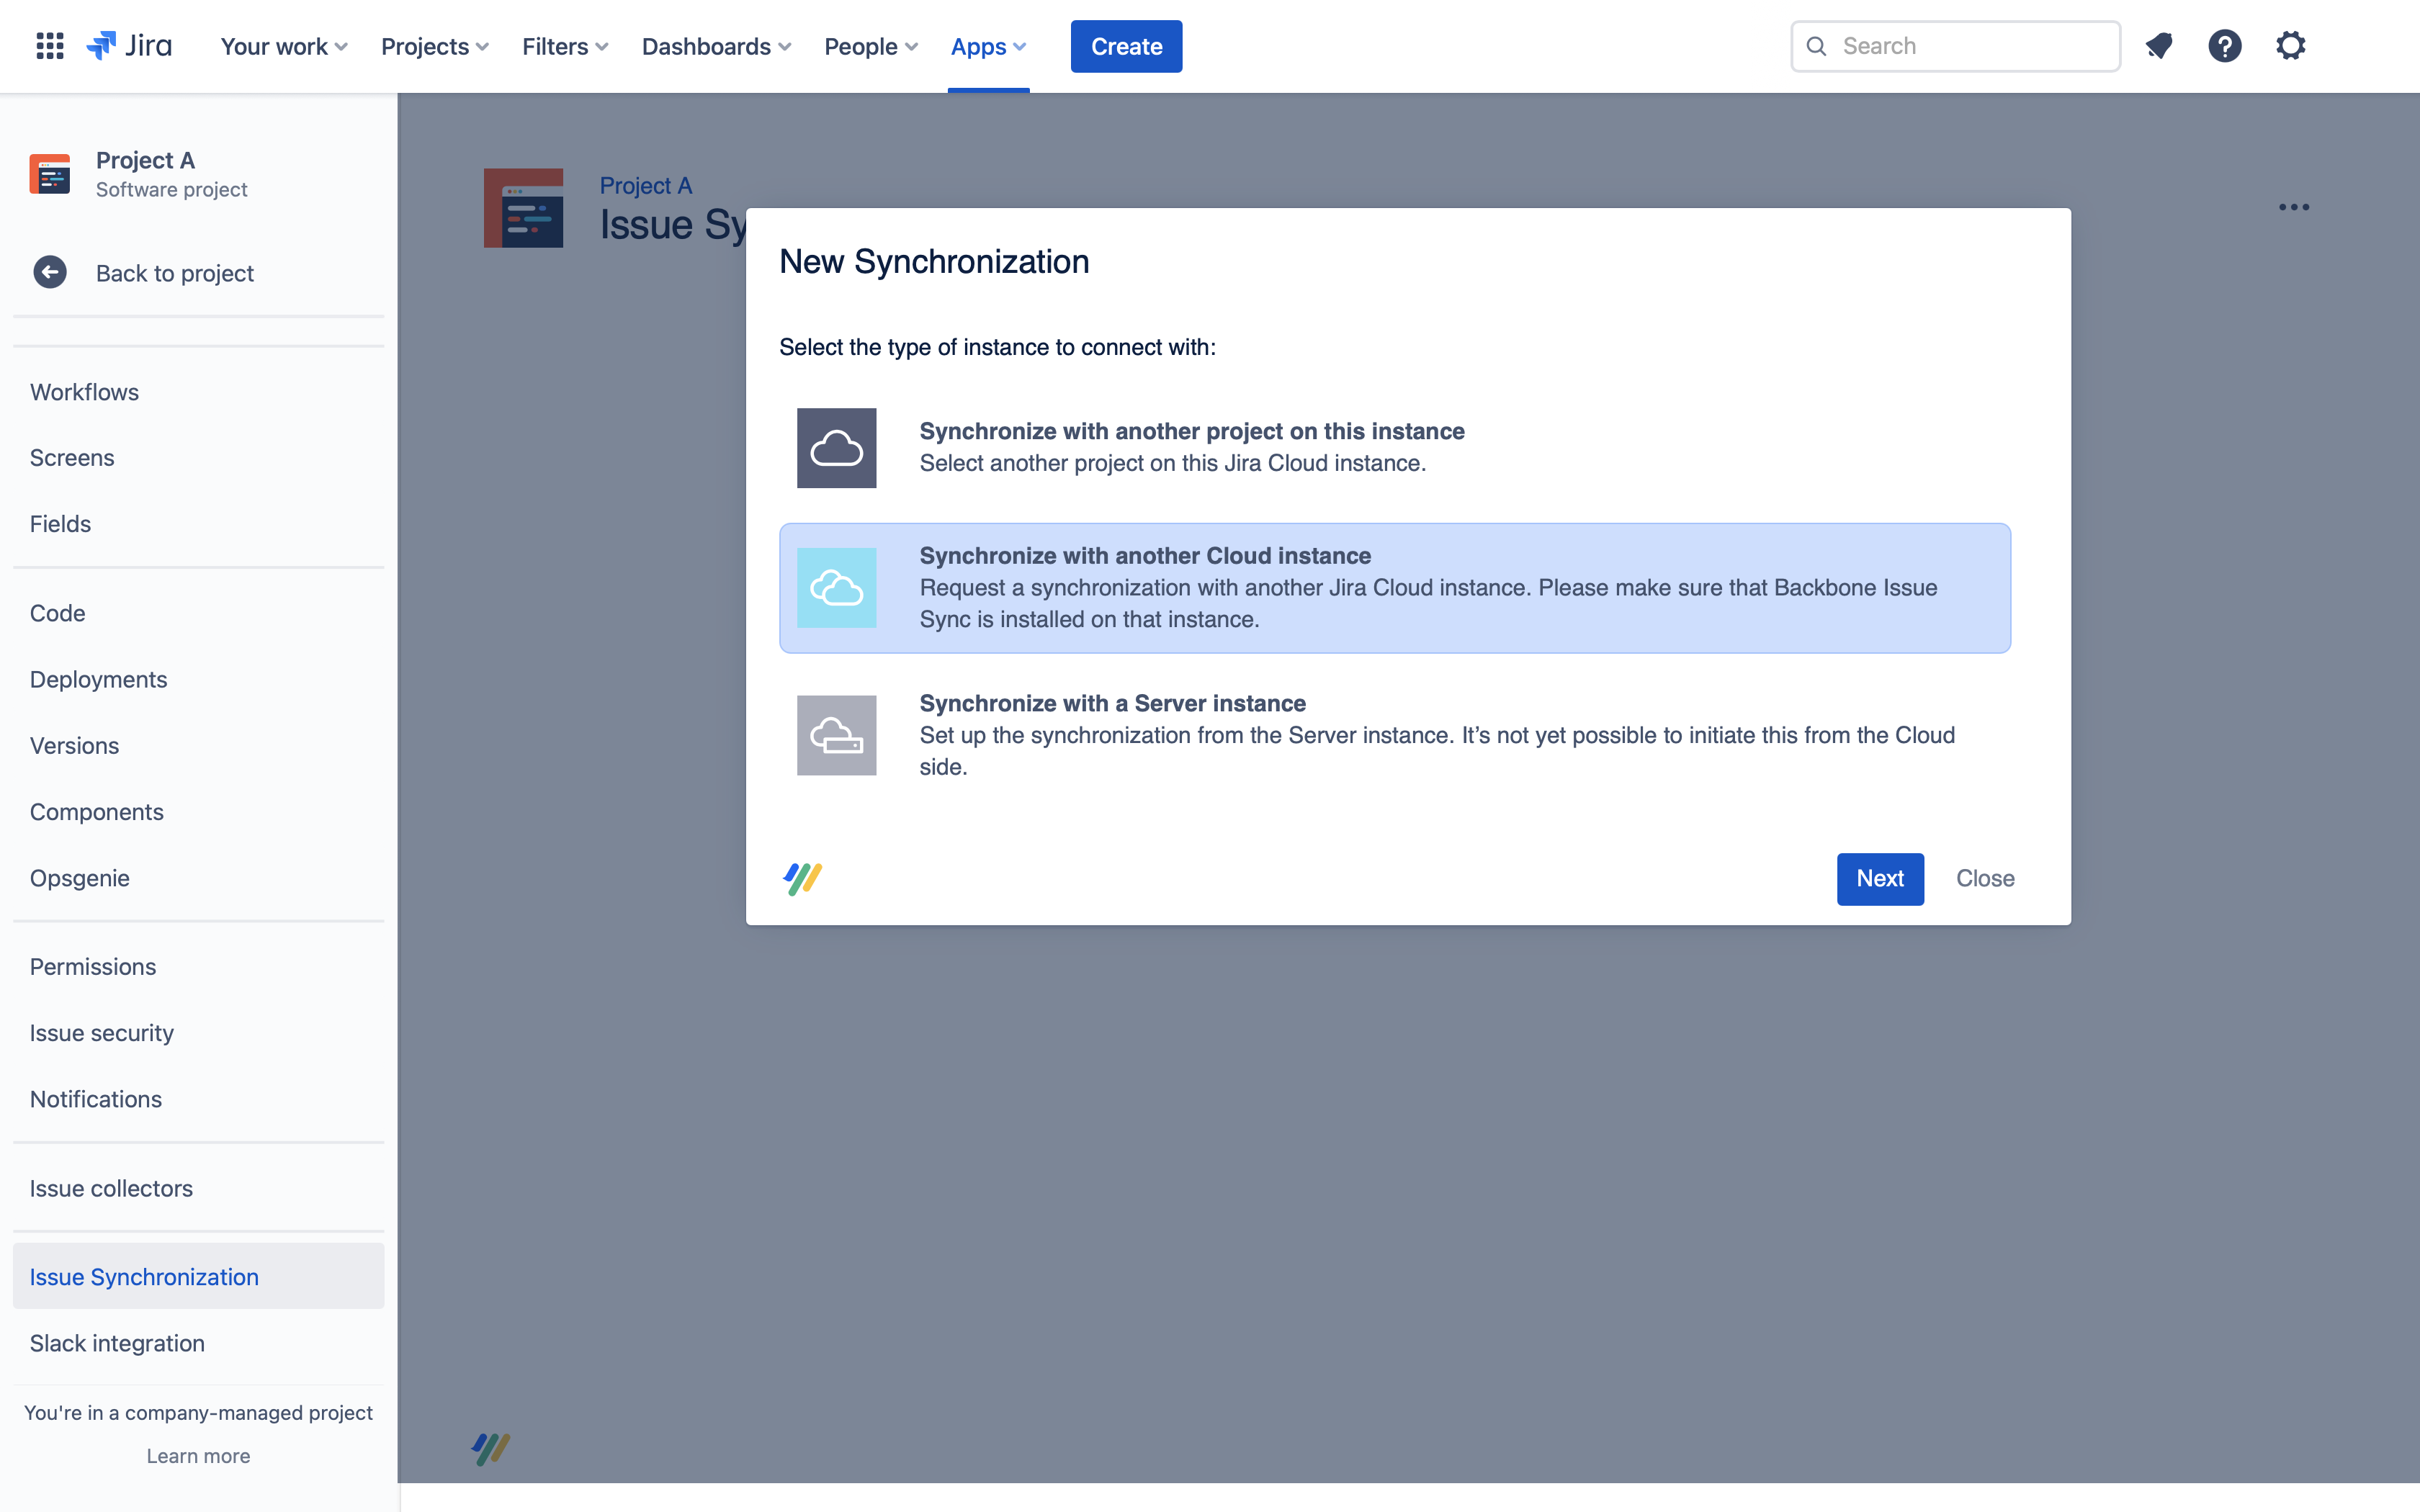
- Open Project A and select Project settings > Issue synchronization > New Synchronization > Request synchronization with another Jira instance > Next:
- In the Partner Instance column, enter the following data:
- In the Base URL field, enter the base URL of the Jira instance you want to synchronize with – it will have this structure: https://example.atlassian.net
- In the Project Key field, you can enter a specific project key of a project in the partner instance. Enter Project B's project key, and click Next
- For now, let's stick with the default name and description – just click Next
- Check the configuration settings, and click Send Request
- Now, any user with the Administer Projects permission for Project B can accept the synchronization request to establish the connection between the projects. To accept the request, open Project B and click Project settings > Issue synchronization > in the Actions column, click ... > View Request > Accept Request
Now we've connected the projects, it's time to configure some synchronization settings.
3: Configure synchronization settings
In this step, we'll configure the synchronization, telling Backbone what data it should synchronize between the projects.
- To start configuring the synchronization, click Start configuration
- Open the Issue Types tab, and click Start with simple mappings to select what issue types to sync
- Next, map the issue type Task in Project A to Task in Project B:
- Now, map which fields should be synchronized at Fields - Mappings > Suggestions
- Check Summary and Description, and click Create
- Click Publish Draft to save the configuration, then click Start to start the synchronization
Well done – you've configured your first synchronization! Now, all new issues with type Task will be synchronized between Projects A and B, and the Summary and Description fields will be synchronized between those issues.
4: Use the synchronization
Now for the fun part: let's use the synchronization by creating an issue in Project B, and watching as it is automatically synchronized to Project A.
- Create a new issue with type Task in Project B, and enter some content in the Summary and Description fields
- Now, open Project A – you'll see that the issue has now been synchronized
- Open the synchronized issue in Project A, and edit the summary and description
- Go back to the issue in Project B, and the edits have now been synchronized back over
That's all there is to it – you have successfully created and tested your first synchronization.
Next steps
Now, you can try out more configuration options, such as different issue/field types, or comments and attachments.